It was a Tuesday in November, the kind where the sky is the color of old dishwater and the wind is rattling the windowpanes hard enough to make you want to cancel all plans. I had three overripe bananas sitting on the counter, looking less like fruit and more like science experiments. They were spotted, bruised, and practically begging to be thrown out. But I knew, with that specific baker’s intuition, that they were also begging to be bread.
I pulled out my usual banana bread recipe, the one I’d been making for years. I mixed the batter, popped it in the oven, and waited for that familiar, comforting smell of warm sugar and caramelized fruit. When I pulled it out, the crust was perfect. The inside was moist. It was… fine. It was good. But it wasn’t unforgettable. It didn’t make me stop mid-bite and close my eyes. It didn’t make my husband come into the kitchen and ask for a second slice before he’d even finished his coffee.
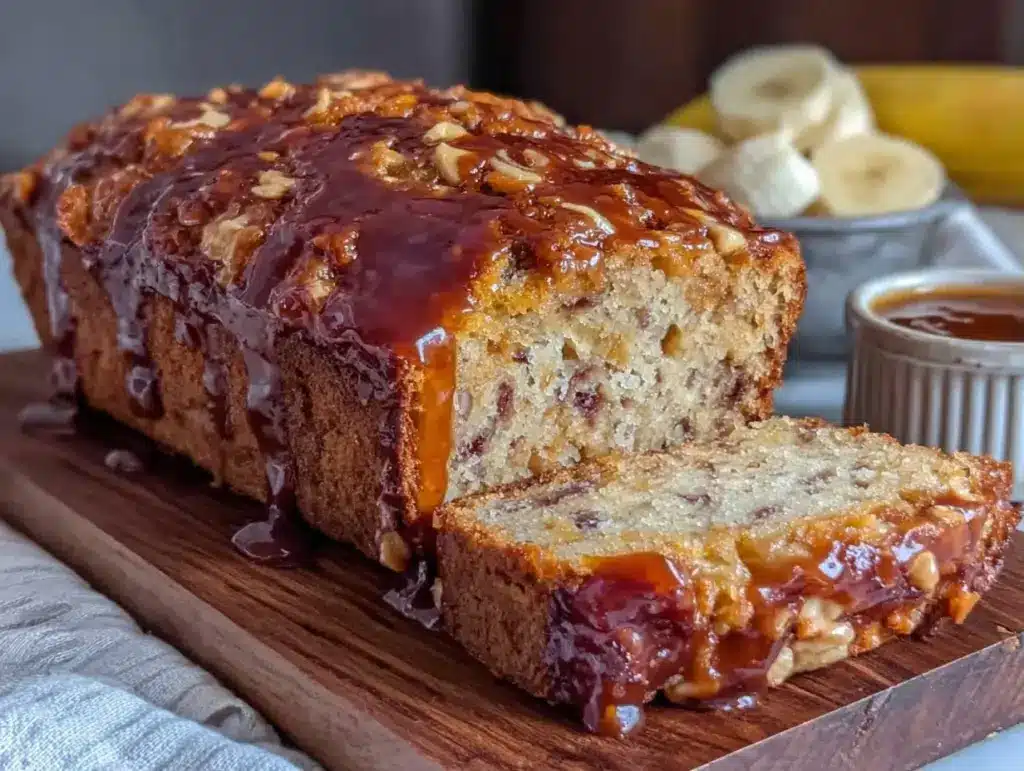
So, I decided to hack it. I decided to take the one thing that makes banana bread dry—the lack of fat—and replace it with the richest, most nutty ingredient I know: brown butter. And then, because I couldn’t stop there, I made a glaze. Not just any glaze, but a brown butter glaze that drips down the sides, pools in the cracks, and turns a simple loaf into something that feels like it came from a high-end bakery but costs pennies to make.
This ultra-moist banana bread with brown butter glaze is not just a recipe. It’s a rescue mission for those sad, spotted bananas. It’s my answer to “what do I do with these?” It’s the reason I keep bananas on the counter even when I’m trying to eat healthier. I’ve tested this version at least twelve times, tweaking the butter ratio, the flour type, and the glaze consistency until it was perfect. The result is a loaf that stays moist for days, smells like a cozy autumn day, and tastes like pure comfort. If you’ve ever been disappointed by dry, crumbly banana bread, this is the one that will change your mind forever.
Why You’ll Love This Recipe
There are a lot of banana bread recipes out there. I’ve tried them all. Some are too dense, some are too sweet, and some taste like they were made with cardboard. This ultra-moist banana bread with brown butter glaze is different. It’s not just “good for banana bread.” It’s genuinely amazing on its own merits.
The Brown Butter Difference — Seriously, this is the game-changer. Browning the butter toasts the milk solids, giving it a deep, nutty, almost hazelnut flavor. It adds a level of sophistication that regular melted butter just can’t touch. It makes the bread taste richer and more complex without adding any extra sweetness. It’s the secret weapon.
Actually Moist (Not Gummy) — I’ve seen recipes that use applesauce or yogurt to make banana bread “healthy” and moist, but they often end up gummy or heavy. This recipe uses the natural moisture from the bananas and the emulsifying power of the brown butter to create a texture that is tender and airy, not dense. It slices beautifully. It doesn’t stick to your teeth.
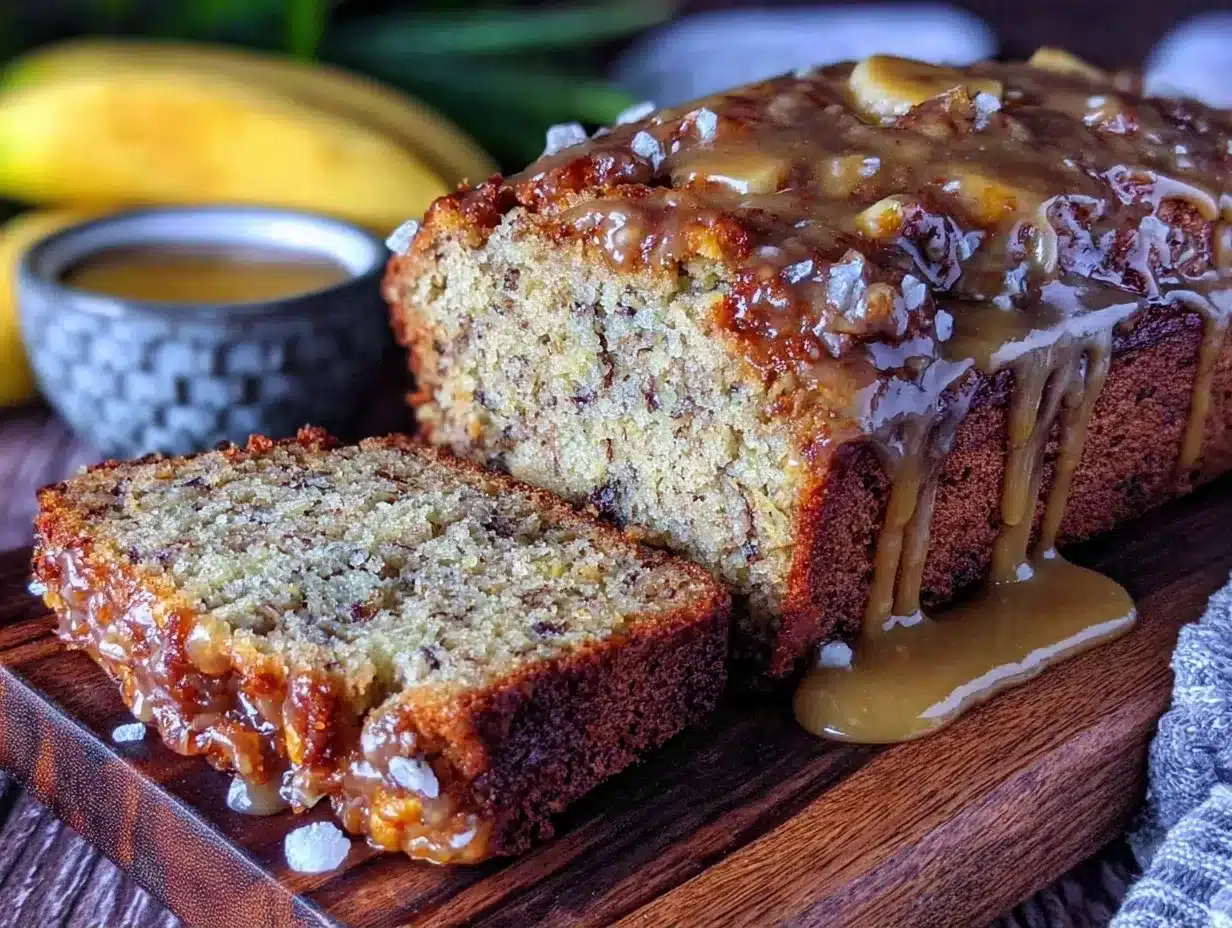
The Glaze is Non-Negotiable — I know, I know, banana bread doesn’t usually have glaze. But this brown butter glaze is thin enough to drizzle but thick enough to set into a shiny, crackly shell. It adds a salty-sweet contrast that cuts through the richness of the bread. Once you try it, you’ll never go back to plain banana bread again.
Uses Up That Trash — This is the best part. The riper the bananas, the better this bread is. We’re talking black skins, mushy interiors, the kind you’d normally throw in the compost. This recipe turns kitchen waste into gold. It’s sustainable, budget-friendly, and delicious.
Ready in Under an Hour — From mixing to cooling, this takes about 45 minutes. It’s perfect for a weekend breakfast, an afternoon snack, or even a last-minute gift for a neighbor. The smell alone will have people knocking on your door.
I make this for everyone. My picky niece who only eats white bread loves it. My gluten-sensitive friend loves it (when I swap the flour). My husband loves it so much he eats it for breakfast, lunch, and dinner. It’s the kind of recipe that just works.
Ingredients You’ll Need
Here’s the best part: you probably have most of this already. The beauty of banana bread is that it relies on pantry staples. But because we’re elevating it with brown butter and a glaze, the quality of your ingredients matters a little more than usual.
For the Bread:
Ripe Bananas (3 large / about 1.5 cups mashed) — This is the most important ingredient. They need to be very ripe. I mean, black skins, mushy inside, ripe. If they’re yellow, they won’t be sweet enough. I keep a bag of bananas in the freezer. When they get too ripe, I peel them, freeze them, and then thaw them for baking. It makes them super easy to mash.
Unsalted Butter (1/2 cup / 113g) — We’re browning this. Use good quality butter. The flavor of the brown butter will be prominent, so don’t skimp on the quality. I use Kerrygold or Plugra, but any good European-style butter works.
Granulated Sugar (3/4 cup / 150g) — This balances the tartness of the bananas. Don’t reduce this too much, or the bread will be dense and not sweet enough. I’ve tried reducing it to 1/2 cup, and it just wasn’t as good.
Light Brown Sugar (1/4 cup / 50g) — This adds a hint of molasses flavor and helps keep the bread moist. It’s optional, but I highly recommend it.
Egg (1 large / room temperature) — This binds everything together. Make sure it’s room temperature so it emulsifies better with the butter and sugars.
Vanilla Extract (1 teaspoon) — Pure vanilla, please. I know it’s more expensive, but the fake stuff tastes chemical. In a simple recipe like this, the vanilla shines through.
All-Purpose Flour (1 1/2 cups / 190g) — I use Gold Medal or King Arthur. Don’t use self-rising flour; the leavening won’t be right. If you want to use whole wheat flour, you can substitute up to half of the all-purpose flour, but the bread will be denser.
Baking Soda (1 teaspoon) — This is what makes the bread rise. Make sure it’s not expired. I check mine every few months.
Salt (1/2 teaspoon) — This enhances the flavor. Don’t skip it.
Walnuts or Pecans (1/2 cup / 60g, optional) — I like to toast them first for extra flavor. If you’re allergic to nuts, just leave them out. The bread is still delicious without them.
For the Brown Butter Glaze:
Unsalted Butter (2 tablespoons / 28g) — We’re browning this again. It’s a lot of butter, but it’s worth it. The nutty flavor is incredible.
Powdered Sugar (1 cup / 120g) — Sifted, please. Clumps in glaze are the worst. I sift mine into a bowl before I start.
Heavy Cream (1-2 tablespoons) — This thins the glaze. Start with 1 tablespoon and add more if needed. You want a drizzle-able consistency, not a thick paste.
Salt (1/4 teaspoon) — A pinch of salt in the glaze balances the sweetness. It makes the flavor pop.
Pro Tip: I always measure my flour by spooning it into the cup and leveling it off. Scooping directly from the bag packs it down and leads to dry bread. I’ve made that mistake before, and it’s not fun.
Equipment Needed
You don’t need fancy equipment for this. Here’s what I actually use.
Medium Saucepan — For browning the butter. I use a stainless steel pan because I can see the color change clearly. A light-colored pan is best so you can watch the butter turn golden brown.
Mixing Bowls — Two bowls. One for the wet ingredients, one for the dry. I use glass bowls because they’re easy to clean and I can see how much is left.
Whisk — For beating the butter and sugars, and for mixing the glaze. I use a balloon whisk because it incorporates air better.
Spatula — A rubber spatula is essential for folding in the flour and scraping the bowl. I have a set from IKEA that’s cheap and works perfectly.
Loaf Pan — 9×5 inch. I use a metal pan. Glass pans cook slower and can lead to a darker crust. If you use glass, reduce the oven temp by 25 degrees.
Parchment Paper — I line the pan with parchment paper. It makes cleanup a breeze and ensures the bread doesn’t stick. I also leave a little overhang on the sides so I can lift the bread out easily.
Cooling Rack — For cooling the bread. I don’t let it cool in the pan because it can get soggy from the steam. I transfer it to a rack after 10 minutes.
Optional but nice:
– Pastry Brush — For brushing the glaze on evenly. I use a silicone brush because it’s easy to clean.
– Microplane — For zesting lemon if you want to add a citrus twist to the glaze. I sometimes add lemon zest, and it’s amazing.
Tool Tip: Don’t have a saucepan for browning butter? You can do it in the microwave in 15-second intervals, but it’s harder to watch. I stick to the stovetop because it’s more reliable.
How to Make It: Step-by-Step
Alright, let’s make this! I’m walking you through exactly how I do it, including the little tricks I’ve picked up.
Step 1: Prep and Preheat (5 minutes)
Preheat your oven to 350°F (175°C). Line your 9×5 loaf pan with parchment paper. I leave a little overhang on the long sides so I can lift the bread out later. Mash your ripe bananas in a bowl until they’re smooth. I like them smooth, but if you like chunks, that’s fine too. Set aside.
Step 2: Brown the Butter (5 minutes)
This is the critical step. Melt the 1/2 cup of butter in a medium saucepan over medium heat. Stir constantly. The butter will foam up. Keep stirring. You’ll see the foam subside and start to hear a sizzling sound. That’s the milk solids cooking. Look for little brown specks at the bottom of the pan and smell that nutty aroma. It should look like amber-colored honey. This takes about 3-5 minutes. Don’t walk away! If it smells like burnt toast, you’ve gone too far. Once it’s browned, immediately pour it into a heatproof bowl to stop the cooking. Let it cool for 5 minutes.
Step 3: Mix the Wet Ingredients (3 minutes)
In a large mixing bowl, whisk the cooled brown butter, granulated sugar, and brown sugar together until well combined. The mixture will look a bit grainy at first, but that’s okay. Whisk in the egg and vanilla extract until smooth. Then, stir in the mashed bananas. The batter should be thick and fragrant.
Step 4: Add the Dry Ingredients (2 minutes)
In a separate bowl, whisk together the flour, baking soda, and salt. Sprinkle the dry ingredients over the wet ingredients. Use a spatula to gently fold them together. Stop as soon as the flour disappears. Do not overmix! Overmixing develops gluten, and you’ll end up with tough bread. The batter will be thick. If you’re adding nuts, fold them in now.
Step 5: Bake (50-60 minutes)
Pour the batter into your prepared loaf pan. Smooth the top with your spatula. Bake at 350°F (175°C) for 50-60 minutes. The bread is done when the top is golden brown, the edges pull away from the pan, and a toothpick inserted into the center comes out clean or with just a few moist crumbs. If the top is browning too fast, tent it with foil after 30 minutes.
Step 6: Cool and Glaze (15 minutes)
Let the bread cool in the pan for 10 minutes, then transfer it to a cooling rack to cool completely. While it cools, make the glaze. Brown the 2 tablespoons of butter in a small saucepan just like before. Let it cool for 2 minutes. Whisk in the powdered sugar, salt, and 1 tablespoon of heavy cream. Whisk until smooth. Add more cream if needed to reach a drizzle-able consistency. Drizzle the glaze over the completely cooled bread. Let it set for 10 minutes before slicing.
Total Time: About 1 hour 15 minutes (including cooling time)
Expert Tips & Tricks
Here’s everything I’ve learned from making this dozens of times. These tips will save you from my mistakes.
Don’t Skip the Browning
I know it takes extra effort, but regular melted butter just doesn’t give you that depth of flavor. The toasted milk solids add a nuttiness that pairs perfectly with the bananas. It’s the difference between good and great.
Watch the Oven
Ovens vary. My oven runs hot, so I check my bread at 45 minutes. If the toothpick comes out clean, pull it. If it’s wet, give it 5 more minutes. Overbaking is the #1 reason for dry banana bread. It’s better to underbake slightly than overbake.
Use Very Ripe Bananas
The riper the banana, the sweeter and more flavorful the bread. If your bananas are still yellow, put them in a 300°F oven for 15-20 minutes until they turn black. It speeds up the ripening process and concentrates the flavor.
Don’t Overmix
I cannot stress this enough. Once you add the flour, mix until it’s just combined. Lumps are okay. A few streaks of flour are fine. Overmixing makes the bread dense and tough. You want a tender crumb.
Cool Completely Before Glazing
If you glaze warm bread, the glaze will melt into the bread and disappear. You want it to sit on top and set into a shiny shell. Be patient. Let it cool on a rack for at least 30 minutes.
Common Mistakes (and how to avoid them):
Mistake: Bread is dense and gummy
Fix: You overmixed the batter, or you used too much flour. Spoon and level your flour, and mix gently.
Mistake: Bread is dry
Fix: You overbaked it. Check it earlier, and use a toothpick to test for doneness. Also, make sure your bananas are very ripe.
Mistake: Glaze is too thick
Fix: Add more heavy cream, one teaspoon at a time, until it’s the consistency you want.
Pro Tricks I’ve Learned:
For Extra Flavor
Add a pinch of cinnamon or nutmeg to the batter. It’s not traditional, but it adds a warm, cozy note that I love.
For Better Texture
Let the batter rest for 10 minutes before baking. This allows the flour to hydrate fully, resulting in a more tender crumb.
Make-Ahead Strategy
You can make the bread ahead and store it in an airtight container for up to 3 days. The glaze might soften, but the flavor is still amazing. You can also freeze the unglazed bread for up to 3 months.
Variations & Substitutions
Once you’ve nailed the basic version, here’s how you can mix it up. I’ve tried all of these.
Chocolate Chip Banana Bread
Fold in 1/2 cup of chocolate chips before baking. The chocolate and banana are a classic combo. I use semi-sweet chocolate chips.
Spiced Banana Bread
Add 1 teaspoon of cinnamon, 1/2 teaspoon of nutmeg, and 1/4 teaspoon of allspice to the dry ingredients. It tastes like fall in a loaf.
Coconut Banana Bread
Substitute 1/2 cup of the flour with shredded coconut. Add 1/2 cup of coconut chips for extra crunch. It’s tropical and delicious.
Gluten-Free Version
Use a 1:1 gluten-free flour blend. I’ve used King Arthur’s blend, and it works great. Make sure to xanthan gum is in the blend, or add 1/2 teaspoon.
Dairy-Free Version
Use vegan butter instead of regular butter. The brown butter step still works with vegan butter. For the glaze, use coconut cream instead of heavy cream.
Lower-Sugar Version
Reduce the sugar to 1/2 cup granulated and 2 tablespoons brown sugar. It’s less sweet but still flavorful. I recommend this if you’re watching your sugar intake.
With Other Nuts
I’ve used pecans, walnuts, and macadamia nuts. All are delicious. Toast them first for extra flavor.
Glaze Variations
Add lemon zest to the glaze for a citrus twist. Or add a splash of bourbon for a grown-up version. I’ve even tried adding a pinch of chili flakes for a spicy kick.
Serving & Storage
How to Serve:
I usually serve this straight from the cooling rack, warm or at room temperature. It’s perfect with a cup of coffee or tea. I like to slice it thick and pair it with a dollop of whipped cream or a scoop of vanilla ice cream. But honestly, it’s delicious on its own.
Side Dishes:
– Fresh fruit salad
– Greek yogurt with honey
– A simple green salad with balsamic vinaigrette (yes, really! The sweetness of the bread balances the acidity of the salad perfectly)
Storage Instructions:
Refrigerator:
Store in an airtight container for up to 4 days. The bread will stay moist, but the glaze might soften. If you want the glaze to stay crisp, store it uncovered for the first hour, then cover.
Freezer:
You can freeze the unglazed bread for up to 3 months. Wrap it tightly in plastic wrap and then in aluminum foil. Thaw at room temperature before glazing. I don’t recommend freezing the glazed bread because the glaze can become sticky and messy.
Reheating:
If you want warm banana bread, microwave a slice for 20-30 seconds. It’ll be soft and gooey. Or, toast a slice in the oven at 350°F for 5-10 minutes. It’ll be crispy on the outside and soft on the inside.
Pro tip: If the bread starts to dry out, wrap it in a damp paper towel and microwave it for 10 seconds. It’ll steam back to life.
Nutrition Information
I’m not a nutritionist, but here’s the breakdown if you’re tracking. This is a rich, indulgent treat, so enjoy it in moderation.
Per Serving (based on 10 slices, with glaze):
– Calories: 280
– Protein: 3g
– Carbs: 42g
– Fiber: 1g
– Sugar: 28g
– Fat: 12g
– Saturated Fat: 7g
– Cholesterol: 35mg
– Sodium: 180mg
What’s Good:
– It’s a good source of potassium from the bananas.
– The brown butter adds healthy fats (in moderation, of course).
What to Know:
– Higher in sugar due to the glaze.
– Contains dairy and gluten.
– Moderate calories, but very satisfying.
My Take:
Look, this is a dessert, not a health food. It’s rich, sweet, and buttery. But it’s also made with real ingredients, and you know exactly what’s in it. When I make this, I slice it into smaller pieces and share it with family. It’s a treat, not a daily snack. But when I do have it, I savor every bite.
Final Thoughts
So that’s my ultra-moist banana bread with brown butter glaze! I’ve probably talked your ear off at this point, but when you make a recipe this often, you have a lot to say about it.
This has saved my breakfasts more times than I can count. It’s my answer to “what do I do with these bananas?” It’s my go-to when I want something sweet but homemade. My kids are happy, my husband’s happy, and I’m happy because I’m not stressed about cooking.
Make it yours! Try different add-ins, swap in your favorite nuts, adjust the glaze thickness. The best recipes are the ones you adapt to your family’s tastes. And if you want to try other banana recipes, check out my banana zucchini bread with brown sugar swirl for a slightly different twist.
If you make this, drop a comment and let me know what you think! I love hearing how recipes turn out in your kitchen. And if something doesn’t work, tell me that too—I’m here to help troubleshoot. Happy cooking! And I hope your kitchen smells half as good as mine does right now.
Frequently Asked Questions
Can I use frozen bananas?
Yes! In fact, frozen bananas are often better because they’re already very ripe. Just thaw them completely and drain any excess liquid before mashing. I keep a bag of frozen bananas in the freezer specifically for baking.
Why did my bread turn out dry?
Usually, this means you overbaked it. Banana bread continues to cook in the pan after you take it out of the oven. Check it a few minutes before the timer goes off. Also, make sure your bananas are very ripe. Underripe bananas don’t have enough moisture or sweetness.
Can I make this ahead for a party?
Absolutely. Make the bread a day ahead and store it in an airtight container. Glaze it right before serving. If you glaze it too early, the glaze can get sticky or melt into the bread. I recommend glazing it 1-2 hours before you serve it.
Can I use whole wheat flour?
You can, but the bread will be denser and heavier. I recommend substituting up to half of the all-purpose flour with whole wheat flour. If you use 100% whole wheat, the texture will be quite different. I like the balance of half-and-half.
How do I store leftovers?
Store in an airtight container at room temperature for up to 3 days. If it’s very hot and humid, store it in the fridge. The bread will stay moist, but the glaze might soften. You can also freeze the unglazed bread for up to 3 months.
Can I add chocolate chips?
Yes! Fold in 1/2 cup of chocolate chips before baking. The chocolate and banana are a classic combo. I use semi-sweet chocolate chips, but milk chocolate or dark chocolate work too.
Why did my glaze run off the bread?
Either the glaze was too thin, or the bread was too warm. Make sure the bread is completely cooled before glazing. If the glaze is too thin, add more powdered sugar. If it’s too thick, add more heavy cream.
Pin This Recipe!
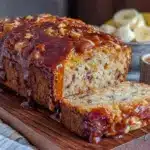
Ultra-Moist Banana Bread with Brown Butter Glaze
- Total Time: 1 hour 15 minutes
- Yield: 10 servings 1x
Description
An ultra-moist banana bread recipe elevated with nutty brown butter and finished with a shiny, salty-sweet brown butter glaze. This recipe uses very ripe bananas for maximum flavor and ensures a tender, airy crumb.
Ingredients
- 3 large ripe bananas (about 1.5 cups mashed)
- 1/2 cup (113g) unsalted butter (for browning)
- 3/4 cup (150g) granulated sugar
- 1/4 cup (50g) light brown sugar
- 1 large egg (room temperature)
- 1 teaspoon vanilla extract
- 1 1/2 cups (190g) all-purpose flour
- 1 teaspoon baking soda
- 1/2 teaspoon salt
- 1/2 cup (60g) walnuts or pecans (optional, toasted)
- 2 tablespoons (28g) unsalted butter (for glaze)
- 1 cup (120g) powdered sugar (sifted)
- 1–2 tablespoons heavy cream
- 1/4 teaspoon salt (for glaze)
Instructions
- Preheat oven to 350°F (175°C). Line a 9×5 inch loaf pan with parchment paper, leaving an overhang on the long sides.
- Mash the ripe bananas in a bowl until smooth and set aside.
- Melt the 1/2 cup butter in a medium saucepan over medium heat. Stir constantly until the foam subsides, brown specks appear, and the butter smells nutty (about 3-5 minutes). Pour into a heatproof bowl and let cool for 5 minutes.
- In a large mixing bowl, whisk the cooled brown butter, granulated sugar, and brown sugar until combined. Whisk in the egg and vanilla extract until smooth. Stir in the mashed bananas.
- In a separate bowl, whisk together the flour, baking soda, and 1/2 teaspoon salt.
- Gently fold the dry ingredients into the wet ingredients using a spatula until just combined. Do not overmix. Fold in nuts if using.
- Pour batter into the prepared loaf pan and smooth the top. Bake for 50-60 minutes, or until a toothpick inserted into the center comes out clean. Tent with foil if browning too quickly.
- Let the bread cool in the pan for 10 minutes, then transfer to a cooling rack to cool completely.
- While the bread cools, brown the 2 tablespoons of butter for the glaze in a small saucepan. Let cool for 2 minutes.
- Whisk the browned butter, powdered sugar, 1/4 teaspoon salt, and 1 tablespoon heavy cream until smooth. Add more cream if needed for a drizzle-able consistency.
- Drizzle the glaze over the completely cooled bread and let it set for 10 minutes before slicing.
Notes
Ensure bananas are very ripe (black skins) for best flavor and moisture. Do not overmix the batter to avoid a dense texture. Cool the bread completely before glazing to prevent the glaze from melting into the bread. For gluten-free version, use a 1:1 gluten-free flour blend.
- Prep Time: 15 minutes
- Cook Time: 50-60 minutes
- Category: Dessert
- Cuisine: American
Nutrition
- Serving Size: 1 slice
- Calories: 280
- Sugar: 28
- Sodium: 180
- Fat: 12
- Saturated Fat: 7
- Carbohydrates: 42
- Fiber: 1
- Protein: 3
Keywords: banana bread, brown butter, glaze, moist banana bread, baking, breakfast, dessert, easy recipe