I’ll never forget the first time I stood in my cousin’s kitchen in Albuquerque, watching her roast a pile of green chilies on a gas burner. The kitchen was filled with this incredible, smoky aroma that felt like a warm hug, and my eyes were watering from the smoke. She handed me a chile, peeled the charred skin off with her fingers, and dipped a tortilla into the chunky, vibrant salsa sitting on the counter. It was bright, tangy, smoky, and just a little bit spicy. That was it. I was hooked.
Since then, I’ve been on a quest to recreate that exact flavor profile in my own home kitchen. I’ve tried blanching, boiling, and even using the broiler, but nothing compares to the depth of flavor you get from fire-roasting. This roasted hatch chili salsa verde is the result of that quest. It’s my go-to when I want something that tastes like summer, but with a little kick. It’s tangy from the tomatillos, smoky from the charred chilies, and fresh from the cilantro and lime. I make this at least once a month, especially when I’m craving something that pairs perfectly with everything from tacos to grilled chicken.
If you’ve never made salsa verde from scratch, you’re in for a treat. It’s surprisingly easy, and the flavor is worlds apart from anything you’ll buy in a jar. I’ve tested this recipe dozens of times, tweaking the balance of acidity and heat until it was just right. The secret is in the roasting—getting those skins blistered and blackened without burning the flesh. Once you master this technique, you’ll wonder how you ever lived without it. I promise, this roasted hatch chili salsa verde will become a staple in your fridge, sitting right next to your hot sauce and sour cream.
Why You’ll Love This Fire-Roasted Green Salsa
There are a hundred reasons I keep coming back to this recipe, but let’s be honest—some are more important than others. Here’s why this salsa has earned a permanent spot in my weekly meal rotation.
Smoky Depth Without the Grill — You don’t need a BBQ or an outdoor fire to get that charred flavor. I use my oven’s broiler, and it gives me that authentic blistered skin and smoky taste every time. It’s the closest thing to roasting over an open flame I’ve found.
Lightning Fast Prep — Yes, the roasting takes some time, but the actual hands-on work is minimal. Once the chilies and tomatillos are roasted, the rest is just blending. I can have this salsa ready in under 30 minutes if I’m feeling ambitious, or I can roast them while I cook dinner and blend it later.
Versatility Central — This isn’t just a dip for chips. I use it as a topping for my Hatch Green Chile Chicken Enchiladas, a garnish for my Summer Chicken Caprese Skillet (yes, it works with Italian flavors too), and even as a base for my morning eggs. It’s the Swiss Army knife of salsas.
Customizable Heat — Not everyone likes it spicy, and that’s okay. This recipe lets you control the heat level. Want mild? Leave the seeds in the chilies. Want it fiery? Add an extra jalapeño or keep all the seeds. I usually start mild and add a dash of hot sauce if I need more kick.
Makes Amazing Leftovers — This salsa actually gets better after sitting in the fridge for a day or two. The flavors meld together, and it becomes even more cohesive. I often make a big batch on Sunday and eat it for the rest of the week. It’s perfect for meal prep, especially if you’re making bowls or tacos.
This salsa is my answer to “what can I add to make this boring chicken taste good?” or “what do I need for game day?” It’s reliable, delicious, and always a crowd-pleaser. I’ve served it to picky eaters and spice lovers alike, and everyone asks for the recipe.
Ingredients You’ll Need
This recipe relies on a few key ingredients, but don’t let the simplicity fool you. Each one plays a specific role in creating that perfect balance of flavors. I’m particular about a couple of things here, so pay attention to the details.
Tomatillos (2 pounds / 900g) — These are the backbone of salsa verde. Look for firm tomatillos with their papery husks still attached. If the husk is missing or the tomatillo is slimy, skip it. You’ll need to remove the husks and rinse off the sticky residue. This step is crucial for a clean flavor.
Hatch Green Chilies (1-2 cups, chopped / 150-200g) — If you’re in the Southwest, use fresh Hatch chilies. They have a unique balance of heat and flavor that’s hard to beat. If you can’t find them, Anaheim chilies or poblano peppers work as good substitutes. I like to use a mix of mild and hot chilies for complexity.
White Onion (1 medium, chopped / about 150g) — White onion is traditional for this salsa. It has a sharper, cleaner flavor than yellow onion, which cuts through the richness of the chilies. Red onion works too, but it changes the color and flavor profile slightly.
Garlic (4-5 cloves, peeled) — Don’t skimp on the garlic. It adds a necessary pungency that balances the acidity of the tomatillos. I use fresh garlic only—jarred garlic just doesn’t have the same punch in a raw salsa like this.
Cilantro (1 cup, packed / about 30g) — Fresh cilantro is non-negotiable. It adds that bright, herbal freshness that makes the salsa taste alive. If you hate cilantro (the soapy taste gene is real), you can substitute with parsley, but it won’t be the same. I usually use the stems too—they have great flavor.
Lime Juice (2-3 limes, juiced / about ¼ cup / 60ml) — Fresh lime juice is essential. Bottled lime juice tastes metallic and flat. You need the bright, acidic punch to balance the roasted flavors. Taste as you go—some limes are juicier than others.
Sea Salt (1 teaspoon, plus more to taste) — Use kosher salt or sea salt. Iodized table salt can taste bitter. Start with 1 teaspoon and adjust to your preference. This salsa needs salt to make the flavors pop.
Jalapeño or Serrano Pepper (1 small, optional / 15-20g) — For extra heat, add one of these. I usually add a small serrano because it’s hotter and has a cleaner heat than jalapeño. Remove the seeds and ribs if you want less spice.
Vegetable Oil (1 tablespoon) — I use a neutral oil like vegetable or canola for roasting. It helps the chilies and tomatillos char evenly without burning. Olive oil can work, but it has a stronger flavor that might overpower the salsa.
Equipment Needed
You don’t need any fancy gadgets to make this salsa. Here’s what I actually use in my kitchen.
Baking Sheet — I use a rimmed baking sheet, preferably lined with parchment paper or foil for easy cleanup. A dark sheet helps with browning, but a light-colored one prevents burning. Either works fine.
Broiler or Grill — I use my oven’s broiler because it’s consistent and easy. If you have a gas grill, you can roast the chilies directly over the flames for an even smokier flavor. I love the charcoal taste, but it’s messier.
Blender or Food Processor — A standard blender works great. I prefer my high-speed blender because it gives a smoother texture, but a food processor is fine too. Just don’t overblend—it’s supposed to be chunky.
Sharp Knife and Cutting Board — For chopping the onions, chilies, and cilantro. A good knife makes this step much faster and safer.
Measuring Spoons and Cups — Standard stuff. I use a set from the dollar store that’s held up fine.
Spatula — For scraping the roasted veggies off the baking sheet. Silicone works best.
Jar or Airtight Container — For storing the salsa. I use mason jars because they’re easy to clean and stack well.
How to Make It: Step-by-Step

Alright, let’s make this! I’m walking you through exactly how I do it, including the little tricks I’ve picked up over the years. This process is straightforward, but attention to detail makes all the difference.
Step 1: Prep the Tomatillos and Chilies (5 minutes)
Remove the papery husks from the tomatillos. You’ll notice they’re sticky—this is natural. Rinse them thoroughly under cold water to remove the residue. Pat them dry with a paper towel. If your tomatillos are large, cut them in half. For the Hatch chilies, rinse them and pat dry. If you’re using fresh chilies, you can leave them whole or cut them in half lengthwise for faster roasting.
Step 2: Roast the Vegetables (15-20 minutes)
Preheat your oven’s broiler to high. Line a baking sheet with foil or parchment paper. Toss the tomatillos and chilies with the vegetable oil, ensuring they’re lightly coated. Spread them out in a single layer on the baking sheet. Place the sheet under the broiler, about 4-6 inches from the heat source. Watch them closely! You want the skins to blister and char, turning black in spots. The tomatillos should soften and collapse slightly. This usually takes 8-10 minutes per side. Flip them halfway through. If you’re using a grill, place the chilies directly over the flames and turn occasionally until charred on all sides.
Step 3: Steam the Chilies (10 minutes)
Once the chilies are charred, transfer them to a bowl and cover it tightly with plastic wrap or a lid. Let them steam for 10 minutes. This loosens the skin, making it easy to peel. Don’t skip this step—it makes peeling so much easier. After steaming, rub the skins off the chilies with your fingers. You don’t need to remove every tiny bit of blackened skin, just the majority. Discard the stems and seeds if you want less heat, or keep some seeds for more spice.
Step 4: Blend the Salsa (2 minutes)
In a blender or food processor, combine the roasted tomatillos, peeled chilies, chopped white onion, garlic, cilantro, lime juice, salt, and jalapeño (if using). Pulse several times until you reach your desired consistency. I like my salsa verde chunky, so I pulse about 10-15 times. If you prefer a smoother salsa, blend longer. Taste and adjust seasoning. Need more salt? Add it. Too spicy? Add a squeeze of lime or a spoonful of sugar to balance it. Too tart? Add a pinch of salt or a tiny bit of honey.
Step 5: Rest and Serve (30 minutes)
Transfer the salsa to a jar or serving bowl. Let it sit at room temperature for at least 30 minutes before serving. This allows the flavors to meld together. The salsa will keep in the refrigerator for up to 5 days. I usually make a double batch because it goes fast. Serve with tortilla chips, alongside tacos, or as a topping for grilled meats. It’s also great mixed into scrambled eggs for breakfast.
Total Time: About 45 minutes (20 minutes active, 25 minutes mostly hands-off)
Expert Tips & Tricks
Here’s everything I’ve learned from making this salsa dozens of times. These tips will save you from my mistakes and help you get it right the first time.
Don’t Skip the Steaming Step
This is the most common mistake I see. If you try to peel the chilies right after roasting, you’ll struggle and end up with bits of skin stuck to the flesh. The steam loosens the skin, making it easy to rub off. Be patient here—it’s worth it.
Watch the Broiler Like a Hawk
Broilers vary wildly in intensity. One oven might char veggies in 5 minutes, another might take 15. Keep the door slightly open so you can watch, and don’t walk away. Burnt salsa tastes bitter and ruins the whole batch. You want char, not charcoal.
Use Fresh Lime Juice
I can’t stress this enough. Bottled lime juice has preservatives that taste artificial in a fresh salsa. Freshly squeezed lime juice is bright and clean. If you’re in a pinch, you can freeze fresh lime juice in ice cube trays for later use.
Balance the Heat
If you’re sensitive to spice, start with fewer seeds and a milder chili. You can always add heat, but you can’t take it away. I usually add a small serrano and remove the seeds, then taste. If it needs more kick, I add a dash of hot sauce or a pinch of cayenne.
Let It Rest
It’s tempting to serve the salsa immediately, but letting it sit for 30 minutes (or even overnight) allows the flavors to meld. The raw onion and garlic mellow out, and the smoky, tangy flavors become more cohesive. Patience pays off.
Common Mistakes (and how to avoid them):
- Salsa is too watery: This happens if the tomatillos aren’t roasted enough or if you add too much liquid. Roast until they’re soft and collapsed. If it’s still watery, let it sit in the fridge uncovered for a few hours to reduce.
- Salsa is too spicy: Remove the seeds and ribs from the chilies. If it’s already too spicy, add more tomatillos or a spoonful of yogurt to mellow it out.
- Salsa tastes flat: It needs more acid or salt. Add a squeeze of lime or a pinch of salt and taste again. Sometimes it just needs time to meld.
Variations & Substitutions
Once you’ve nailed the basic version, here’s how you can mix it up. I’ve tried all of these, and they all work well.
Smoky Chipotle Version
Add 1-2 canned chipotle peppers in adobo sauce to the blender. This adds a deep, smoky heat that’s fantastic with grilled meats. I love this version with my Slow Cooker White Chicken Chili.
Fruit-Forward Salsa
Add ½ cup of diced mango or pineapple to the blender. The sweetness balances the heat and tang beautifully. This is great for summer gatherings. I’ve also tried it with diced peaches, which pairs well with spicy dishes.
Avocado Salsa Verde
Blend in 1 ripe avocado just before serving. This makes the salsa creamier and adds healthy fats. It’s delicious with chips or as a topping for burritos. Eat it immediately, as the avocado will brown if left too long.
Roasted Corn Salsa
Add 1 cup of roasted corn kernels to the blender or mix them in by hand. This adds a nice crunch and sweetness. It’s similar to a corn salsa verde and works well with grilled fish or chicken.
Dietary Modifications:
- Vegan: This recipe is naturally vegan. No modifications needed.
- Gluten-Free: This recipe is naturally gluten-free. Just ensure your salsa isn’t cross-contaminated.
- Low-Sodium: Reduce the salt to ½ teaspoon and use low-sodium broth if you add any liquid.
Serving & Storage
How to Serve:
I usually serve this salsa verde in a glass bowl with tortilla chips on the side. It’s perfect for tacos, burritos, quesadillas, and nachos. I also love it as a topping for baked potatoes or scrambled eggs. For a fancy touch, drizzle some olive oil on top and garnish with fresh cilantro leaves.
Side Dishes:
- Tortilla chips (homemade or store-bought)
- Warm corn tortillas
- Grilled chicken or fish
- Black bean and rice bowls
- Crispy Air Fryer Banana Pepper Rings for a spicy snack
Storage Instructions:
Refrigerator: Store in an airtight container or mason jar for up to 5 days. The salsa will thicken slightly in the fridge, which is normal. Stir it before serving.
Freezing: Yes, you can freeze salsa verde! Portion it into freezer-safe containers or zip-top bags. It will keep for up to 3 months. Thaw it in the fridge overnight and stir well before serving. The texture might be slightly softer, but the flavor remains great.
Pro Tip: If you’re making this for a party, make it a day ahead. The flavors will develop and become even more complex. Bring it to room temperature before serving for the best taste.
Nutrition Information
I’m not a nutritionist, but here’s the breakdown if you’re tracking. Keep in mind that these values are estimates and can vary based on the specific ingredients you use.
Per Serving (based on 8 servings, ¼ cup each):
- Calories: 45
- Protein: 1g
- Carbs: 8g
- Fiber: 2g
- Sugar: 4g
- Fat: 1g
- Sodium: 280mg
What’s Good:
- Low in calories and fat
- Good source of Vitamin C from tomatillos and lime
- Contains antioxidants from the chilies
- High in fiber from the vegetables
What to Know:
- Contains sodium from the salt
- Contains natural sugars from the tomatillos and onions
- Not suitable for those with cilantro allergy
My Take:
Look, this is a vegetable-based salsa. It’s naturally low in calories and fat, but it’s packed with flavor. It’s a great way to add some veggies to your diet without feeling like you’re eating a salad. When I’m trying to eat healthier, I load up on this salsa with my meals. It’s delicious and satisfying.
Final Thoughts
So that’s my roasted hatch chili salsa verde! I’ve talked your ear off, but when you make a recipe this often, you have a lot to say about it. This salsa has saved my dinners more times than I can count. It’s my answer to “what can I add to make this boring dinner taste good?” It’s tangy, smoky, and just the right amount of spicy. My family loves it, and I’m always asked for the recipe when I bring it to gatherings.
Make it yours! Try different types of chilies, add some fruit, or adjust the heat to your liking. The best recipes are the ones you adapt to your taste. If you make this, drop a comment and let me know what you think! I love hearing how recipes turn out in your kitchen. And if something doesn’t work, tell me that too—I’m here to help troubleshoot.
Happy cooking! And I hope your kitchen smells half as good as mine does right now.
Frequently Asked Questions
Can I use canned tomatillos instead of fresh?
You can, but the flavor won’t be quite as bright. Canned tomatillos are cooked and often softer, so they lack the fresh, tangy punch of roasted fresh tomatillos. If you must use canned, rinse them well and pat them dry before roasting. I prefer fresh when I can get them, especially during tomatillo season.
Why is my salsa too spicy?
If your salsa is too spicy, you can mellow it out by adding more tomatillos, lime juice, or a spoonful of yogurt or sour cream. The dairy helps neutralize the capsaicin in the chilies. You can also add a pinch of sugar to balance the heat. Next time, remove more seeds and ribs from the chilies.
Can I make this salsa ahead of time?
Absolutely! In fact, it tastes even better the next day. The flavors have time to meld and develop. I often make this salsa on Sunday and eat it throughout the week. Just store it in an airtight container in the fridge.
How long does this salsa last in the fridge?
This salsa verde will last up to 5 days in the refrigerator when stored in an airtight container. If you notice any off smells, mold, or changes in texture, discard it. Always use clean utensils when serving to prevent contamination.
Can I freeze this salsa?
Yes, you can freeze salsa verde. Portion it into freezer-safe containers or zip-top bags, leaving some headspace for expansion. It will keep for up to 3 months. Thaw it in the fridge overnight and stir well before serving. The texture might be slightly softer, but the flavor remains great.
What’s the difference between salsa verde and pico de gallo?
Salsa verde is made with tomatillos and is usually blended or pureed, giving it a smooth or chunky liquid consistency. Pico de gallo is a fresh salsa made with diced tomatoes, onions, cilantro, and jalapeños, with a chunkier, drier texture. Both are delicious, but they have different flavor profiles and uses. I love both, but salsa verde is my go-to for cooking and baking into dishes.
Can I use green bell peppers instead of Hatch chilies?
You can, but green bell peppers lack the heat and unique flavor of Hatch chilies. They’ll make the salsa milder and less complex. If you’re looking for a very mild salsa, you can use a mix of green bell peppers and mild chilies. For authentic flavor, try to find Hatch chilies or Anaheim peppers.
Pin This Recipe!


Roasted Hatch Chili Salsa Verde: 10-Min Easy Recipe
- Total Time: 45 minutes
- Yield: 8 servings 1x
Description
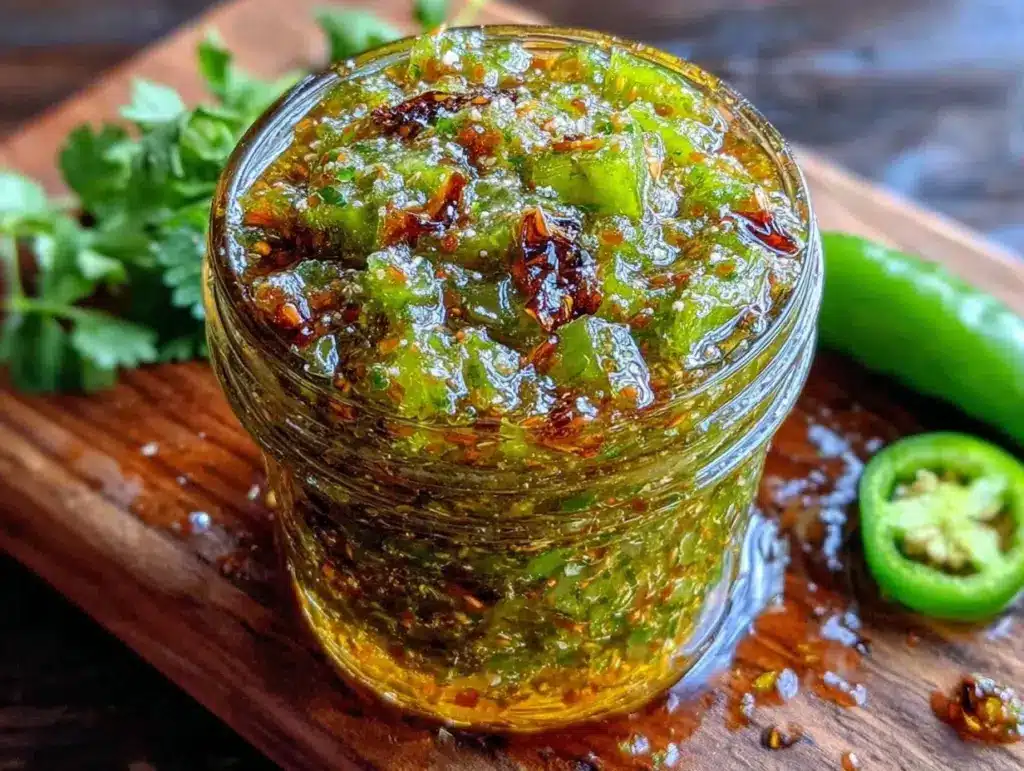
A bright, tangy, and smoky salsa verde made with fire-roasted Hatch green chilies and tomatillos. This easy recipe delivers authentic Southwest flavor with minimal hands-on prep time.
Ingredients
- 2 pounds (900g) tomatillos, husks removed and rinsed
- 1–2 cups (150-200g) Hatch green chilies, chopped
- 1 medium white onion, chopped
- 4–5 cloves garlic, peeled
- 1 cup packed fresh cilantro
- 2–3 limes, juiced (about ¼ cup / 60ml)
- 1 teaspoon sea salt, plus more to taste
- 1 small jalapeño or serrano pepper, optional
- 1 tablespoon vegetable oil
Instructions
- Preheat oven broiler to high. Line a rimmed baking sheet with foil or parchment paper.
- Remove husks from tomatillos and rinse thoroughly to remove sticky residue. Pat dry. If large, cut in half. Rinse and pat dry chilies.
- Toss tomatillos and chilies with vegetable oil to coat lightly. Spread in a single layer on the baking sheet.
- Broil vegetables 4-6 inches from heat source for 8-10 minutes per side, flipping halfway, until skins are blistered and charred.
- Transfer charred chilies to a bowl, cover tightly with plastic wrap or a lid, and let steam for 10 minutes.
- Rub the skins off the chilies with your fingers. Discard stems and seeds if desired for less heat.
- In a blender or food processor, combine roasted tomatillos, peeled chilies, onion, garlic, cilantro, lime juice, salt, and optional pepper.
- Pulse until desired consistency is reached (chunky or smooth). Taste and adjust seasoning with salt or lime.
- Transfer to a jar or serving bowl and let rest at room temperature for at least 30 minutes before serving to allow flavors to meld.
Notes
The steaming step is crucial for easily removing chili skins. Watch the broiler closely to prevent burning. Salsa tastes better after resting for 30 minutes or overnight. Store in the refrigerator for up to 5 days or freeze for up to 3 months.
- Prep Time: 5 minutes
- Cook Time: 20 minutes
- Category: Appetizer
- Cuisine: Mexican
Nutrition
- Serving Size: ¼ cup
- Calories: 45
- Sugar: 4
- Sodium: 280
- Fat: 1
- Carbohydrates: 8
- Fiber: 2
- Protein: 1
Keywords: salsa verde, hatch green chili, roasted salsa, tomatillo salsa, Mexican dip, gluten-free, vegan, easy recipe