There was a weekend not long ago when I decided to finally stop buying sourdough bread from the store. I had this rustic loaf on my mind for months—crisp, crackly crust with a chewy, tangy crumb that just melts in your mouth. But every time I tried making sourdough at home, I’d end up with a dense loaf or a crust that was more “sad and leathery” than “golden and crackly.”
Then I stumbled on a no-knead method that changed everything. No fancy mixers, no complicated folding techniques, no hours of babysitting dough. Just a simple mix, a long slow rise, and a hot Dutch oven to work magic. I’ve tested this no-knead rustic sourdough bread with crispy crackly crust recipe more than a dozen times (some loaves were better than others), and I’m confident enough to say it’s the easiest way to get bakery-level bread at home.
Here’s the thing: sourdough is intimidating, but it doesn’t have to be. This recipe is my answer to that sourdough dream without the stress. If you’ve ever wanted to make your own crusty loaf but felt overwhelmed, this will change your mind. Plus, it’s perfect for weekend baking projects or whenever you want fresh bread without kneading your arms sore.
Why You’ll Love This Recipe
This no-knead rustic sourdough bread has completely transformed my baking game—and not just because it tastes amazing. Here’s why it’s become my go-to recipe for weekends (and sometimes midweek when I’m feeling fancy):
- Hands-Off Simplicity — I love that this recipe requires almost zero active work. Mix the dough, let it rest, and do the minimal shaping before baking. No kneading, no stressing about perfect folds.
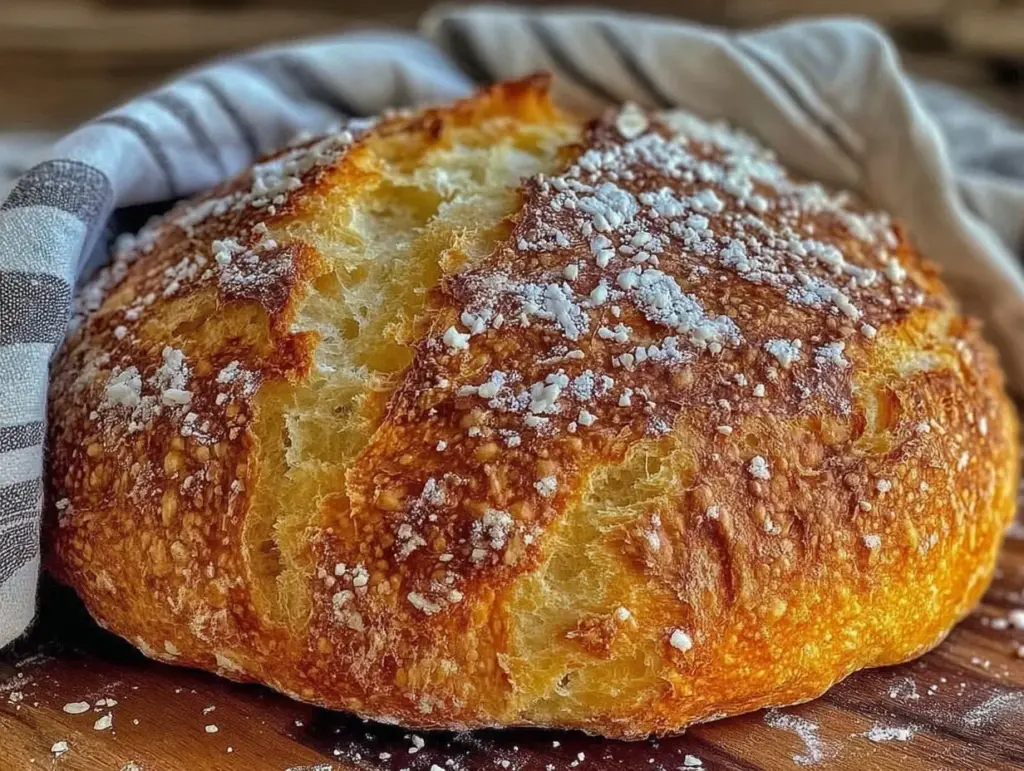
- Crispy, Crackly Crust Every Time — Thanks to baking in a hot Dutch oven and using steam, the crust turns out beautifully crackly and golden. I’ve tried other methods, but this one nails that artisan bakery crust.
- Deep, Tangy Flavor — The slow fermentation overnight develops a wonderful sourdough tang without needing complicated starter feeds or special flours.
- Perfect Texture — The crumb is airy yet chewy, with those lovely irregular holes that make sourdough so special. No dense or gummy bites here.
- Pantry-Friendly Ingredients — Just flour, water, salt, and your sourdough starter. No fancy add-ins or expensive flours needed.
- Great for Sharing or Meal Prep — I love slicing this up for sandwiches, serving alongside soups (like my slow cooker creamy tomato basil gnocchi soup), or just slathering with butter for a simple snack. The leftovers keep well and even taste better the next day toasted.
This recipe has saved my weekends from boring store-bought bread and made me feel like a real baker, even on busy days. I’m excited to share it with you.
Ingredients You’ll Need
Here’s the best part: you probably have most of these ingredients already. I’m pretty particular about a few things, so I’ll explain why each matters for that perfect rustic sourdough loaf.
- Active sourdough starter (½ cup / 120ml) — You need a bubbly, active starter for good rise and flavor. Feed yours 4-6 hours before mixing dough to make sure it’s lively. If you don’t have one yet, there are plenty of easy starters online, or you can borrow from a friend.
- Unbleached all-purpose flour (3 cups / 360g) — This gives you the perfect balance of chew and structure. I’ve experimented with bread flour, but AP flour works great and is easier to find.
- Whole wheat flour (1 cup / 120g) — Adds a nutty depth and helps the dough ferment better. You can swap for all AP flour if you want milder flavor, but I recommend the mix.
- Water (1 ½ cups / 360ml, lukewarm) — Use filtered or tap water at room temperature for best fermentation. Avoid hot water—it can kill your starter.
- Salt (2 teaspoons / 10g) — Essential for flavor and controlling fermentation speed. I use fine sea salt or kosher salt here.
Pro tip: Keep your starter in a glass jar with a loose lid while fermenting. You want it bubbly and thick but not runny. Also, pre-measure all ingredients before starting; it makes the process smoother.
Equipment Needed
You don’t need fancy equipment for this. Here’s what I actually use and recommend:
- Large mixing bowl — For mixing and fermenting the dough. Glass or stainless steel works fine.
- Kitchen scale — Measuring by weight is key for consistent results. If you don’t have one, measuring cups work but be gentle with scooping flour.
- Dutch oven with lid (6-quart) — This is the secret weapon for the crispy crust. The heavy lid traps steam, giving you that crackly crust like in a bakery. If you don’t have a Dutch oven, a heavy oven-safe pot with a lid works too.
- Bench scraper or sharp knife — For shaping and scoring the dough.
- Kitchen towel or plastic wrap — To cover the dough while it rises.
If you like easy cleanup, line your Dutch oven with parchment paper before transferring the dough—it’s a game-changer for sticking issues.
How to Make It: Step-by-Step

Alright, let’s get into the nitty-gritty. I’m walking you through exactly how I make this no-knead rustic sourdough bread with crispy crackly crust, including my little tricks for success.
Step 1: Mix the Dough (10 minutes)
In your large bowl, combine the sourdough starter with the lukewarm water. Stir until the starter dissolves. Add the flours and salt, then mix with a wooden spoon or your hand until no dry flour remains. The dough will be shaggy and sticky—don’t worry, that’s perfect. Cover the bowl with a clean kitchen towel or plastic wrap.
Step 2: Bulk Fermentation (12-18 hours)
Let the dough rest at room temperature (about 70°F / 21°C) for 12-18 hours. The dough will rise and bubble and smell mildly sour. It should roughly double in size. If your kitchen is warmer, check earlier; if cooler, give it more time. This slow fermentation is what develops flavor and texture.
Step 3: Shape the Dough (10 minutes)
Lightly flour your work surface and dump the dough out. Gently fold the edges over to shape it into a rough ball. Don’t punch it down. Place the dough seam-side down on a floured kitchen towel or parchment paper. Cover it loosely and let it rest for 1-2 hours. It will puff up a bit.
Step 4: Preheat the Oven and Dutch Oven (45 minutes)
About 30 minutes before baking, place your Dutch oven (with lid) in the oven and preheat to 450°F (230°C). This step is crucial to get that crispy crust.
Step 5: Score and Bake (40 minutes)
Carefully remove the hot Dutch oven from the oven. Using a bench scraper or sharp knife, transfer the dough seam-side up into the pot (you can use parchment paper to help). Score the top with a sharp blade to allow expansion. Cover with the lid and bake for 20 minutes. Then remove the lid and bake for another 20 minutes until the crust is deep golden and crackly.
Step 6: Cool Completely (at least 1 hour)
This is the hardest part—waiting. Let the bread cool on a wire rack completely before slicing. Cutting too soon will make the crumb gummy.
Expert Tips & Tricks
- Use a kitchen scale: Weighing ingredients ensures consistent dough hydration and better bread every time.
- Don’t skip preheating the Dutch oven: A scorching hot pot is what creates steam and that perfect crust.
- Score deeply: At least ¼ inch deep to let the bread expand and get those beautiful oven springs.
- Be patient with fermentation: Longer fermentation = better flavor. I’ve had dough rise overnight for 18 hours and it was incredible.
- Use parchment paper: Makes transferring dough in and out of the Dutch oven so much easier and cleaner.
- Store your starter well: Feed it regularly and keep it happy. A lively starter is the backbone of this bread.
- Adjust water temperature: Lukewarm water helps wake up your starter but doesn’t kill the yeast.
Some common pitfalls: if your crust isn’t crackly, your oven isn’t hot enough or you didn’t trap enough steam. If your loaf is dense, your starter might not be active enough or you didn’t ferment long enough.
Variations & Substitutions
Once you’ve nailed the basic no-knead rustic sourdough bread, here are some ways to switch it up:
- Whole Wheat Sourdough — Swap out half or all of the AP flour for whole wheat for a heartier loaf with extra nutrition.
- Seeded Loaf — Add ¼ cup mixed seeds (sunflower, flax, sesame) to the dough for crunch and flavor.
- Olive and Herb — Fold in chopped olives and fresh rosemary or thyme for a Mediterranean twist.
- Gluten-Free — This method is tricky with gluten-free flours, but you can try a blend designed for sourdough with xanthan gum. I haven’t perfected this yet but it’s worth experimenting.
- Use Bread Flour — For a chewier texture, swap AP flour with bread flour.
For a cozy meal, serve this bread alongside my slow cooker creamy tomato basil gnocchi soup or pair it with a fresh dense bean salad with feta for a light lunch. Both make excellent companions to this rustic loaf.
Serving & Storage
Serving Suggestions: I usually slice this bread thick and serve it with butter, olive oil, or a smear of soft cheese. It’s also fantastic for sandwiches or dipping into soups and stews.
- Toast leftover slices for breakfast with jam or avocado
- Make garlic bread by rubbing with cut garlic and drizzling olive oil, then broiling briefly
- Use for bruschetta topped with tomatoes and basil
Storage: Store at room temperature wrapped loosely in a linen bag or paper. Avoid plastic bags—they trap moisture and soften the crust.
Reheating: To revive the crust, pop slices in a 350°F (175°C) oven for 5-7 minutes or toast. This brings back that crackly texture better than microwaving.
Freezing: Slice the loaf and freeze in airtight bags for up to 3 months. Toast slices directly from frozen for best results.
Nutrition Information
| Nutrient | Per Serving (1 slice) |
|---|---|
| Calories | 160 |
| Protein | 5g |
| Carbohydrates | 32g |
| Fiber | 2g |
| Fat | 0.5g |
| Sodium | 210mg |
I’m not a nutritionist, but this bread provides decent protein and fiber from the whole wheat flour and starter fermentation. It’s naturally low in fat and sugar. Of course, portion size matters—sourdough is a treat best enjoyed in moderation.
Final Thoughts
So that’s my tried-and-true no-knead rustic sourdough bread with crispy crackly crust. I’ve probably rambled enough to fill a bakery class, but when you bake this often, you pick up a lot of tricks (and a fair share of burnt loaves, too!).
This bread has saved me on busy weekends and made every meal feel a little more special. It’s simple, satisfying, and a great way to connect with the joy of homemade baking without the headache of traditional sourdough methods.
Make it yours—adjust the hydration, try different flours, or add herbs and seeds. Baking is part science, part art, and part experimenting until you find your perfect loaf.
If you try this recipe, please leave a comment and tell me how it went! I love hearing your baking wins—and if you run into any trouble, I’m here to help. Happy baking, and here’s to crackly crusts and joyful kitchens!
Frequently Asked Questions
Q: How do I know if my sourdough starter is active enough?
A: Your starter should double in size and be bubbly and airy within 4-6 hours after feeding. It should also pass the float test—drop a spoonful in water and if it floats, it’s ready. If it sinks, give it more time or feed it again. Using an active starter is key to good rise.
Q: Can I use bread flour instead of all-purpose flour?
A: Absolutely! Bread flour has more protein, which gives more chew and structure. I like using a mix of bread and whole wheat flours, but you can swap all AP for bread flour if you want a sturdier crumb.
Q: My crust isn’t crackly—what happened?
A: Usually this means the oven or Dutch oven wasn’t hot enough, or you didn’t trap enough steam early on. Make sure to preheat your Dutch oven for at least 30 minutes and bake covered for the first 20 minutes. Also, avoid opening the oven during the first half of baking.
Q: Can I make this bread without a Dutch oven?
A: You can, but you’ll miss out on the steam that creates the crackly crust. Try baking on a preheated baking stone or steel and add a pan of water to the oven for steam. It takes practice but can work in a pinch.
Q: How do I store leftover bread without losing the crust?
A: Store bread wrapped in a linen bag or paper at room temperature. Avoid plastic bags unless you plan to freeze, as they trap moisture and soften the crust. When reheating, toast or warm in the oven to revive crispiness.
Q: Can I freeze the dough after the first rise?
A: Yes! After the bulk fermentation, shape the dough and freeze it on a parchment-lined tray. Once frozen, transfer to a bag. Thaw overnight in the fridge before baking. This is great for prepping ahead.
Q: What if my dough is too sticky to handle?
A: Sourdough dough is naturally sticky. Use wet hands and plenty of flour on your work surface to shape gently. Don’t add too much extra flour or you’ll dry out the loaf.
Pin This Recipe!


No-Knead Rustic Sourdough Bread Recipe with Crispy Crackly Crust Made Easy
- Total Time: 13 hours
- Yield: 1 loaf (about 8-10 slices) 1x
Description
An easy no-knead sourdough bread recipe that yields a rustic loaf with a crispy, crackly crust and chewy, tangy crumb. Perfect for weekend baking with minimal active work.
Ingredients
- ½ cup (120 ml) active sourdough starter
- 3 cups (360 g) unbleached all-purpose flour
- 1 cup (120 g) whole wheat flour
- 1 ½ cups (360 ml) lukewarm water
- 2 teaspoons (10 g) salt
Instructions
- In a large mixing bowl, combine the sourdough starter with lukewarm water and stir until dissolved.
- Add the all-purpose flour, whole wheat flour, and salt. Mix with a wooden spoon or hand until no dry flour remains; dough will be shaggy and sticky.
- Cover the bowl with a kitchen towel or plastic wrap and let the dough rest at room temperature (about 70°F / 21°C) for 12-18 hours until doubled in size and bubbly.
- Lightly flour a work surface and gently fold the dough edges to shape into a rough ball. Place seam-side down on a floured kitchen towel or parchment paper, cover loosely, and let rest for 1-2 hours until puffed.
- About 30 minutes before baking, preheat the oven to 450°F (230°C) with a 6-quart Dutch oven inside.
- Carefully remove the hot Dutch oven, transfer the dough seam-side up into it (using parchment paper if desired), and score the top with a sharp knife about ¼ inch deep.
- Cover with the lid and bake for 20 minutes. Remove the lid and bake for another 20 minutes until the crust is deep golden and crackly.
- Remove bread from the oven and cool completely on a wire rack for at least 1 hour before slicing.
Notes
Use a kitchen scale for best results. Preheat the Dutch oven for at least 30 minutes to ensure a crispy crust. Score the dough at least ¼ inch deep to allow expansion. Use parchment paper to ease transferring dough. Let bread cool completely before slicing to avoid gummy crumb. Store bread wrapped in linen or paper to maintain crust. Reheat slices in a 350°F oven for 5-7 minutes to revive crust.
- Prep Time: 20 minutes
- Cook Time: 40 minutes
- Category: Bread
- Cuisine: American
Nutrition
- Serving Size: 1 slice
- Calories: 160
- Sodium: 210
- Fat: 0.5
- Carbohydrates: 32
- Fiber: 2
- Protein: 5
Keywords: no-knead sourdough bread, rustic sourdough, crispy crust bread, easy sourdough recipe, homemade bread, artisan bread