One summer afternoon, I found myself knee-deep in a basket of peaches from a local farmer’s market, wondering what to do with all these perfectly ripe, juicy fruits before they spoiled. I’m not exaggerating when I say I tasted nearly every peach on the spot—sticky fingers and all—because, well, fresh peaches don’t hang around for long in my house. But I wanted something more than just a snack. Something that would capture that summertime sweetness and keep it around long after the peaches were gone.
That’s when I accidentally stumbled upon this fresh peach jam recipe that’s easy, quick, and only requires three ingredients. Yep, just three. No fancy pectin, no complicated canning process that makes you sweat over boiling jars for hours. Just peaches, sugar, and lemon juice. I’ve made this jam more times than I can count, tweaking it ever so slightly each time, and it’s become my secret weapon for turning summer peaches into a jar of sunshine that lasts all year.
Honestly, this recipe feels like a little magic in a pot. Every time I open a jar, it takes me back to that sticky-fingered summer day and makes me smile. If you’ve ever wanted to make homemade jam without the fuss but with all the flavor, stick around—I’m sharing how to do it step-by-step.
Why You’ll Love This Fresh Peach Jam Recipe
This fresh peach jam recipe has changed how I think about preserving fruit—and I bet it will for you, too. Here’s why I keep coming back to it:
- Ridiculously Simple — Three ingredients. That’s it. If you can peel peaches and stir a pot, you’re golden. I’ve even made this while juggling dinner prep and a toddler screaming for snacks.
- Quick to Make — From peeling to jar, it takes about 30 minutes. No overnight waiting, no long boiling—perfect for when peaches are at their peak and you want to capture that flavor fast.
- True Fresh Peach Flavor — Unlike store-bought jams loaded with preservatives and artificial flavors, this tastes like biting into a sun-warmed peach. The lemon juice brightens it up perfectly.
- Versatile — Spread it on toast, swirl into yogurt, dollop on pancakes, or even use it in desserts. It’s sweet, fresh, and just a little tangy.
- Budget-Friendly — No need for fancy equipment or expensive ingredients. If peaches are in season, you’re already halfway there.
This jam has become my go-to gift for friends and a staple in my fridge, especially when I’m making cozy meals like the creamy chicken tortellini soup on chilly nights. It’s the little homemade touch that makes everything feel special.
Ingredients You’ll Need
Here’s the best part: you probably have most of these ingredients already. I’m super picky about the quality of peaches and sugar here, so I’ll share why each matters.
- Fresh Peaches (about 4 cups peeled and chopped / 600g) — Use ripe, juicy peaches with no bruises. Freestone peaches are easier to peel, but clingstone works too. The fresher, the better—this is what makes the jam sing.
- Granulated Sugar (1 cup / 200g) — This helps preserve the jam and balances the tartness. You can tweak the amount depending on your sweetness preference, but don’t skip it or your jam won’t set properly.
- Fresh Lemon Juice (2 tablespoons / 30ml) — Adds brightness and natural pectin to help the jam gel. Freshly squeezed is key here; bottled lemon juice just doesn’t have the same zing.
Optional add-ins I’ve played with: a pinch of ground cinnamon for warmth or a splash of vanilla extract for complexity. But honestly, this jam is perfect as-is.
If you’re wondering about where to find the best peaches, local farmer’s markets or the produce section during peak summer are your best bets. And if you want to explore more about pantry staples and easy homemade condiments, you might enjoy my take on creamy crockpot broccoli cheddar chicken—it’s another simple recipe that tastes way fancier than it is.
Equipment Needed
You don’t need fancy kitchen gadgets for this jam. Here’s what I actually use:
- Heavy-bottomed saucepan or pot — A 3-quart pot works perfectly. The heavy bottom prevents burning and helps the jam cook evenly.
- Wooden spoon or heatproof spatula — For stirring. I like wooden spoons because they feel sturdy and don’t scratch my pots.
- Knife and cutting board — For peeling and chopping peaches.
- Measuring cups and spoons — Basic but necessary for getting the sugar and lemon juice right.
- Glass jars with lids — For storing your jam. Mason jars are ideal, but any clean, airtight container works.
Quick tip: If you want to get fancy and preserve your jam for longer, you can sterilize your jars by boiling them. But I usually just store mine in the fridge and use within a couple of weeks.
How to Make Fresh Peach Jam: Step-by-Step

Alright, let’s get this fresh peach jam cooking! I’m walking you through each step, including the little tricks that make it foolproof.
Step 1: Prep Your Peaches (10 minutes)
Start by peeling your peaches. The easiest way is to score a small “X” on the bottom of each peach, then blanch them in boiling water for 30 seconds before plunging into ice water. The skins slip right off. Once peeled, chop the peaches into small chunks—about ½-inch pieces. This size breaks down nicely during cooking but still leaves some texture in the jam.
Step 2: Combine Ingredients in Pot (2 minutes)
Place the chopped peaches, sugar, and lemon juice into your heavy-bottomed pot. Give it a good stir to mix everything evenly. Let it sit for 10-15 minutes if you have time—that helps the peaches release their juices and makes cooking faster.
Step 3: Cook the Jam (15 minutes)
Turn your burner to medium-high and bring the mixture to a gentle boil. Stir frequently to prevent sticking and burning. After a few minutes, the peaches will start to soften, and the mixture will thicken. Keep stirring and watching—it’s done when it coats the back of a spoon and you can run your finger through it without it immediately filling back in. This usually takes about 15 minutes.
Here’s a little secret: if you want your jam a bit chunkier, cook it for less time. For a smoother jam, cook a little longer or mash the peaches slightly with your spoon.
Step 4: Jar and Cool
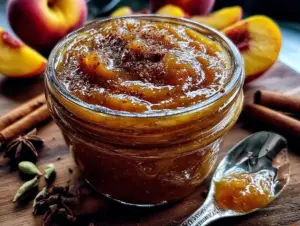
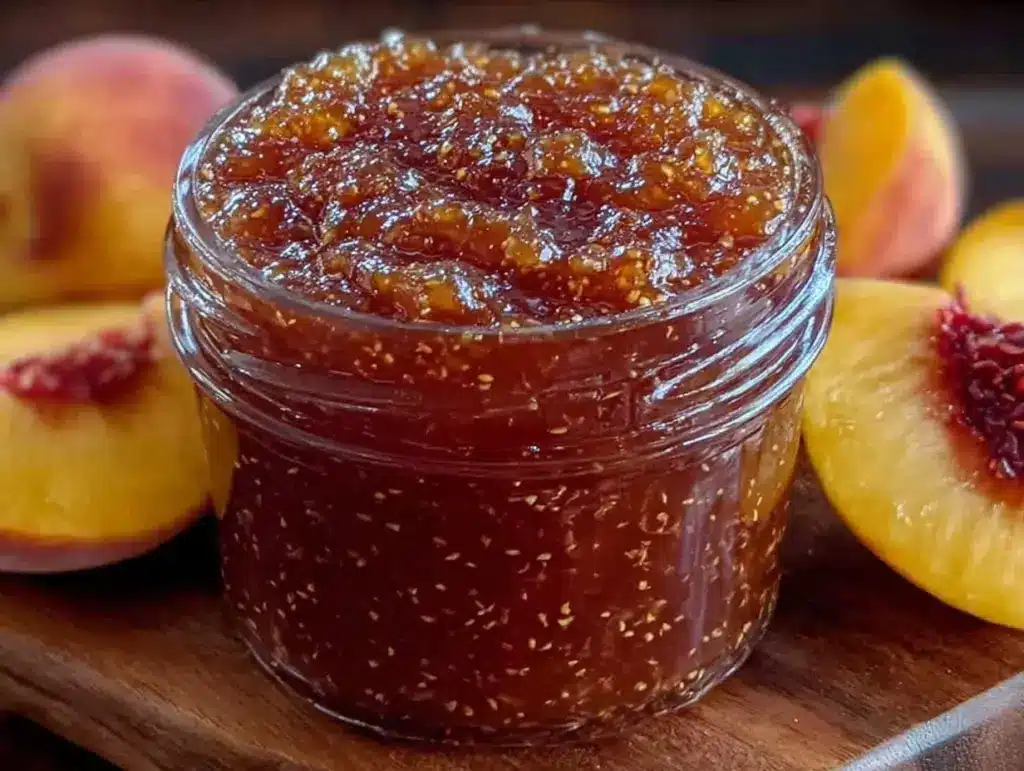
Once your jam has reached the right thickness, remove it from heat and let it cool slightly. Then spoon it into clean jars. Let it cool completely at room temperature before sealing and refrigerating.
Step 5: Enjoy!
Eat it fresh on toast, swirl it into oatmeal, or use it as a topping for desserts. I promise, once you taste homemade fresh peach jam, you’ll never want to go back to store-bought.
Expert Tips & Tricks
Here’s everything I’ve learned after making this jam dozens of times. These tips will save you from my early mistakes.
- Don’t rush the cooking — The jam thickens as it cools, so stop cooking when it coats the spoon but still looks a bit loose. It’ll set up nicely once cooled.
- Use ripe peaches — Less-ripe peaches won’t break down well or have that sweet, fresh flavor.
- Save some peach slices — Stir in a few fresh peach chunks at the end for texture and visual appeal.
- Stir frequently — Jam likes to stick and burn at the bottom. I learned this the hard way and scorched a batch once. Not fun.
- Adjust sugar to taste — If your peaches are super sweet, start with less sugar and add more if needed during cooking.
- Love more homemade pantry staples? You’ll appreciate my easy honey garlic pork tenderloin—a simple crockpot recipe that’s perfect for busy nights.
Variations & Substitutions
Once you’ve nailed this basic jam, here’s how to switch things up:
- Spiced Peach Jam — Add a cinnamon stick or ½ teaspoon ground ginger during cooking for a warm twist.
- Peach and Berry Jam — Toss in 1 cup of fresh or frozen raspberries or blackberries for a mixed fruit version.
- Low-Sugar Version — Use ½ cup sugar and add 1 tablespoon of chia seeds at the end. Chia helps thicken naturally.
- Vegan-Friendly — This recipe is already vegan! Just make sure your sugar is organic if you want to avoid bone char processing.
- Freeze for Later — Want to keep your jam longer? Freeze in airtight containers for up to 3 months.
Serving & Storage
How to Serve: I love this jam on warm buttered toast or stirred into plain yogurt for breakfast. It’s also fantastic spooned over vanilla ice cream or dolloped on pancakes. For an easy snack, spread it on a slice of crusty bread with a smear of cream cheese. If you’re making a brunch spread, it pairs nicely with soft cheeses and charcuterie boards.
Storage: Store your fresh peach jam in the fridge for up to 3 weeks. The flavor actually deepens after a few days. Make sure your jars are airtight to keep it fresh.
Reheating: If your jam gets a bit thick in the fridge, just warm it gently in the microwave or on the stovetop with a splash of water to loosen.
Pro tip: This jam is a lovely complement to hearty, comforting meals like the slow cooker French onion chicken, adding a touch of sweetness to balance savory flavors.
Nutrition Information
| Nutrient | Per Serving (2 tbsp) |
|---|---|
| Calories | 60 |
| Protein | 0.3g |
| Carbohydrates | 15g |
| Fiber | 0.5g |
| Sugar | 14g |
| Fat | 0g |
| Sodium | 1mg |
Not a nutritionist, but here’s the scoop: this jam is mostly carbs from natural fruit sugars and added sugar. It’s fat-free and very low in sodium. Because it’s homemade, you avoid preservatives and additives common in store-bought jams. Great for a sweet boost without guilt.
Final Thoughts
So that’s my easy, quick, and absolutely delicious fresh peach jam recipe with just three ingredients. I’ve probably talked your ear off, but when a recipe this simple delivers such incredible flavor, I can’t help myself. It’s the kind of homemade touch that makes breakfast feel special and transforms everyday moments into memories.
This jam has saved me from wasting too many peaches and given me something to look forward to every morning. Plus, it’s a fantastic gift that says, “I made this with love.”
Make it yours—add a pinch of spice, toss in berries, or keep it classic. Whatever you do, don’t be shy with the peaches. And hey, if you try this recipe, drop a comment and tell me how it went. I’m here for all your jam questions and tweaks!
Happy cooking and happy spreading. I hope your kitchen smells as good as mine does right now.
Frequently Asked Questions
Can I use frozen peaches for this jam?
You can! Just thaw them completely and drain any excess liquid before cooking. Frozen peaches tend to be softer, so your jam might cook faster and be a bit smoother. I’ve done this when fresh peaches weren’t available, and it still turns out tasty.
Do I need to sterilize jars for storing fresh peach jam?
If you’re eating the jam within a few weeks and storing it in the fridge, sterilizing isn’t necessary. Just make sure your jars and lids are clean. For longer storage or shelf stability, sterilizing is recommended, but that involves more equipment and time.
Why is my jam not setting?
This usually happens if the sugar or lemon juice amounts are off, or if the jam didn’t cook long enough. Lemon juice provides natural pectin, which helps the jam gel. If it’s too runny, cook it a bit longer to reduce liquid, or add a tiny bit of store-bought pectin next time.
Can I use honey instead of sugar?
Honey will change the flavor and texture and won’t help the jam set as well. I’ve tried it—it’s tasty but more syrupy. If you want to experiment, use about ¾ cup honey and reduce cooking time, but don’t expect the same firmness.
How long does homemade peach jam last?
In the fridge, up to 3 weeks if kept in an airtight jar. If you freeze it, it can last 2-3 months. Always check for mold or off smells before eating if it’s been stored a while.
Can I double this recipe?
Absolutely! Just double all ingredients and use a larger pot for cooking. The cooking time might be a bit longer since there’s more volume, so keep an eye on the jam’s thickness as it cooks.
Is there a way to make this jam without peeling peaches?
You can cook peaches with skins on, but the texture will be different—more rustic and a bit chewy. The skins add color and nutrients but might not give you that smooth jam texture. I prefer peeling for the classic jam experience.
Pin This Recipe!


Fresh Peach Jam Recipe Easy 3-Ingredient Quick Homemade Guide
- Total Time: 27 minutes
- Yield: About 4 cups (approximately 8 servings of 2 tbsp each) 1x
Description
A simple and quick fresh peach jam recipe using only three ingredients: peaches, sugar, and lemon juice. Perfect for capturing the sweet flavor of summer peaches without complicated canning.
Ingredients
- 4 cups peeled and chopped fresh peaches (about 600g or 1.3 lbs)
- 1 cup granulated sugar (200g)
- 2 tablespoons fresh lemon juice (30ml)
Instructions
- Peel peaches by scoring an ‘X’ on the bottom, blanching in boiling water for 30 seconds, then plunging into ice water. Skins will slip off easily. Chop peaches into ½-inch pieces.
- Place chopped peaches, sugar, and lemon juice into a heavy-bottomed pot. Stir to combine and let sit for 10-15 minutes to release juices.
- Cook mixture over medium-high heat, stirring frequently to prevent burning. Boil gently until jam thickens and coats the back of a spoon, about 15 minutes.
- Remove from heat and let cool slightly. Spoon jam into clean glass jars and let cool completely at room temperature before sealing and refrigerating.
- Enjoy on toast, yogurt, pancakes, or as a topping for desserts.
Notes
Do not rush cooking; jam thickens as it cools. Use ripe peaches for best flavor. Stir frequently to avoid burning. Adjust sugar to taste depending on peach sweetness. Optional add-ins include cinnamon or vanilla. Store in fridge up to 3 weeks or freeze up to 3 months.
- Prep Time: 12 minutes
- Cook Time: 15 minutes
- Category: Condiment
- Cuisine: American
Nutrition
- Serving Size: 2 tablespoons
- Calories: 60
- Sugar: 14
- Sodium: 1
- Carbohydrates: 15
- Fiber: 0.5
- Protein: 0.3
Keywords: fresh peach jam, homemade jam, easy peach jam, 3-ingredient jam, quick jam recipe, summer peaches, peach preserves