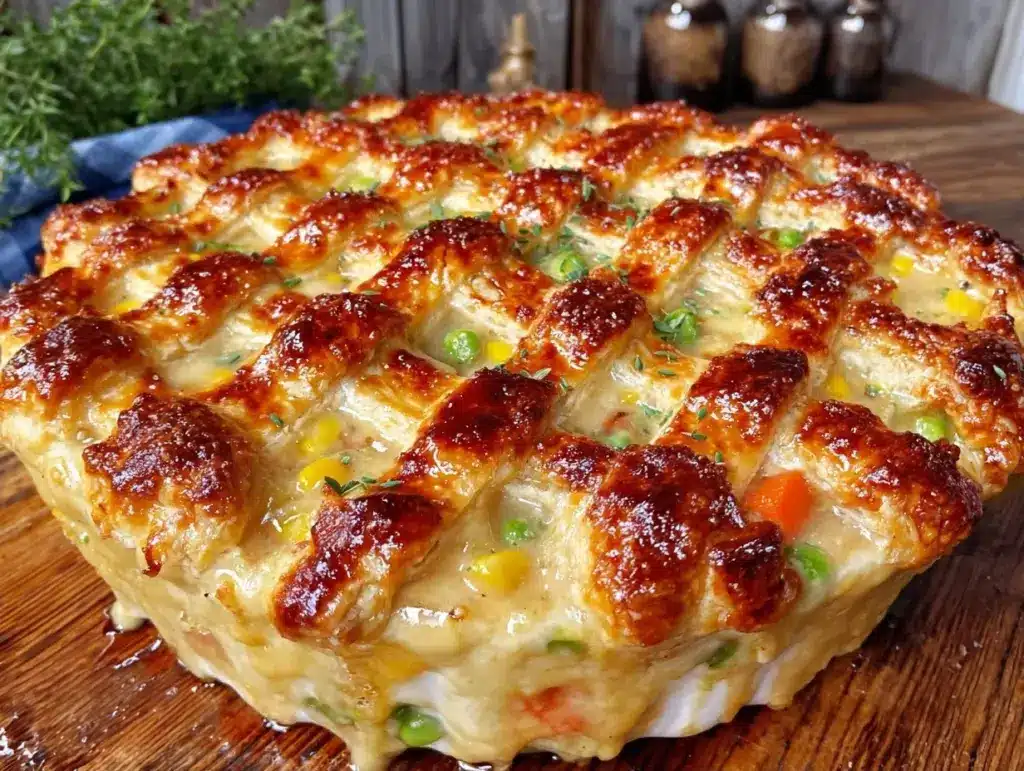
There is a specific kind of magic that happens when you pull a golden-brown pie out of the oven on a rainy Tuesday night. The kitchen fills with the scent of roasted thyme and buttery pastry, and suddenly, the stress of the workday just melts away. I remember the first time I made this homemade chicken pot pie with flaky buttery crust. It was during one of those brutal winters where the wind howled so hard it rattled the windowpanes. My family was huddled around the table, shivering, until I set this bubbling dish in the center. The silence that followed wasn’t awkward—it was the quiet of pure, unadulterated comfort. My dad, who usually complains about everything, took one bite, closed his eyes, and said, “You’re never making canned soup again.” That was it. That was the moment I realized that homemade pot pie isn’t just a meal; it’s an emotional anchor.
For years, I stuck with the store-bought crusts because I was intimidated by the idea of making pastry from scratch. I was afraid of tough dough, soggy bottoms, and the general chaos of rolling pins. But here’s the thing: once you learn the basic technique for a flaky crust, you’ll never go back. The difference is night and day. This homemade chicken pot pie with flaky buttery crust has become my go-to recipe for cold months, rainy Sundays, and whenever I need to feed a hungry crew on a budget. It’s hearty, it’s nostalgic, and it’s surprisingly easy if you know the little tricks. I’ve made this version at least a dozen times, tweaking the spice blend and the ratio of filling to crust until it was absolutely perfect. And today, I’m sharing exactly how I do it.
What makes this recipe special isn’t just the golden, shattering crust. It’s the filling. I’ve moved away from the thick, gelatinous white sauces of the past and toward a creamy, herb-infused gravy that clings to tender chunks of chicken and sweet peas. It’s rustic, it’s generous, and it tastes like it came from a small-town diner, but made with love in your own kitchen. If you’ve been intimidated by baking your own dough, this is the recipe to start with. It’s forgiving, it’s delicious, and the payoff is worth every minute of prep. Let’s get baking.
Why You’ll Love This Recipe
There are plenty of chicken pot pie recipes out there, but this one stands out for reasons that go beyond just taste. It’s the kind of dish that makes people stop scrolling on their phones and actually pay attention to what’s on the table. Here’s why this homemade chicken pot pie with flaky buttery crust has earned a permanent spot in our weekly rotation:
- Actually Flaky Crust — I’m not talking about that dense, cardboard-like dough you get from a tube. This is a real, butter-heavy, cold-technique pastry that shatters when you cut into it. I’ve tested this dough with every kind of butter I own, and it consistently delivers layers of flakiness that rival any bakery.
- Hearty and Filling — This isn’t a light salad disguised as dinner. It’s packed with protein, vegetables, and complex carbs. A single bowl keeps you full for hours. I’ve fed this to my husband after he’s been hiking all day, and he’s never been happier.
- Uses Up Leftovers — One of the best parts? You can use rotisserie chicken. Seriously. If you have a leftover rotisserie bird from the grocery store, you’re already halfway done. This recipe is perfect for clearing out the fridge before grocery day.
- Comfort Food Upgrade — It feels fancy enough for company but simple enough for a weeknight. Serve it with a simple homemade balsamic vinaigrette and some crusty bread, and you’ve got a complete, impressive meal without the stress.
- Freezer Friendly — This recipe freezes beautifully. I often make two pies—one to eat fresh and one to freeze for those nights when I’m too tired to cook. It reheats almost as well as it did fresh.
This recipe has saved me more times than I can count. It’s my answer to “what’s for dinner” when I’m tired, broke, and craving something warm. It’s reliable, it’s delicious, and it makes your house smell like heaven.
Ingredients You’ll Need
Here’s the best part: you probably have most of this already in your pantry. I’m particular about three ingredients here—the butter, the chicken, and the herbs—and I’ll tell you exactly why they matter.
For the Flaky Buttery Crust
Unsalted Butter (1 cup / 226g, very cold) — This is non-negotiable. I use high-quality European-style butter if I can find it, but regular cold butter works fine. The key is keeping it cold. If it melts before it hits the oven, you lose the flaky layers. Cube it and keep it in the freezer for 10 minutes before using.
All-Purpose Flour (2 ½ cups / 315g) — Standard AP flour is perfect. Don’t swap in whole wheat unless you want a denser, nuttier crust. I measure mine by spooning it into the cup and leveling it off. Packing it down makes the crust tough.
Ice Water (6-8 tablespoons) — Use actual ice water. The colder the water, the less the butter melts. If your water isn’t cold enough, throw a few ice cubes in a glass and use that.
Salt (1 teaspoon) — Just enough to bring out the flavor of the butter.
For the Creamy Filling
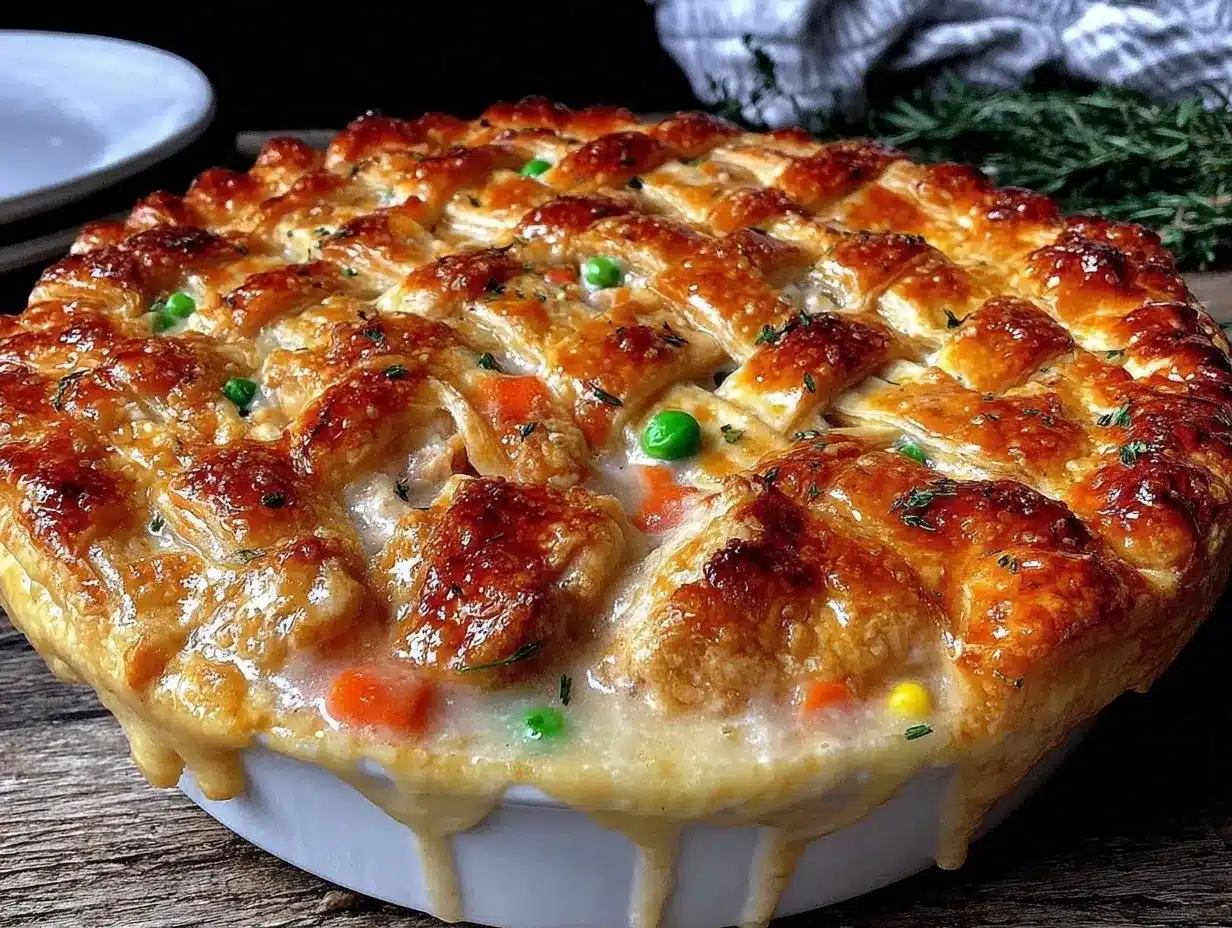
Chicken (3 cups, cooked and diced) — I prefer boneless, skinless chicken thighs for their juiciness, but breast meat works too. If you’re using rotisserie chicken, shred it up. I often pair this with crispy lemon garlic chicken thighs if I’m feeling fancy, but plain roasted chicken is totally fine.
Unsalted Butter (¼ cup / 56g) — For the roux. Yes, more butter. It adds richness and helps thicken the sauce.
All-Purpose Flour (¼ cup / 30g) — To make the roux. This thickens the gravy so it’s not soupy.
Chicken Broth (2 cups / 480ml) — Use low-sodium so you can control the saltiness. Good quality broth makes a huge difference here.
Heavy Cream (1 cup / 240ml) — For that rich, creamy texture. Half-and-half works if you want it lighter, but heavy cream gives you that restaurant-quality mouthfeel.
Vegetables — 1 cup frozen peas, 1 cup frozen carrots (thawed), and 1 cup diced onions. I use frozen veggies because they’re pre-cut and convenient. Fresh carrots take longer to cook and can be tough in a pot pie.
Herbs — 1 teaspoon dried thyme, ½ teaspoon dried rosemary, and 1 teaspoon black pepper. Fresh herbs are nice, but dried hold up better to the baking process. I like a good earthy flavor here.
Optional Add-ins
Mushrooms — Sautéed sliced cremini mushrooms add a deep, savory umami flavor. I love adding them if I have them on hand.
White Wine — A splash of dry white wine deglazes the pan and adds complexity. Not essential, but nice.
Equipment Needed
You don’t need fancy equipment for this. Here’s what I actually use:
- 9-inch Pie Dish — Ceramic or glass works best. I use a ceramic dish because it holds heat well and gives a nice golden bottom crust.
- Large Skillet — For sautéing the vegetables and making the roux. 12-inch is ideal.
- Food Processor — Optional, but it makes making the crust dough so much faster. You can also do it by hand with a pastry cutter or your fingers.
- Rolling Pin — Any standard rolling pin works. I like a wooden one.
- Sharp Knife — For dicing the chicken and veggies.
- Pastry Brush — For brushing the top crust with egg wash.
How to Make It: Step-by-Step
Alright, let’s make this! I’m walking you through exactly how I do it, including the little tricks I’ve picked up over the years.
Step 1: Make the Dough (15 minutes)
If you’re using a food processor, pulse the flour and salt together. Add the cold, cubed butter and pulse until the mixture looks like coarse crumbs with some pea-sized pieces of butter remaining. If you’re doing it by hand, use a pastry cutter or your fingers to work the butter into the flour. Sprinkle ice water one tablespoon at a time, pulsing or mixing gently, until the dough just starts to come together. Do not overmix. Divide the dough into two disks (one slightly larger for the bottom), wrap in plastic, and refrigerate for at least 30 minutes. This rest is crucial—it relaxes the gluten and keeps the butter cold.
Step 2: Prep the Filling (10 minutes)
Preheat your oven to 400°F (200°C). In a large skillet, melt the ¼ cup of butter over medium heat. Add the diced onions and cook until softened, about 3-4 minutes. Sprinkle the ¼ cup flour over the onions and stir constantly for 1-2 minutes to cook off the raw flour taste. This is your roux. Slowly whisk in the chicken broth, then the heavy cream. Stir constantly until the mixture thickens and bubbles. Remove from heat and stir in the cooked chicken, thawed carrots, peas, thyme, rosemary, and black pepper. Taste and adjust seasoning. It should be creamy and flavorful.
Step 3: Assemble the Pie (10 minutes)
On a lightly floured surface, roll out the larger dough disk into a circle about 12 inches in diameter. Carefully lift it and place it into your 9-inch pie dish. Trim the edges so they hang slightly over the side. Pour the warm filling into the crust-lined dish. Roll out the second disk for the top crust. You can place it whole over the top, or cut it into strips for a lattice effect. I usually go with a full top crust and cut slits for steam to escape. Tuck the top crust edges into the bottom crust and crimp them with your fingers or a fork. Brush the top with an egg wash (1 egg beaten with 1 tablespoon water) and sprinkle with coarse salt if you like.
Step 4: Bake to Golden Perfection (45-50 minutes)
Place the pie on a baking sheet (to catch any drips) and bake at 400°F (200°C) for 45-50 minutes. The crust should be deep golden brown, and you should see bubbles of filling coming through the vents. If the edges start to brown too quickly, cover them with a pie shield or strips of aluminum foil. Let the pie cool for at least 15-20 minutes before cutting. This allows the filling to set so it doesn’t run out when you slice it.
Expert Tips & Tricks
Here’s everything I’ve learned from making this dozens of times. These tips will save you from my mistakes.
- Keep Everything Cold — This is the #1 rule for flaky pastry. Cold butter, cold water, cold bowl. If your butter starts to melt while you’re working, put the dough back in the fridge. Patience pays off.
- Don’t Skip the Rest — I know you want to get to the eating part, but chilling the dough relaxes the gluten. If you skip this, the crust will shrink and be tough. Give it that 30 minutes.
- Thicken the Filling — Make sure your roux is cooked and thickened before adding the chicken. If the filling is too thin, it will make the bottom crust soggy. A thick, creamy filling holds up better.
- Egg Wash is Key — Don’t skip the egg wash. It gives that beautiful, shiny, golden-brown finish. For extra crunch, sprinkle coarse sea salt on top after brushing.
- Let It Cool — This is the hardest part. Cutting into a hot pie is a mistake. The filling needs time to set. Wait at least 15 minutes, or your slice will look like a soup disaster.
Variations & Substitutions
Once you’ve nailed the basic version, here’s how you can mix it up. I’ve tried all of these.
- Turkey Pot Pie — Perfect for leftovers after Thanksgiving. Use leftover turkey instead of chicken. The flavor is almost identical.
- Vegetarian Version — Swap the chicken for extra veggies like diced potatoes, celery, and mushrooms. Use vegetable broth instead of chicken broth. Add a handful of spinach at the end for color.
- Gluten-Free Crust — Use a 1:1 gluten-free flour blend for the dough. It works surprisingly well, though it can be a bit more fragile to handle. Be gentle!
- Herb-Infused — Add a bay leaf to the filling while it simmers, then remove it before baking. It adds a subtle, aromatic depth.
- Spicy Kick — Add a pinch of cayenne pepper or red pepper flakes to the filling for a little heat. Goes great with a cold beer.
Serving & Storage
I usually serve this straight from the baking dish at the dinner table—it looks rustic and stays warm. But here are other ways I’ve enjoyed it:
Side Dishes
- Simple green salad with homemade balsamic vinaigrette
- Roasted asparagus with lemon zest
- Garlic bread or dinner rolls
Storage Instructions
Refrigerator: Store leftovers in an airtight container for up to 4 days. The crust will soften slightly, but the flavor remains great.
Reheating: Reheat in the oven at 350°F (175°C) for 15-20 minutes to crisp up the crust. Microwave works in a pinch, but the crust will get chewy.
Freezing: You can freeze unbaked pies! Wrap the assembled, unbaked pie tightly in plastic and foil. Freeze for up to 3 months. Bake directly from frozen, adding 15-20 minutes to the cook time. You can also freeze individual slices.
Nutrition Information
I’m not a nutritionist, but here’s the breakdown if you’re tracking. This is comfort food, so it’s not a diet recipe, but it’s balanced enough for a hearty meal.
Per Serving (based on 8 servings):
- Calories: 450
- Protein: 25g
- Carbs: 35g
- Fat: 22g
- Fiber: 3g
- Sodium: 600mg
It’s rich in protein from the chicken and calcium from the cream. To lighten it up, use half-and-half instead of heavy cream and reduce the butter in the crust. But honestly? Sometimes you just need the real deal.
Final Thoughts
So that’s my go-to homemade chicken pot pie with flaky buttery crust! I’ve probably talked your ear off at this point, but when you make a recipe this often, you have a lot to say about it. This has saved weeknight dinners more times than I can count. It’s my answer to “what’s for dinner” when I’m tired, don’t want takeout, and still want something that tastes really good. My kids are happy, my husband’s happy, and I’m happy because I’m not stressed about cooking.
Make it yours! Try different add-ins, swap in your favorite vegetables, adjust the herbs. The best recipes are the ones you adapt to your family’s tastes. If you make this, drop a comment and let me know what you think! I love hearing how recipes turn out in your kitchen. And if something doesn’t work, tell me that too—I’m here to help troubleshoot. Happy cooking! And I hope your kitchen smells half as good as mine does right now.
Frequently Asked Questions
Can I use store-bought crust?
Absolutely. If you’re short on time, a high-quality store-bought pie crust works fine. But honestly, homemade is so much better. The flakiness and buttery flavor are worth the extra 15 minutes. If you do use store-bought, make sure to blind bake the bottom crust for 10 minutes to prevent sogginess.
Why is my bottom crust soggy?
This usually happens if the filling is too thin or if the crust isn’t pre-baked. Make sure your roux is thick and creamy before adding it to the pie. You can also brush the bottom crust with a little egg wash before adding the filling to create a barrier.
Can I make this ahead of time?
Yes! You can assemble the pie up to 24 hours in advance. Keep it in the fridge until you’re ready to bake. You may need to add a few extra minutes to the baking time since it’s starting cold.
What’s the best way to reheat leftovers?
Oven is best. Reheat at 350°F (175°C) for 15-20 minutes. This crisps up the crust. Microwave will make the crust soggy, so use that only if you’re in a huge rush.
Can I freeze the cooked pie?
It’s better to freeze it unbaked. If you freeze it cooked, the crust can become tough and the filling may separate when thawed. If you must freeze cooked slices, wrap them tightly and reheat gently in the oven.
Can I use fresh vegetables instead of frozen?
Yes, but you’ll need to cook them first. Fresh carrots and celery take longer to cook, so sauté them with the onions until tender before adding to the filling. Fresh peas should be blanched briefly. Frozen veggies are pre-cooked, which saves time and ensures they’re tender in the final pie.
Why did my crust shrink in the oven?
This happens if the gluten wasn’t relaxed or if the dough was stretched too much when rolling. Make sure to chill the dough before rolling, and don’t stretch it when placing it in the pie dish. Let it shrink naturally and trim the edges.
Pin This Recipe!


Homemade Chicken Pot Pie: 6 Easy Steps for Flaky Crust
- Total Time: 80-85 minutes
- Yield: 8 servings 1x
Description
A comforting homemade chicken pot pie featuring a rich, creamy herb-infused filling and a shatteringly flaky, buttery pastry crust. This recipe is perfect for using leftovers and provides a nostalgic, diner-quality meal.
Ingredients
- For the Flaky Buttery Crust:
- 1 cup (226g) unsalted butter, very cold and cubed
- 2 ½ cups (315g) all-purpose flour
- 6–8 tablespoons ice water
- 1 teaspoon salt
- For the Creamy Filling:
- 3 cups cooked chicken, diced or shredded
- ¼ cup (56g) unsalted butter
- ¼ cup (30g) all-purpose flour
- 2 cups (480ml) low-sodium chicken broth
- 1 cup (240ml) heavy cream
- 1 cup frozen peas
- 1 cup frozen carrots, thawed
- 1 cup diced onions
- 1 teaspoon dried thyme
- ½ teaspoon dried rosemary
- 1 teaspoon black pepper
- Optional: Sautéed cremini mushrooms
- Optional: Splash of dry white wine
- For Assembly:
- 1 egg beaten with 1 tablespoon water (egg wash)
- Coarse salt for sprinkling
Instructions
- Make the Dough: Pulse flour and salt in a food processor. Add cold cubed butter and pulse until mixture resembles coarse crumbs with pea-sized butter pieces. Sprinkle in ice water one tablespoon at a time until dough comes together. Do not overmix. Divide into two disks (one slightly larger), wrap in plastic, and refrigerate for at least 30 minutes.
- Prep the Filling: Preheat oven to 400°F (200°C). In a large skillet, melt ¼ cup butter over medium heat. Sauté diced onions until softened (3-4 minutes). Sprinkle ¼ cup flour over onions and stir for 1-2 minutes to make a roux. Slowly whisk in chicken broth and heavy cream, stirring until thickened and bubbling. Remove from heat and stir in chicken, carrots, peas, thyme, rosemary, and black pepper.
- Assemble the Pie: Roll out the larger dough disk into a 12-inch circle and place into a 9-inch pie dish. Pour the warm filling into the crust-lined dish. Roll out the second disk for the top crust. Place over the filling, trim edges, and crimp. Cut slits for steam or create a lattice. Brush with egg wash and sprinkle with coarse salt.
- Bake: Place pie on a baking sheet and bake at 400°F (200°C) for 45-50 minutes until the crust is deep golden brown and filling bubbles. If edges brown too quickly, cover with foil. Cool for 15-20 minutes before slicing to allow filling to set.
Notes
Keep all ingredients for the crust very cold to ensure flakiness. Chill the dough for at least 30 minutes to relax the gluten. Ensure the filling is thick before baking to prevent a soggy bottom crust. Let the pie cool for 15-20 minutes before cutting to allow the filling to set. Can be frozen unbaked for up to 3 months.
- Prep Time: 35 minutes
- Cook Time: 45-50 minutes
- Category: Main Course
- Cuisine: American
Nutrition
- Serving Size: 1 slice
- Calories: 450
- Sugar: 4
- Sodium: 600
- Fat: 22
- Saturated Fat: 12
- Carbohydrates: 35
- Fiber: 3
- Protein: 25
Keywords: chicken pot pie, homemade pie crust, flaky crust, comfort food, easy dinner, rotisserie chicken recipe, creamy chicken filling