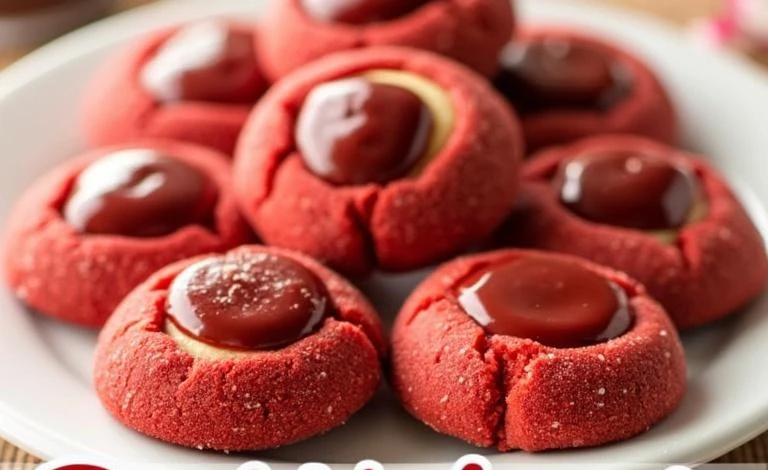
There’s something utterly irresistible about red velvet desserts, and when you combine that with cheesecake, you’ve got a match made in heaven! These Ultimate Red Velvet Cheesecake Thumbprints are not just a treat for your taste buds; they are a feast for your eyes as well. Perfectly soft, with a hint of cocoa, and a creamy cheesecake center, they’re ideal for any occasion—from holiday gatherings to casual get-togethers with friends. You know, every time I make these, I can’t help but smile at how festive they look, especially with that vibrant red hue!
Why should you try making these thumbprints? First off, they’re straightforward to whip up, even for baking novices. Plus, the combination of flavors and textures will leave your guests asking for the recipe. Seriously, who wouldn’t want to know how to make these delightful little gems? Fun fact: red velvet cake has its roots in the Victorian era, making it not only a delicious treat but also a piece of history! So, let’s dive into this recipe that I guarantee will become a favorite!
Why You Will Love this Recipe
Red velvet cake has a rich history that dates back to the 1800s, often associated with Southern cuisine. It’s a beautiful balance of cocoa powder and a hint of tanginess from buttermilk, giving it that signature flavor. When I first tried red velvet cheesecake, I was blown away by how well the creaminess of the cheesecake complements the subtle cocoa. Honestly, it’s like having two desserts in one!
These thumbprints are not only scrumptious but also incredibly versatile. You can easily switch up the cheesecake filling by adding different flavors like lemon or even a hint of mint. Plus, they’re perfect for any season—imagine serving these at a holiday party or a summer barbecue! The vibrant color makes them especially appealing during Valentine’s Day or Christmas gatherings. Over the years, I’ve seen how this recipe has evolved, with many variations popping up, but I always come back to the classic.
Ingredient Discussion
Let’s break down the ingredients that make these Ultimate Red Velvet Cheesecake Thumbprints so special:
- All-Purpose Flour: This is your base. Make sure to sift it for a lighter texture.
- Cocoa Powder: Unsweetened cocoa powder adds that subtle chocolate flavor. Look for high-quality brands for best results.
- Granulated Sugar: Sweetness is key! White sugar is what we typically use, but you can experiment with brown sugar for a deeper flavor.
- Butter: Always use unsalted butter to control the saltiness. It adds richness to the dough.
- Egg: This binds everything together. Room temperature eggs mix more easily!
- Red Food Coloring: The star of the show! Gel coloring gives a more vibrant hue, whereas liquid can dilute the flavor.
- Buttermilk: This adds moisture and that classic tang. If you don’t have buttermilk, mixing milk with a bit of vinegar works too.
- Cheese Cream: The creamy center! Full-fat cream cheese yields the best results. Let it soften at room temperature for easy mixing.
- Powdered Sugar: This will sweeten your cheesecake filling without the graininess.
- Vanilla Extract: A splash enhances the flavor of both the dough and the filling.
For anyone with dietary restrictions, there are substitutions available. You can use gluten-free flour or dairy-free cream cheese. Just be mindful of the texture differences! When it comes to selecting ingredients, freshness is key. Always check expiration dates on your baking supplies, and if you’re using food coloring, choose a reputable brand for the best results. Personally, I love using Wilton’s gel food coloring for its vibrant colors.
Equipment Needed
Before we start baking, gather your tools! Here’s what you’ll need:
- Mixing bowls
- Electric mixer (handheld or stand)
- Measuring cups and spoons
- Rubber spatula
- Baking sheet
- Parchment paper
- Cookie scoop or tablespoon
- Small round measuring tool (for thumbprints)
If you don’t have a stand mixer, a handheld electric mixer works just fine! I prefer using parchment paper for easy cleanup and to prevent sticking. For the thumbprints, any small round tool will do—like the end of a wooden spoon. Trust me, it makes a world of difference!
Preparation Method
- Preheat your oven: Set it to 350°F (175°C). Line a baking sheet with parchment paper.
- Mix the dry ingredients: In a bowl, whisk together 2 cups of all-purpose flour, 2 tablespoons of cocoa powder, and a pinch of salt until well combined.
- Cream the butter and sugar: In another bowl, beat 1 cup of softened unsalted butter with 1 cup of granulated sugar until light and fluffy, about 3-4 minutes.
- Add egg and food coloring: Mix in 1 large egg and 2 tablespoons of red food coloring until fully incorporated.
- Combine wet and dry: Gradually add the flour mixture to the butter mixture, alternating with ½ cup of buttermilk. Mix until just combined.
- Form the dough: Using a cookie scoop or tablespoon, drop the dough onto the prepared baking sheet, spacing them about 2 inches apart.
- Make the thumbprint: Use your thumb or a small round tool to create an indentation in the center of each cookie. Don’t press too hard!
- Bake: Place in the oven for about 10-12 minutes, or until the edges are set but the center remains soft.
- Cool: Allow cookies to cool completely on the baking sheet.
- Prepare the cheesecake filling: In a bowl, beat 8 oz (225g) of softened cream cheese with 1 cup of powdered sugar and 1 teaspoon of vanilla extract until smooth.
- Fill the thumbprints: Spoon or pipe the cream cheese filling into the cooled thumbprint indentations.
- Chill: Refrigerate for at least 30 minutes to let the filling set.
As you follow these steps, you’ll notice the rich, sweet aroma filling your kitchen. If the dough feels too sticky, don’t hesitate to add a touch more flour, or if it’s too dry, a splash of milk can help. Remember, the key is to keep an eye on the baking time; overbaking can lead to a dry texture!
Cooking Tips & Techniques
Now that you’re on your way to making these delightful thumbprints, here are a few tips to ensure they come out perfectly every time:
- Don’t rush the cooling: Letting the cookies cool completely is crucial for the filling to set properly.
- Check your oven: Every oven is different! Keep an eye on your cookies during the last few minutes of baking to avoid overbaking.
- Experiment with flavors: If you want to add a twist to the cheesecake filling, try incorporating lemon zest or a splash of almond extract.
- Practice makes perfect: If your first batch doesn’t turn out as expected, don’t be disheartened! Baking is a learning experience.
Trust me, I’ve burned my fair share of cookies, and it’s all part of the process. Just keep trying, and you’ll nail it!
Variations & Adaptations
These thumbprints are super flexible, so feel free to get creative! Here are some variations you might enjoy:
- Seasonal Flavors: For fall, try adding a pinch of cinnamon or nutmeg to the dough for a cozy twist.
- Different Fillings: Swap out the cheesecake filling for a raspberry jam or chocolate ganache for an exciting change.
- Gluten-Free Version: Use a gluten-free flour blend in place of all-purpose flour. Just be sure it’s a 1:1 substitute.
One of my favorite adaptations is to make a peanut butter cheesecake filling! Just mix in some peanut butter with the cream cheese, and you’ve got a whole new dessert experience.
Serving & Storage Suggestions
When it comes to serving these thumbprints, I recommend presenting them on a beautiful platter with fresh strawberries or raspberries for a pop of color. They’re best enjoyed chilled, so keep them in the fridge until you’re ready to serve. Pair them with a glass of cold milk or your favorite coffee for a delightful treat!
For storage, place the thumbprints in an airtight container in the refrigerator for up to a week. You can also freeze them for up to a month. Just make sure they’re fully set before freezing! When you’re ready to enjoy, simply thaw them in the fridge overnight.
Nutritional Information & Benefits
These thumbprints, while indulgent, can be enjoyed in moderation! Each cookie contains approximately:
- Calories: 150
- Fat: 8g
- Saturated Fat: 4g
- Carbohydrates: 19g
- Sugars: 10g
- Protein: 2g
Key ingredients like cream cheese provide calcium and protein, while the cocoa powder contains antioxidants. Just remember, if you have dietary restrictions, there are plenty of alternatives to keep these treats delicious and friendly for your needs!
Conclusion
In summary, these Ultimate Red Velvet Cheesecake Thumbprints are a delightful way to satisfy your sweet tooth while impressing your friends and family. The vibrant red color and creamy filling make them perfect for any occasion, and you can easily customize them to suit your taste. I love how they can bring people together, sparking joy and conversation around the table.
So, why not give this recipe a try? I’d love to hear how they turn out for you! Feel free to share your variations or any tips you discover along the way. Happy baking, and may your kitchen be filled with the sweet aroma of these delicious thumbprints!
FAQs
1. Can I make the dough in advance?
Yes! You can prepare the dough a day ahead of time and store it in the refrigerator. Just let it come to room temperature before baking.
2. Can I use a different type of food coloring?
Absolutely! Gel food coloring gives the best results, but you can use liquid if that’s what you have on hand. Just be sure to adjust the amount for the desired color.
3. What if I don’t have buttermilk?
No worries! You can make a quick substitute by mixing ½ cup of milk with 1 teaspoon of vinegar or lemon juice. Let it sit for about 5 minutes before using.
4. How do I know when the cookies are done baking?
The edges should appear set while the centers look slightly soft. They will firm up as they cool, so don’t overbake!
5. Can I freeze the thumbprints?
Yes! Once they are completely cooled and set, you can freeze them in an airtight container for up to a month. Just thaw in the refrigerator before serving.
Print
Ultimate Red Velvet Cheesecake Thumbprints
- Total Time: 45 minutes
- Yield: 24 servings 1x
Description
These Ultimate Red Velvet Cheesecake Thumbprints are a delightful combination of soft red velvet cookies with a creamy cheesecake center, perfect for any occasion.
Ingredients
- 2 cups all-purpose flour
- 2 tablespoons cocoa powder
- 1 cup granulated sugar
- 1 cup unsalted butter, softened
- 1 large egg
- 2 tablespoons red food coloring
- ½ cup buttermilk
- 8 oz cream cheese, softened
- 1 cup powdered sugar
- 1 teaspoon vanilla extract
- Pinch of salt
Instructions
- Preheat your oven to 350°F (175°C). Line a baking sheet with parchment paper.
- In a bowl, whisk together the flour, cocoa powder, and salt until well combined.
- In another bowl, beat the softened butter with granulated sugar until light and fluffy, about 3-4 minutes.
- Mix in the egg and red food coloring until fully incorporated.
- Gradually add the flour mixture to the butter mixture, alternating with buttermilk. Mix until just combined.
- Using a cookie scoop or tablespoon, drop the dough onto the prepared baking sheet, spacing them about 2 inches apart.
- Use your thumb or a small round tool to create an indentation in the center of each cookie.
- Bake for about 10-12 minutes, or until the edges are set but the center remains soft.
- Allow cookies to cool completely on the baking sheet.
- In a bowl, beat the softened cream cheese with powdered sugar and vanilla extract until smooth.
- Spoon or pipe the cream cheese filling into the cooled thumbprint indentations.
- Refrigerate for at least 30 minutes to let the filling set.
Notes
Let the cookies cool completely for the filling to set properly. Experiment with different flavors for the cheesecake filling.
- Prep Time: 15 minutes
- Cook Time: 12 minutes
- Category: Dessert
- Cuisine: American
Nutrition
- Serving Size: 1 cookie
- Calories: 150
- Sugar: 10
- Fat: 8
- Saturated Fat: 4
- Carbohydrates: 19
- Protein: 2
Keywords: red velvet, cheesecake, thumbprints, dessert, baking


