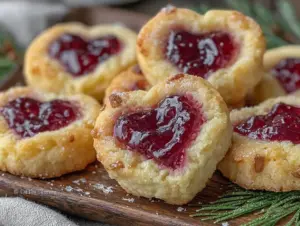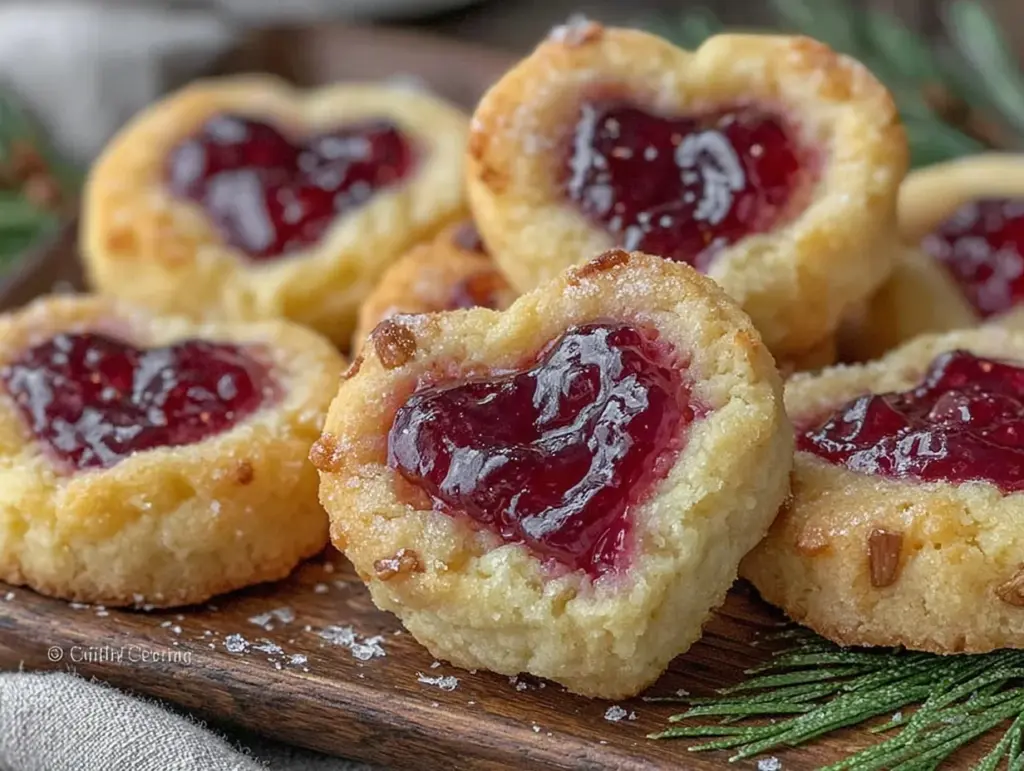
One chilly February afternoon, I found myself rummaging through my pantry, determined to whip up something sweet and simple for Valentine’s Day—without any complicated ingredients or fancy tools. I wanted a treat that felt homemade, heartfelt, and just a little playful. That’s when I stumbled on the idea of thumbprint heart cookies. I’d made thumbprint cookies before, but shaping them into perfect little hearts? That was new territory. After a few attempts (and a fair share of dough stuck to my fingers), I finally nailed the technique. These thumbprint heart cookies quickly became my favorite Valentine’s Day treat to make and share. They’re easy, charming, and just sweet enough to brighten any winter day.
Now, I make these every year—sometimes with my kids, sometimes with friends—and no matter who’s around, they disappear fast. I’ve tested this recipe over a dozen times, tweaking the jam filling and dough to get the perfect balance of tender cookie and gooey center. If you want a simple Valentine’s Day treat that feels special without hours of baking, these are it. Plus, they’re a little reminder that sometimes the best desserts come from a few pantry staples and a lot of love.
Why You’ll Love This Recipe
This thumbprint heart cookies recipe is my go-to for Valentine’s Day (and honestly, whenever I want a sweet bite that’s not too fussy). Here’s why it’s stuck around in my baking rotation:
- Simple and Kid-Friendly — I’ve made these with my kids, and the heart-shaping is a fun, hands-on activity. Even little helpers can join in, which makes baking extra special.
- Quick Prep and Bake — The dough comes together in 10 minutes, and baking takes just 12. You can have warm cookies ready in under 30 minutes.
- Minimal Ingredients — You probably already have everything in your kitchen: butter, sugar, flour, and jam. No surprise trips to the store.
- Customizable Fillings — I’ve swapped raspberry jam for strawberry, apricot, and even lemon curd. Each gives a slightly different vibe, so you can tailor it to your taste.
- Perfect for Gifting — These cookies look cute and professional without you needing to be a pro baker. Wrapped in parchment paper or a tin, they’re a sweet gift for neighbors, teachers, or coworkers.
Real talk: these cookies have saved me more than once when I needed a last-minute Valentine’s Day treat that felt thoughtful and homemade. Plus, they taste way better than any store-bought cookie and come with zero stress.
Ingredients You’ll Need
Here’s the best part: this recipe uses simple pantry staples with just a few thoughtful choices that make a big difference. I’m picky about a couple of these ingredients, and I’ll tell you why.
- Unsalted Butter (1 cup / 227g) — Use real butter here for rich flavor and tender crumb. I always take my butter out of the fridge 30 minutes before baking so it’s soft and easy to cream.
- Granulated Sugar (½ cup / 100g) — Regular white sugar works perfectly. For a slight twist, you can substitute half with brown sugar for a hint of caramel flavor, but it’s not necessary.
- Vanilla Extract (1 teaspoon) — Always use pure vanilla if you have it. It’s a small addition, but trust me, it lifts the flavor.
- All-Purpose Flour (2 cups / 240g) — I sift mine before measuring to avoid clumps and ensure a light texture. If you want a slightly softer cookie, you can swap ¼ cup with almond flour.
- Salt (¼ teaspoon) — Just enough to balance sweetness and enhance flavor.
- Jam or Preserves (⅓ cup / 110g) — Raspberry is my favorite for its bright color and tartness, but strawberry, apricot, or cherry all work beautifully. For a unique twist, try lemon curd or even Nutella (though that’s not a jam).
Optional add-ons:
- Powdered Sugar — For dusting after baking, adds a pretty finish.
- Almond Extract (½ teaspoon) — Adds a lovely nutty note if you want to mix things up.
If you like easy homemade sweets, you might also enjoy trying the soft pistachio ricotta cookies for another twist on tender, flavorful baking.
Equipment Needed
You don’t need anything fancy for these thumbprint heart cookies—just the basics most home bakers already have. Here’s what I use:
- Mixing Bowls — One large for the dough, and a small one if you want to beat eggs or mix extracts separately.
- Hand Mixer or Stand Mixer — I prefer my stand mixer for creaming butter and sugar smoothly, but a handheld mixer works just fine.
- Measuring Cups and Spoons — Accurate measurements make all the difference in baking.
- Baking Sheet — Line with parchment paper or a silicone mat for easy cleanup and perfect bottoms.
- Small Spoon or Melon Baller — To scoop jam into the cookie centers.
- Toothpick or Small Cookie Cutter — Optional but helpful for shaping the heart indentations precisely.
- Cooling Rack — Let cookies cool completely for the best texture.
If you don’t have a stand mixer, you can absolutely cream the butter and sugar by hand with a sturdy wooden spoon or whisk—just takes a bit more elbow grease!
How to Make Thumbprint Heart Cookies: Step-by-Step

Alright, let’s get to baking! I’m walking you through exactly how I make these thumbprint heart cookies, including my little tricks to get that perfect heart shape and tender crumb.
Step 1: Cream the Butter and Sugar (5 minutes)
Start by beating softened butter and granulated sugar together until the mixture is pale and fluffy. It should look light and creamy—this step is key to tender cookies. I usually do this on medium speed with my stand mixer, but a hand mixer or even vigorous stirring works.
Step 2: Add Vanilla and Salt (1 minute)
Mix in the vanilla extract and salt until combined. If you’re using almond extract, add it here too. These little flavor boosters make a big difference.
Step 3: Incorporate the Flour (2-3 minutes)
Gradually add the sifted all-purpose flour, mixing on low speed until just combined. Don’t overmix—stop as soon as the dough comes together. The dough will be soft but not sticky.
Step 4: Shape the Cookies (10 minutes)
Preheat your oven to 350°F (175°C) and line a baking sheet with parchment. Scoop dough into 1-inch balls (about 1 tablespoon each) and place them evenly spaced on the sheet. Now for the fun part: use your thumb or the back of a small spoon to gently press into the center of each ball, creating a deep well. Then, carefully shape the indent into a heart by pressing two small points on either side with your fingertip or a toothpick. It takes a little patience, but the hearts will hold their shape beautifully during baking.
Step 5: Fill with Jam (5 minutes)
Fill each heart indentation with about ½ teaspoon of your chosen jam. Don’t overfill; the jam will spread slightly as it bakes.
Step 6: Bake (12-14 minutes)
Bake in the preheated oven until the edges are just starting to turn golden and the jam looks set but not bubbling—usually about 12 to 14 minutes. Keep an eye on them; overbaking dries the cookies out.
Step 7: Cool and Dust (15 minutes)
Transfer the cookies to a wire rack to cool completely. Once cool, dust with powdered sugar if you like a pretty, snowy finish.
Pro tip: If your jam seems too runny, pop the jar in the microwave for 10 seconds to thicken it up before filling the cookies.
Expert Tips & Tricks
- Chill the Dough if Needed — If your kitchen is warm or your dough feels too soft, pop it in the fridge for 15 minutes. It makes shaping easier and prevents spreading.
- Perfecting the Heart Shape — Use a toothpick or the edge of a small cookie cutter to refine your hearts after making the initial thumbprint. It helps keep them crisp and defined.
- Jam Alternatives — If you want less sweetness, try using a tart jam like black currant or even a spoonful of lemon curd for a fresh zing.
- Don’t Skip the Parchment — These cookies can stick and brown unevenly without a liner. Makes cleanup a breeze too.
- Storage — Keep cookies in an airtight container at room temperature for up to 5 days. If the jam dries out, refresh by microwaving a cookie for 10 seconds.
Also, if you enjoy making homemade treats that combine simple ingredients with impressive results, you might want to check out the cornbread cookies with honey butter frosting—they’re another fun twist on classic cookies!
Variations & Substitutions
Once you’ve nailed the basic thumbprint heart cookies, here are some ways to switch things up:
- Chocolate Lover’s — Add ¼ cup cocoa powder to the flour for a chocolate dough. Fill with raspberry jam or melted chocolate chips.
- Nutty Twist — Roll cookie dough balls in finely chopped nuts before pressing the heart indent. Pistachios, walnuts, or almonds add great texture.
- Gluten-Free — Use a 1-to-1 gluten-free baking flour blend. The texture will be slightly different but still delicious.
- Vegan — Substitute butter with coconut oil and use a flax egg (1 tablespoon ground flaxseed + 3 tablespoons water) instead of regular eggs. Use a vegan jam.
- Spiced Cookies — Add ½ teaspoon cinnamon or pumpkin pie spice into the dough for warmth and aroma.
For more cozy comfort food ideas that pair well with these sweet treats, you might enjoy the smothered cheesy sour cream chicken—perfect for Valentine’s Day dinner before dessert.
Serving & Storage
How to Serve: These thumbprint heart cookies are adorable on their own but shine when served with a cup of tea or coffee. They’re great for a Valentine’s brunch spread or a sweet snack while watching a movie. I love arranging them on a pretty plate with a few fresh berries for color.
Storage: Store cookies in an airtight container at room temperature for up to 5 days. If the jam hardens or dries out, a quick zap in the microwave for 10 seconds softens it back up. Avoid storing in the fridge; it can dry the cookies out.
Freezing: You can freeze baked cookies in a single layer on a baking sheet, then transfer to a freezer bag for up to 3 months. Thaw at room temperature before serving. Don’t freeze the dough with jam inside—it gets messy.
Nutrition Information
I’m not a nutritionist, but here’s a rough breakdown per cookie (based on 24 cookies):
| Calories | 120 |
|---|---|
| Protein | 1g |
| Carbohydrates | 16g |
| Fiber | 0.5g |
| Sugar | 8g |
| Fat | 6g |
| Saturated Fat | 3.5g |
| Sodium | 40mg |
These cookies are definitely a treat with butter and sugar, but the jam adds a bit of fruit sweetness. You can make them a little lighter by using less sugar or swapping in a naturally sweetened jam.
Final Thoughts
So that’s my easy, charming thumbprint heart cookies recipe for Valentine’s Day. I’ve probably shared too much about my attempts to get the heart shape just right, but when you bake something this often, you collect all the little tips and tricks. These cookies have saved me from scrambling for a sweet gift or last-minute dessert more times than I can count.
They’re perfect for gifting, snack time, or just a cozy moment with a warm cup of something. Plus, they’re flexible enough to make your own with different jams and add-ins. I hope you have as much fun making these as I do. If you try them, drop a comment and tell me how your cookies turned out! And if you hit any bumps, I’m here to help troubleshoot.
Happy baking! May your kitchen smell like butter and jam, and your heart be as full as your cookie jar.
Frequently Asked Questions
Q: Can I use store-bought pie filling instead of jam?
A: You can, but pie filling is usually thicker and chunkier, which can make filling the cookies tricky. If you want to try it, scoop small amounts and press gently so the cookies don’t crack. I prefer smooth jams for that classic thumbprint look.
Q: Why did my cookies spread too much while baking?
A: This usually means your dough was too warm or soft. Next time, chill the dough in the fridge for 15-30 minutes before shaping. Also, make sure you didn’t over-cream the butter and sugar—it should be fluffy but not greasy.
Q: Can I make these cookies ahead of time?
A: Yes! You can make the dough and shape the cookies (without jam) up to 2 days ahead. Store them in the fridge, then add the jam and bake when ready. Alternatively, bake the cookies and add jam right after baking once they’re cooled.
Q: My jam ran out during baking. How can I prevent this?
A: Don’t overfill the cookie wells. About ½ teaspoon per cookie is plenty. If your jam is very runny, heat it gently in a pan or microwave to thicken before filling.
Q: Can I substitute butter with margarine or shortening?
A: Butter gives the best flavor and texture, but in a pinch, margarine or shortening works. The cookies may be less rich and slightly different in texture. I recommend using real butter whenever possible.
Q: How do I prevent jam from burning during baking?
A: Keep an eye on the baking time and temperature. If your oven runs hot, lower it by 10-15 degrees Fahrenheit. Also, don’t overfill the jams, and use a jam with good fruit content—not too sweet or sugary.
Q: Can I freeze the cookie dough?
A: Absolutely! Roll the dough into balls, place them on a baking sheet, freeze until solid, then transfer to a freezer bag. Bake straight from frozen—just add a couple of minutes to the baking time.
Pin This Recipe!


Thumbprint Heart Cookies Easy Valentine’s Day Treats Recipe to Make
- Total Time: 25-30 minutes
- Yield: 24 cookies 1x
Description
These thumbprint heart cookies are an easy, charming Valentine’s Day treat made with simple pantry staples. They feature a tender cookie base with a gooey jam center shaped into adorable hearts.
Ingredients
- 1 cup (227g) unsalted butter, softened
- ½ cup (100g) granulated sugar
- 1 teaspoon vanilla extract
- 2 cups (240g) all-purpose flour, sifted
- ¼ teaspoon salt
- ⅓ cup (110g) jam or preserves (raspberry, strawberry, apricot, cherry, or lemon curd)
- Optional: powdered sugar for dusting
- Optional: ½ teaspoon almond extract
Instructions
- Preheat oven to 350°F (175°C) and line a baking sheet with parchment paper.
- Beat softened butter and granulated sugar together until pale and fluffy, about 5 minutes.
- Mix in vanilla extract, salt, and almond extract if using.
- Gradually add sifted all-purpose flour, mixing on low speed until just combined. Do not overmix.
- Scoop dough into 1-inch balls (about 1 tablespoon each) and place evenly spaced on the baking sheet.
- Use your thumb or the back of a small spoon to press a deep well into the center of each ball, then shape the indent into a heart using your fingertip or a toothpick.
- Fill each heart indentation with about ½ teaspoon of jam. Do not overfill.
- Bake for 12 to 14 minutes until edges start to turn golden and jam looks set but not bubbling.
- Transfer cookies to a wire rack to cool completely.
- Once cool, dust with powdered sugar if desired.
Notes
If dough is too soft, chill for 15 minutes before shaping to prevent spreading. Use a toothpick or small cookie cutter to perfect the heart shape. If jam is too runny, heat it briefly to thicken before filling. Store cookies in an airtight container at room temperature for up to 5 days. Freeze baked cookies for up to 3 months. Dough can be frozen before baking.
- Prep Time: 10 minutes
- Cook Time: 12-14 minutes
- Category: Dessert
- Cuisine: American
Nutrition
- Serving Size: 1 cookie
- Calories: 120
- Sugar: 8
- Sodium: 40
- Fat: 6
- Saturated Fat: 3.5
- Carbohydrates: 16
- Fiber: 0.5
- Protein: 1
Keywords: thumbprint cookies, heart cookies, Valentine’s Day cookies, jam cookies, easy cookies, homemade treats, kid-friendly baking