Let me tell you about the time I discovered the magic of Reese’s Peanut Butter No-Bake Bars. It was one of those days where turning on the oven felt like a chore, but my sweet tooth was demanding attention. Enter these bars: the perfect combination of smooth peanut butter and rich chocolate, all without breaking a sweat. They’re quick, ridiculously easy, and taste like you’ve worked on them for hours. Spoiler alert: you haven’t.
If you’ve ever wanted to recreate that iconic Reese’s flavor at home, this recipe is your answer. And the best part? No baking required. Grab your mixing bowl and let’s dive into this dreamy, peanut butter-chocolate heaven.
Why You’ll Love This Recipe
Alright, hear me out. These Reese’s Peanut Butter No-Bake Bars are my ultimate go-to when I need a dessert that’s a total crowd-pleaser. I’ve brought them to potlucks, family dinners, and even last-minute gatherings, and they always steal the show. Here’s why you’ll fall in love:
- Quick & Easy: This recipe doesn’t require any baking, and you can whip it together in under 15 minutes. Perfect for those “I need dessert NOW” moments.
- Minimal Ingredients: You only need a handful of pantry staples—no fancy ingredients or complicated techniques.
- Irresistible Flavor: Peanut butter and chocolate are a match made in dessert heaven. Add some powdered sugar and butter, and it’s like magic happens.
- Kid-Friendly: My kids love helping out with this recipe (mostly because they want to lick the bowl). It’s a fun family activity with delicious results.
This recipe is the ultimate treat when you need something sweet but don’t want to deal with preheating the oven or waiting for things to bake. Trust me, you’ll be hooked!
What Ingredients You’ll Need
This ingredient list is short, sweet, and full of pantry staples you probably already have. Let me break it down for you:
- Graham Cracker Crumbs (2 cups / ~250g): These give the bars their structure and a slight crunch. If you don’t have graham crackers, digestive biscuits work too—just crush them into fine crumbs.
- Powdered Sugar (2 cups / ~240g): This is what sweetens the peanut butter mixture and keeps it smooth. No substitutions here—granulated sugar won’t dissolve the same way.
- Butter (1 cup / 225g, melted): Butter makes everything better, and it helps hold the bars together. I use unsalted, but you can use salted if that’s all you have—just skip the added salt.
- Peanut Butter (1 cup / 250g): The star of the show! Creamy peanut butter works best, but if you’re a chunky peanut butter fan, go for it. Just make sure it’s not the natural kind (it’s too runny).
- Chocolate Chips (2 cups / ~340g): I like semi-sweet chocolate for that perfect balance, but use milk chocolate if you prefer sweeter bars. High-quality chocolate makes all the difference here.
- Coconut Oil (2 tablespoons): This helps the chocolate layer stay smooth and shiny. You can substitute with butter if needed, but I find coconut oil gives the best texture.
- Pinch of Salt: A little salt goes a long way to enhance the flavors and balance out the sweetness.
Pro tip: If you’re feeling fancy, toss in some chopped peanuts or flaky sea salt for extra texture and flavor!
Equipment Needed
You don’t need a professional kitchen to whip these up. In fact, you probably have everything you need already:
- 8×8-inch baking dish: Glass or metal works fine. Line it with parchment paper for easy removal.
- Medium mixing bowl: You’ll use this for the peanut butter mixture.
- Microwave-safe bowl: Perfect for melting the chocolate and coconut oil.
- Spatula: For spreading the peanut butter layer and chocolate topping smoothly.
- Plastic wrap or lid for storage: Keeping these bars fresh is key to enjoying them all week.
That’s it! Simple tools for a simple recipe.
How to Make Reese’s Peanut Butter No-Bake Bars

Let’s get started! This is one of those recipes where you’ll feel like a kitchen pro in no time.
- Prep Your Pan: Line an 8×8-inch baking dish with parchment paper, leaving some overhang on the sides. This makes removing the bars a breeze. Trust me, you’ll thank me later.
- Mix the Peanut Butter Base: In a medium bowl, stir together the melted butter, peanut butter, powdered sugar, and graham cracker crumbs. Mix until smooth and well combined—it should form a thick, slightly sticky dough.
- Press Into the Pan: Transfer the peanut butter mixture into your prepared pan. Use the back of a spoon or a spatula to press it down evenly into all corners. Aim for a smooth, flat surface.
- Melt the Chocolate Layer: Combine the chocolate chips and coconut oil in a microwave-safe bowl. Microwave in 20-second intervals, stirring between each, until the mixture is smooth and glossy.
- Add the Chocolate Topping: Pour the melted chocolate over the peanut butter layer. Use a clean spatula to spread it out evenly. This is the part that makes it look ultra-fancy!
- Chill and Set: Pop the pan into the fridge for at least 2 hours, or until the chocolate is firm. If you’re in a hurry, you can put it in the freezer for about 30 minutes.
- Slice and Enjoy: Use the parchment paper to lift the bars out of the pan, then slice them into squares or rectangles. A warm knife will give you cleaner cuts—just run it under hot water and dry it off before slicing.
And that’s it! You’ve got yourself a batch of irresistible Reese’s Peanut Butter No-Bake Bars ready to devour.
My Best Tips & Techniques
After making these bars more times than I’d like to admit, here are my top tips for ensuring perfection:
- Don’t skip the parchment paper: It makes removing and slicing the bars SO much easier. No sticking, no crumbling, just perfect squares.
- Blend your butter and peanut butter well: I use a spatula for mixing, but you can use a hand mixer if you prefer. Just don’t overmix—it should be smooth but not overly whipped.
- Use high-quality chocolate: Trust me, this makes a big difference in the flavor and texture of your chocolate layer. Cheap chocolate can get grainy when melted.
- Customize the sweetness: If you prefer less sugar, cut back on the powdered sugar by ¼ cup. The bars will still hold together and taste amazing, thanks to the natural sweetness of the peanut butter.
- Storage is key: Keep them in the fridge until you’re ready to eat them—this keeps the chocolate layer nice and firm.
Ways to Mix It Up
Want to make these your own? Here are a few variations you can try:
- Nutty Crunch: Stir in ½ cup of chopped peanuts or almonds into the peanut butter layer before pressing it into the pan. Adds a satisfying crunch!
- Extra Chocolate: Sprinkle mini chocolate chips on top of the melted chocolate layer before chilling for double the chocolate goodness.
- Salted Caramel Twist: Drizzle caramel sauce over the chocolate layer and sprinkle with flaky sea salt. It’s like salted caramel heaven.
- Festive Fun: Mix in colorful sprinkles or crushed pretzels for a holiday party treat that everyone will love.
Feel free to experiment with different toppings, mix-ins, or even shapes! These bars are your canvas—go wild.
Serving Ideas & Storage
Here’s how to enjoy these dreamy bars and keep them fresh:
Serving Suggestions
- Solo Treat: Enjoy one straight from the fridge for a quick snack or dessert.
- Party Plate: Arrange them on a pretty platter with fresh fruit for an easy party dessert.
- Ice Cream Pairing: Serve with a scoop of vanilla ice cream for an extra indulgent dessert.
- Coffee Companion: These bars go perfectly with a cup of hot coffee or a latte for an afternoon pick-me-up.
Storage Tips
- Fridge: Store in an airtight container for up to one week. They taste best when chilled—plus, the chocolate stays firm.
- Freezer: These bars are freezer-friendly! Wrap them individually and freeze for up to three months. Let them thaw in the fridge overnight or enjoy them straight from the freezer.
Pro tip: If they lose their crunch after a few days, pop them in the freezer for 10 minutes. They’ll firm right back up!
Nutritional Info & Health Benefits
Let’s be real—these bars are a treat, but they’re still better than store-bought candy. Here’s the rundown:
| Nutritional Info (per bar) | |
|---|---|
| Calories: | 210 |
| Protein: | 4g |
| Carbs: | 24g |
| Fat: | 12g |
Why I love these: They’re indulgent, but still made with simple ingredients you can pronounce. Plus, they’re portion-controlled! One bar is satisfying enough to crush your cravings without overdoing it.
And hey, peanut butter has protein and healthy fats, so that counts for something, right?
Final Thoughts
So that’s my Irresistible Reese’s Peanut Butter No-Bake Bars recipe! It’s simple, dreamy, and has quickly become one of my all-time favorite desserts to make (and eat). If you’re a fan of that perfect peanut butter-chocolate combo, you’re going to love these.
I hope this recipe finds a place in your regular rotation. It’s perfect for lazy afternoons, party prep, or just treating yourself after a long day. And don’t forget to try the variations—there’s a whole world of possibilities to explore!
If you make these, let me know how they turned out! Drop a comment below or tag me on Instagram @yourhandle—because nothing makes me happier than seeing your creations. Happy no-baking!
FAQs
Q: Can I use almond butter instead of peanut butter?
A: Absolutely! Almond butter works great in this recipe. Just make sure it’s the creamy kind and not the runny, natural version. It’ll have a slightly different flavor, but still delicious.
Q: Can I make these dairy-free?
A: Yes, you can substitute the butter with a plant-based alternative like coconut oil or vegan butter, and use dairy-free chocolate chips. They’ll turn out just as good!
Q: How do I make sure the bars don’t stick to the pan?
A: The key is using parchment paper. Line your pan and leave some overhang so you can lift the bars out easily after they’ve set.
Q: Can I make these ahead of time?
A: Totally! These bars are perfect for making ahead. They store well in the fridge for up to a week or the freezer for up to three months.
Q: What’s the best way to cut clean slices?
A: Use a warm knife! Run it under hot water, dry it off, and then slice. It’ll glide through the chocolate without cracking.
Pin This Recipe!


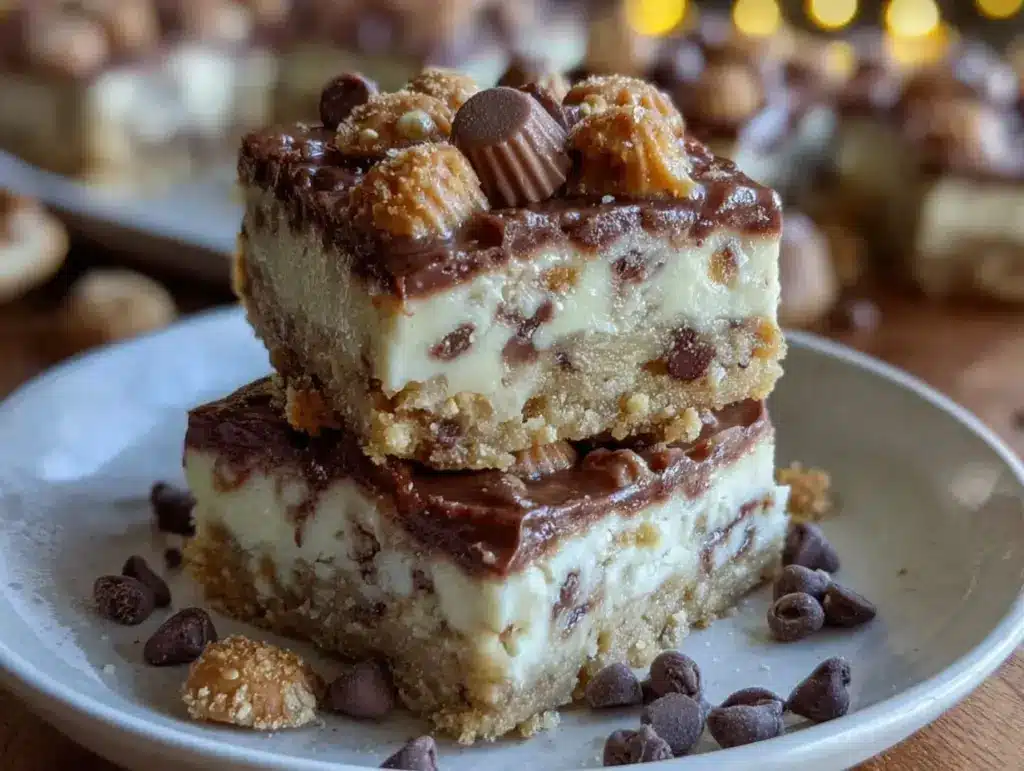
Reese’s Peanut Butter No-Bake Bars
- Total Time: 2 hours 15 minutes
- Yield: 16 bars 1x
Description
These no-bake bars combine smooth peanut butter and rich chocolate for an easy, irresistible dessert that tastes like you spent hours making it.
Ingredients
- 2 cups graham cracker crumbs (~250g)
- 2 cups powdered sugar (~240g)
- 1 cup unsalted butter (225g), melted
- 1 cup creamy peanut butter (250g)
- 2 cups semi-sweet chocolate chips (~340g)
- 2 tablespoons coconut oil
- Pinch of salt
Instructions
- Line an 8×8-inch baking dish with parchment paper, leaving some overhang on the sides.
- In a medium bowl, stir together melted butter, peanut butter, powdered sugar, and graham cracker crumbs until smooth and well combined.
- Transfer the peanut butter mixture into the prepared pan and press it down evenly with a spoon or spatula.
- Combine chocolate chips and coconut oil in a microwave-safe bowl. Microwave in 20-second intervals, stirring between each, until smooth and glossy.
- Pour the melted chocolate over the peanut butter layer and spread it evenly with a clean spatula.
- Refrigerate the pan for at least 2 hours or freeze for 30 minutes until the chocolate is firm.
- Lift the bars out of the pan using the parchment paper and slice into squares or rectangles using a warm knife.
Notes
[‘Use parchment paper for easy removal and clean slicing.’, ‘Blend butter and peanut butter well but avoid overmixing.’, ‘Use high-quality chocolate for the best flavor and texture.’, ‘Adjust sweetness by reducing powdered sugar by ¼ cup if desired.’, ‘Store in the fridge to keep the chocolate layer firm.’]
- Prep Time: 15 minutes
- Cook Time: 0 minutes
- Category: Dessert
- Cuisine: American
Nutrition
- Serving Size: 1 bar
- Calories: 210
- Fat: 12
- Carbohydrates: 24
- Protein: 4
Keywords: no-bake, peanut butter, chocolate, dessert, easy recipe, quick dessert, kid-friendly, party treat