I still remember the night this Peanut Butter Cup Dump Cake became my secret weapon for dessert emergencies. It was one of those unexpected visits from my sister and her kids—no warning, just a text saying, “We’re five minutes away!” I glanced in my pantry, saw a few basic ingredients, and honestly, I thought, “Well, this is a disaster.” But then I grabbed a box of yellow cake mix, some peanut butter cups, and a few pantry staples, tossed them all in a pan without a second thought, and popped it in the oven. Thirty minutes later, I had the most decadent, gooey, chocolate-peanut-buttery dessert that disappeared faster than I could dish it out.
This Peanut Butter Cup Dump Cake has since been my go-to for when I want something insanely easy but still impressive. I’ve made it for birthdays, last-minute potlucks, and cozy nights when I just want to curl up with something sweet. It’s one of those recipes where the name says it all: dump everything in, bake, and enjoy the magic that happens in between. And honestly? It tastes way fancier than it is.
After testing this recipe at least 10 times, tweaking the peanut butter cup quantity and baking time, I’m confident you’ll love how simple—and ridiculously delicious—it is. Plus, it uses ingredients you probably already have on hand, which means you can whip it up with zero stress. Ready to make the easiest decadent dessert ever? Let’s do this.
Why You’ll Love This Peanut Butter Cup Dump Cake Recipe
This dessert has completely changed how I think about “easy” sweets. There are a handful of reasons I keep going back to this recipe, and I’m happy to share all of them with you.
- Ridiculously Easy — No mixing bowls, no fancy equipment, no complicated steps. If you can open packages and pour, you’re halfway there.
- Decadently Delicious — The combo of melty peanut butter cups, buttery cake mix, and a hint of saltiness is seriously addictive. Everyone who’s tried it has asked for the recipe (even my picky nephew).
- Fast Prep, Hands-Off Baking — It takes less than 10 minutes to prep, then you just pop it in the oven and relax. Perfect for busy weeknights or last-minute guests.
- Pantry-Friendly Ingredients — I always have a box of cake mix and peanut butter cups in my pantry for moments like this. No need for fancy ingredients or a special trip to the store.
- Endless Variations — Want to add chopped nuts, swirl in some peanut butter, or throw in chocolate chips? Go for it. It’s super flexible.
- Perfect Crowd-Pleaser — I’ve brought this to potlucks, family dinners, and casual hangouts. It disappears no matter what.
Honestly, this cake is my dessert safety net. When I want something indulgent but can’t face complicated recipes, this Peanut Butter Cup Dump Cake is my go-to. It’s easy, fast, and feels like a treat you deserve.
Ingredients You’ll Need
Here’s the best part: you probably have most of these ingredients already, and if not, they’re easy to find. I’m picky about a few things here, and I’ll tell you why.
- Yellow cake mix (1 box, about 15.25 oz / 432g) — I use classic yellow for that buttery, sweet base. White cake mix works, but I think yellow gives the best flavor.
- Peanut butter cups (about 12 regular-size, chopped / 6 oz / 170g) — The star of the show! I chop them roughly so you get pockets of melty chocolate and peanut butter throughout.
- Butter (1 cup / 2 sticks / 226g, sliced) — Use unsalted butter so you control the saltiness. It creates a rich, golden crust on top.
- Milk (1 cup / 240ml) — Helps moisten the cake mix and merge everything together. Whole milk is best but 2% works too.
- Vanilla extract (1 teaspoon) — Just a touch to deepen the flavor.
- Salt (a pinch) — Enhances all the flavors, especially the peanut butter cups.
Optional add-ins:
- Chopped peanuts — For crunch, sprinkle about ¼ cup on top before baking.
- Chocolate chips — Mix in ½ cup for extra chocolate goodness.
- Peanut butter drizzle — Warm a few tablespoons of peanut butter and swirl it on top before serving.
Quick note: I always buy Reese’s peanut butter cups because they melt perfectly and have just the right balance of peanut butter and chocolate. If you want a twist, dark chocolate peanut butter cups also work great.
Equipment Needed
You don’t need fancy equipment for this. Here’s what I actually use every time I make this dessert.
- 9×13-inch baking dish — Glass or metal works. I prefer glass because it heats evenly and I can see the golden crust developing.
- Mixing spoon or spatula — For spreading the cake mix and stirring the butter slices around.
- Measuring cup — To measure the milk precisely.
- Knife — To roughly chop the peanut butter cups.
- Microwave-safe bowl (optional) — If you want to warm peanut butter for drizzling.
Honestly, that’s it. No mixer, no bowls, no complicated gear. Just simple tools you already own.
How to Make It: Step-by-Step

Alright, let’s make this! I’m walking you through exactly how I do it, including the little tricks I’ve picked up.
Step 1: Preheat and Prep (5 minutes)
Preheat your oven to 350°F (175°C). Grab your 9×13-inch dish and lightly grease it with butter or non-stick spray. Chop your peanut butter cups roughly and slice the butter sticks into thin pats. Having everything ready makes the process smooth.
Step 2: Layer the Cake Mix (1 minute)
Empty the entire box of yellow cake mix evenly into the bottom of the baking dish. Don’t stir or mix—just spread it out so it forms a uniform layer. This dry layer will soak up the milk and butter to create the cake texture.
Step 3: Add the Peanut Butter Cups (1 minute)
Sprinkle the chopped peanut butter cups evenly over the cake mix. Don’t worry if the pieces overlap or aren’t perfectly spread—this adds to the gooey spots you’ll love later.
Step 4: Pour Milk and Add Butter (2 minutes)
Pour 1 cup of milk evenly over the cake mix and peanut butter cups. Then place the thin pats of butter evenly across the top. The butter helps create a beautiful golden crust and keeps everything moist. Sprinkle a pinch of salt and drizzle the vanilla extract over everything.
Step 5: Bake and Cool (35-40 minutes)
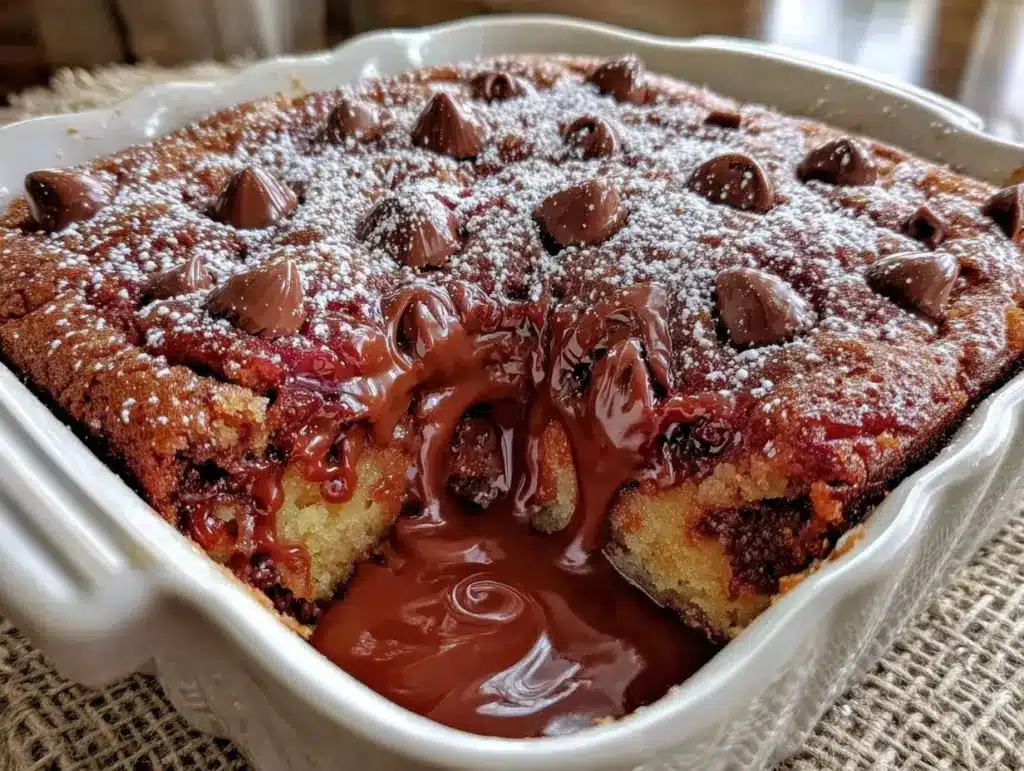
Pop the baking dish into your preheated oven and bake for 35-40 minutes. You’ll know it’s done when the top is golden brown and the edges are bubbling. A toothpick inserted near the center may come out slightly moist due to the melting peanut butter cups—that’s perfect. Let it cool for at least 15 minutes before serving to let everything set up a bit.
Serving Tips
Serve warm with a scoop of vanilla ice cream or a dollop of whipped cream. If you want to get fancy, drizzle warm peanut butter or chocolate sauce on top. It’s a total crowd-pleaser.
Expert Tips & Tricks
Here’s everything I’ve learned from making this dozens of times. These tips will save you from my mistakes.
- Don’t skip the butter pats on top — They melt and soak into the cake mix, creating that signature crisp, golden crust and rich flavor.
- Use whole milk — It adds creaminess and helps the cake mix hydrate perfectly. Skim milk makes the cake a bit dry.
- Rough chop your peanut butter cups — Smaller bits can melt away too much, and big chunks might not heat through. I aim for bite-sized pieces.
- Let the cake cool before serving — I know it’s tempting to dive right in, but it sets up better and slices cleaner after cooling.
- Test your oven temperature — If your oven runs hot, the cake might brown too quickly and burn. Check at 30 minutes and cover loosely with foil if needed.
Common mistake: “My dump cake was soggy.” Usually that means too much milk or not enough butter. Stick to the recipe quantities and you’ll get perfect results.
Variations & Substitutions
Once you’ve nailed the basic version, here’s how you can mix it up. I’ve tried all of these.
- Chocolate Lovers’ Dream — Swap the yellow cake mix for chocolate cake mix and add in ½ cup chocolate chips along with the peanut butter cups.
- Salted Caramel Twist — Drizzle caramel sauce over the top before baking and sprinkle flaky sea salt after baking. The salty-sweet combo is next level.
- Nutty Crunch — Add ½ cup chopped roasted peanuts or pecans on top before baking for extra texture.
- Mini Dump Cakes — Make individual servings in ramekins using the same proportions. Perfect for portion control or parties.
- Vegan Version — Use a dairy-free yellow cake mix, plant-based butter, and a non-dairy milk like almond or oat. Replace peanut butter cups with vegan chocolate peanut butter candies.
Want to keep it simple but still crave variety? This easy Thai peanut chicken recipe has a totally different vibe but a peanut butter twist you might love for dinner.
Serving & Storage
Serving Suggestions
I usually serve this straight from the baking dish with a big scoop of vanilla ice cream melting over the top. It’s a classic combo that never fails. For a little fancy touch, sprinkle chopped peanuts or add a drizzle of chocolate sauce.
It also pairs wonderfully with a cup of coffee or milk for a cozy dessert moment.
Storage Instructions
- Refrigerate: Store leftovers in an airtight container for up to 4 days. The cake will firm up in the fridge, so bring it to room temperature or warm slightly in the microwave before serving.
- Reheat: Microwave in 30-second bursts or warm in a low oven (300°F/150°C) for 10 minutes. Add a small splash of milk before reheating if it feels too dry.
- Freezing: I don’t recommend freezing this cake; the texture tends to suffer and it can get watery when thawed.
If you want a quick dessert fix, you can prep the dry cake mix and chopped peanut butter cups ahead in the dish, cover it, and refrigerate for up to 24 hours before adding milk and butter and baking.
Nutrition Information
I’m not a nutritionist, but here’s the rough breakdown if you’re curious. This is based on about 12 servings.
| Calories | 310 |
|---|---|
| Protein | 5g |
| Carbohydrates | 36g |
| Fat | 17g |
| Saturated Fat | 9g |
| Sugar | 22g |
| Sodium | 220mg |
This dessert is definitely rich and indulgent, thanks to the butter and peanut butter cups. But it’s portion-controlled and perfect for sharing. If you want to lighten it up, try using reduced-fat butter or a light cake mix, or serve with fresh fruit on the side.
Final Thoughts
So that’s my go-to Peanut Butter Cup Dump Cake recipe! I’ve probably talked your ear off by now, but when you make a recipe this simple and delicious, you end up with a lot to say.
This dessert has saved me countless times when I needed something quick and impressive. It’s my answer to “I want chocolate and peanut butter but don’t want to bake for hours.” My family loves it, my friends love it, and I love not stressing over dessert.
Make it yours—add extra chocolate chips, drizzle peanut butter, sprinkle nuts, or keep it classic. This cake is a blank canvas for all your dessert dreams.
If you make this Peanut Butter Cup Dump Cake, drop a comment below and let me know how it turned out! I’m always here to help if you need troubleshooting or want to share your creative spins.
Happy baking! And I hope your kitchen smells half as amazing as mine does right now.
Frequently Asked Questions
Q: Can I use a different cake mix flavor?
A: Absolutely! Yellow cake mix gives the classic flavor, but chocolate or even funfetti cake mix works great too. Just expect a slightly different taste and texture. Chocolate cake mix with peanut butter cups is a particular favorite at my house.
Q: What if I don’t have peanut butter cups? Can I use peanut butter and chocolate chips instead?
A: You can! Use about ½ cup peanut butter chips or swirl in melted peanut butter, plus ½ cup chocolate chips. It won’t be quite the same gooey pockets of peanut butter and chocolate, but it’s still delicious and easy.
Q: Why is it called a “dump cake”?
A: Because you literally dump the ingredients into a pan without mixing and bake. It’s one of those “set it and forget it” desserts that’s perfect for when you want something easy but impressive.
Q: Can I make this gluten-free?
A: Yes! Use a gluten-free yellow cake mix and make sure your peanut butter cups are gluten-free. The rest of the ingredients are naturally gluten-free.
Q: How do I prevent the cake from burning on top?
A: If your oven runs hot or the top is browning too quickly, cover the baking dish loosely with foil halfway through baking. This will protect the top while the inside finishes cooking.
Q: Can I double this recipe for a larger crowd?
A: For sure! Use two 9×13 pans or a larger roasting pan. Just keep the layers the same thickness to ensure even baking. Baking time may be slightly longer, so check for doneness around 40-45 minutes.
Q: What’s the best way to reheat leftovers?
A: Warm gently in the microwave in 30-second bursts with a splash of milk, or in a low oven (300°F/150°C) with foil on top. This helps bring back the creamy texture without drying it out.
By the way, if you’re looking for another quick and comforting dinner idea with a peanut twist, the easy Thai peanut chicken recipe is a favorite around here. It’s a perfect balance of savory and creamy that pairs well with lots of weeknight schedules.
Pin This Recipe!


Peanut Butter Cup Dump Cake
- Total Time: 45-50 minutes
- Yield: 12 servings 1x
Description
An insanely easy and decadent dessert combining yellow cake mix and peanut butter cups, baked to a golden, gooey perfection.
Ingredients
- 1 box yellow cake mix (about 15.25 oz / 432g)
- 12 regular-size peanut butter cups, chopped (about 6 oz / 170g)
- 1 cup unsalted butter (2 sticks / 226g), sliced into thin pats
- 1 cup whole milk (240ml)
- 1 teaspoon vanilla extract
- Pinch of salt
- Optional add-ins: 1/4 cup chopped peanuts, 1/2 cup chocolate chips, peanut butter drizzle
Instructions
- Preheat oven to 350°F (175°C). Lightly grease a 9×13-inch baking dish with butter or non-stick spray.
- Chop peanut butter cups roughly and slice butter into thin pats.
- Empty the entire box of yellow cake mix evenly into the bottom of the baking dish without stirring.
- Sprinkle chopped peanut butter cups evenly over the cake mix.
- Pour 1 cup of milk evenly over the cake mix and peanut butter cups.
- Place the thin pats of butter evenly across the top.
- Sprinkle a pinch of salt and drizzle vanilla extract over everything.
- Bake for 35-40 minutes until the top is golden brown and edges are bubbling.
- Let cool for at least 15 minutes before serving.
Notes
Use whole milk for creaminess; rough chop peanut butter cups for best texture; let cake cool before serving for cleaner slices; cover with foil if top browns too quickly; refrigerate leftovers up to 4 days and reheat gently.
- Prep Time: 10 minutes
- Cook Time: 35-40 minutes
- Category: Dessert
- Cuisine: American
Nutrition
- Serving Size: 1 slice (1/12th of c
- Calories: 310
- Sugar: 22
- Sodium: 220
- Fat: 17
- Saturated Fat: 9
- Carbohydrates: 36
- Protein: 5
Keywords: peanut butter cup dump cake, easy dessert, peanut butter dessert, dump cake recipe, quick cake, chocolate peanut butter dessert


