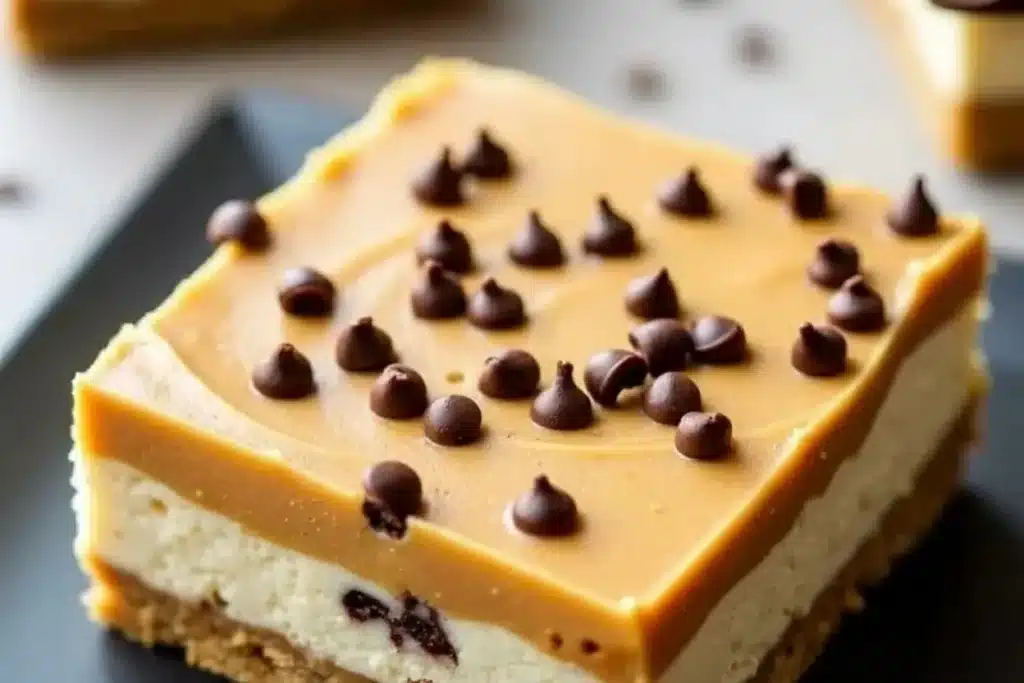
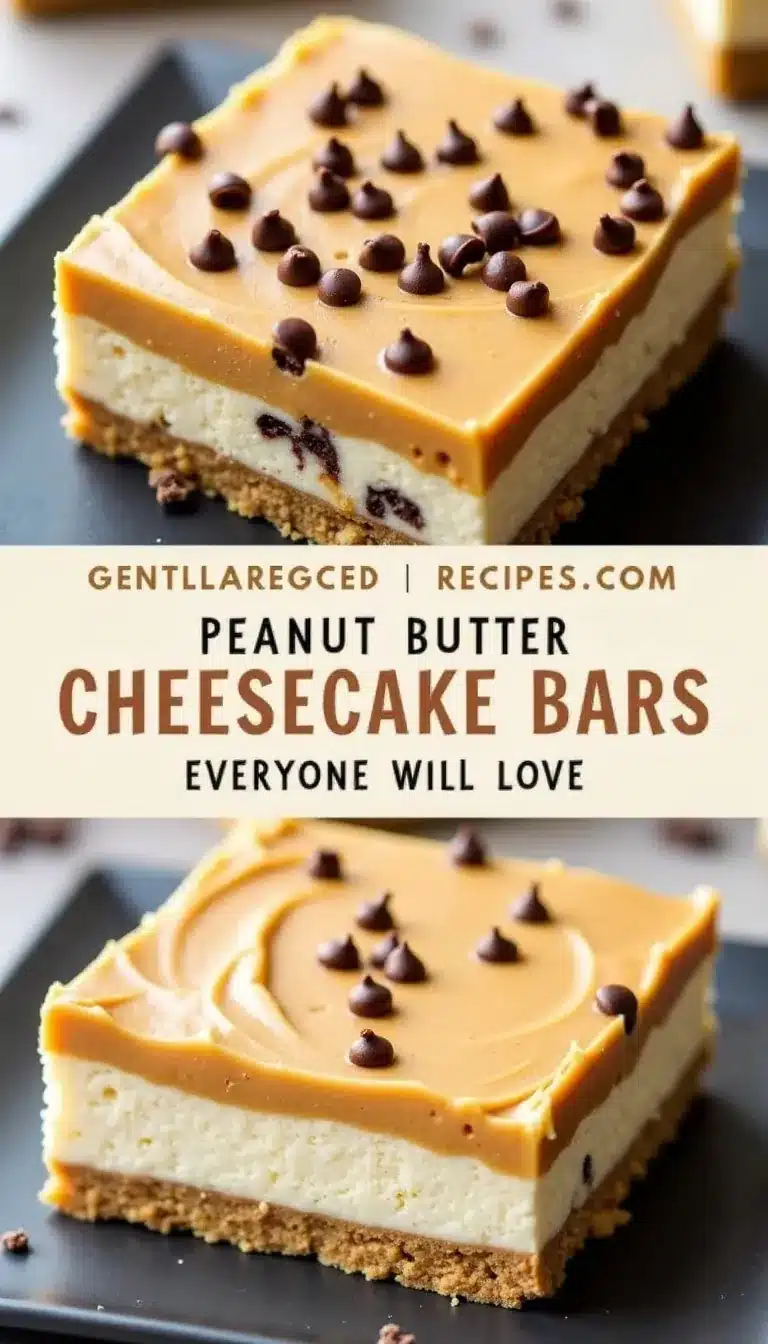
If you’re craving a show-stopping dessert but don’t want to turn on your oven, these No Bake Peanut Butter Cheesecake Bars are about to steal your heart (and your taste buds). Imagine sinking your fork into creamy peanut butter cheesecake, nestled on a buttery cookie crust, finished with a silky chocolate topping. Sounds dreamy, right? This easy layered treat is perfect for peanut butter lovers, busy bakers, or anyone who loves fuss-free desserts. You know, sometimes the best sweets are the ones you don’t have to bake at all!
I first whipped up these bars on a hot summer afternoon when the last thing I wanted was to heat up the kitchen. Honestly, I was surprised by how decadent and satisfying they turned out—no oven required! There’s something magical about the combination of rich peanut butter, tangy cream cheese, and a hint of chocolate that just works. If you’re looking for a dessert that’s both impressive and simple, you’ve just found it. Plus, these cheesecake bars have a little food history charm—did you know that the original no-bake cheesecakes date back to 1940s America when gelatin-based recipes became all the rage? Fast-forward to today, and we’re still loving the no-bake vibe, but with way more flavor and texture.
Why You Will Love This Recipe
Let’s talk about why these No Bake Peanut Butter Cheesecake Bars deserve a spot in your dessert rotation. For starters, peanut butter itself is a classic American staple, born from the creative minds of late 19th-century food innovators. Mixing it into cheesecake feels almost rebellious, but in the best way possible. Growing up, I always associated peanut butter with after-school snacks, but this layered dessert totally transforms it into an elegant, crowd-pleasing treat.
One of my fondest memories is making these bars with my cousin on a sticky July evening—we laughed, spilled a little too much peanut butter, and devoured the batch before sunrise. There’s something nostalgic yet new about the flavor, and every layer adds a different texture and taste. Over time, I’ve tweaked the recipe to include a chocolate topping, inspired by classic peanut butter cups. The chocolate layer is a nod to those sweet candies I used to hide in my lunchbox, but here, it’s grown-up and decadent.
This recipe is also a lifesaver during the holidays or hot weather months. You can whip it up in advance, stash it in the fridge, and know that dessert is handled. The bars are just as fitting for a cozy family movie night as they are for a big summer barbecue. And honestly, isn’t there something so satisfying about a layered dessert? Each bite is a little journey—crunchy crust, creamy filling, and that smooth chocolate finish. It’s a taste of comfort and celebration all in one bite.
Ingredient Discussion
Let’s break down what you’ll need for these No Bake Peanut Butter Cheesecake Bars and why each ingredient makes such a difference.
- Cream Cheese (16 oz / 450g, softened): Go for full-fat cream cheese for the best texture and richness. If you’re watching calories, you can swap for a light version, but I find the original gives that classic cheesecake tang. Make sure it’s fully softened—cold cream cheese can get lumpy (trust me, I’ve rushed this step before and regretted it!).
- Peanut Butter (1 cup / 260g, creamy): Use a smooth, commercial brand like Jif or Skippy for the most consistent results. Natural peanut butters can separate and make the filling oily. If you’re allergic to peanuts, almond butter or sunflower seed butter are good alternatives. Store any opened jar in the fridge to keep it fresh, especially during summer.
- Powdered Sugar (1 cup / 120g): This sweetens the filling and helps it set. If you’re out, you can pulse granulated sugar in a blender until fine. I’ve even tried coconut sugar for a caramel-like twist—works great!
- Heavy Whipping Cream (1 cup / 240ml): Whipped cream adds lightness to the cheesecake layer. Chill your bowl and beaters before whipping for extra fluffiness. You can substitute coconut cream for a dairy-free version—just chill the can overnight and scoop out the solid part.
- Graham Crackers (2 cups / 200g, crushed): This forms the base. For gluten-free, use GF graham-style cookies. Chocolate wafer cookies are a fun switch if you want a richer crust. I keep extra graham crackers sealed in a zip-top bag to prevent them from going stale.
- Unsalted Butter (6 tbsp / 85g, melted): Binds the crust together. Salted butter works in a pinch—just reduce the added salt in the recipe. Melt it gently so it doesn’t scorch.
- Semi-Sweet Chocolate Chips (1 cup / 175g): For the chocolate topping. You can go dark or milk chocolate if that’s your thing. I’ve used chopped chocolate bars in a pinch—just as good!
- Peanuts (¼ cup / 35g, chopped, optional): These add crunch and a little salty finish on top. Toasted pecans or chocolate sprinkles also work if peanuts aren’t your favorite.
When it comes to sourcing, most of these ingredients are pantry staples. If you’re feeling fancy, specialty food stores sometimes carry small-batch peanut butters or gluten-free cookies. For seasonal tweaks, try swirling in a little berry jam before chilling for a summer vibe, or add cinnamon to the crust as the weather cools down. I like to buy cream cheese in bulk when it’s on sale—cheesecake bars disappear fast around here!
Equipment Needed
- 8×8-inch (20x20cm) Square Baking Pan: The classic size for bars. If you only have a 9×9, your bars will be slightly thinner—no biggie.
- Mixing Bowls: At least two—one for crust, one for filling. Glass or stainless steel are easiest to clean.
- Electric Mixer or Stand Mixer: Makes beating the cheesecake layer a breeze. A sturdy hand whisk can work if you’re feeling strong, but it’ll take a bit longer.
- Spatula: For smoothing layers. I love my silicone spatula—nothing sticks!
- Measuring Cups and Spoons: Accuracy is key for cheesecake texture.
- Food Processor or Rolling Pin (for crust): A food processor gives a fine crumb, but a rolling pin and zip-top bag work just as well for crushing cookies.
- Microwave-Safe Bowl: For melting butter and chocolate. If you don’t have a microwave, a double boiler works too.
- Parchment Paper: Lining the pan makes removing the bars so much easier—trust me, don’t skip this!
If you’re on a tight budget, most discount stores carry solid mixing bowls and spatulas that last ages. I learned the hard way to invest in a sturdy pan—thin ones warp in the fridge and make slicing tricky. Clean your electric mixer right away (dried cream cheese is no joke to scrub off), and store parchment paper rolled up to avoid creases.
Preparation Method
-
Prepare the Pan:
Line an 8×8-inch (20x20cm) square baking pan with parchment paper, leaving an overhang on two sides for easy removal. This step saves so much hassle later. -
Make the Crust:
Crush 2 cups (200g) graham crackers into fine crumbs using a food processor or by placing them in a zip-top bag and smashing with a rolling pin. Pour crumbs into a mixing bowl, then add 6 tbsp (85g) melted unsalted butter. Mix with a fork until the mixture looks like damp sand. Press firmly and evenly into the prepared pan (use the bottom of a measuring cup for a smooth surface). Chill in the fridge for at least 15 minutes to set. -
Whip the Cream:
In a cold bowl, whip 1 cup (240ml) heavy cream until stiff peaks form, about 3-4 minutes with an electric mixer on medium-high. Set aside. If your cream isn’t cold enough, it won’t whip properly—if this happens, pop it in the fridge for 10 minutes and try again. -
Mix the Cheesecake Layer:
In a large bowl, beat 16 oz (450g) softened cream cheese until smooth and creamy, about 2 minutes. Add 1 cup (260g) creamy peanut butter and 1 cup (120g) powdered sugar. Beat until fully combined and fluffy, scraping down the bowl as needed. Fold in the whipped cream gently with a spatula until no streaks remain. Don’t overmix—this keeps the filling light. -
Spread the Filling:
Pour the peanut butter cheesecake mixture over the chilled crust. Smooth the top with a spatula, spreading evenly into the corners. Tap the pan gently on the counter to remove any air bubbles. -
Chill the Bars:
Cover the pan with plastic wrap and refrigerate for at least 4 hours, or overnight for best results. The filling should feel firm to the touch. If you’re impatient (I get it), 2 hours in the freezer will do, but the texture might be a bit icy. -
Make the Chocolate Topping:
After the bars are set, melt 1 cup (175g) semi-sweet chocolate chips in a microwave-safe bowl in 30-second bursts, stirring each time, until smooth (about 1-2 minutes total). Pour over the cheesecake layer and tilt the pan to coat evenly. Sprinkle ¼ cup (35g) chopped peanuts over the top, if using. -
Set and Slice:
Return the pan to the fridge for 30 minutes, or until the chocolate is set. Lift the bars out using the parchment overhang. For clean slices, run a sharp knife under hot water and wipe dry between cuts. The first slice is always a bit messy, but after that it’s smooth sailing!
Tip: If the crust crumbles when cutting, chill it longer or try adding an extra tablespoon of butter next time. The bars are ready to enjoy now—soft, creamy, and just the right amount of rich!
Cooking Tips & Techniques
Making No Bake Peanut Butter Cheesecake Bars isn’t hard, but a few tricks can really help. First, always use room-temperature cream cheese. If you forget and it’s cold, microwave it in 10-second bursts until soft—just don’t let it melt. When folding in whipped cream, be gentle; over-mixing can deflate the filling, making it dense instead of airy.
Don’t rush the chilling process. I tried to cut corners once (because, let’s face it, patience isn’t my strong suit) and ended up with gooey bars that wouldn’t hold their shape. Four hours in the fridge is minimum—overnight is even better. For the chocolate layer, microwave in short bursts and stir well to avoid scorching. If your chocolate seizes up, add a teaspoon of coconut oil or butter to smooth it out.
When pressing the crust, really pack it down. Loose crumbs mean a crumbly base (been there, done that). If you want super-clean edges, dip your knife in hot water before each slice. And remember, the first piece is always a little wonky—consider it the chef’s bonus! Multitasking tip: Make the filling while the crust chills, and prepare the chocolate topping during the final chill. This way, everything comes together quickly.
Variations & Adaptations
There are so many ways to make these No Bake Peanut Butter Cheesecake Bars your own. Here are some of my favorites:
- Gluten-Free: Swap out regular graham crackers for gluten-free versions or use gluten-free chocolate sandwich cookies for a fun twist. The texture stays just as dreamy.
- Dairy-Free: Replace cream cheese with dairy-free cream cheese (like Kite Hill or Tofutti), and use coconut cream instead of heavy whipping cream. The bars still set up beautifully, and the coconut adds a subtle tropical note.
- Seasonal Flavors: Swirl in raspberry or strawberry jam before chilling for a PB&J-inspired treat. In fall, try adding a dash of cinnamon or nutmeg to the crust for a cozy vibe.
- Nut-Free: Substitute sunflower seed butter for peanut butter and skip the peanuts on top. I’ve done this for friends with allergies and it’s just as rich and satisfying.
- Extra Chocolatey: Use a chocolate cookie base and add mini chocolate chips to the filling. I tried this once for a chocolate fanatic and the bars disappeared in minutes!
Feel free to get creative—add chopped candy bars, a caramel drizzle, or swap out the chocolate topping for white chocolate. The possibilities are endless, and every batch can feel a little different.
Serving & Storage Suggestions
These No Bake Peanut Butter Cheesecake Bars are at their peak when served chilled, straight from the fridge. The layers stay defined and the texture is super creamy. For a party, cut the bars into smaller squares and arrange them on a platter—they look gorgeous topped with extra chopped peanuts or a drizzle of melted chocolate.
If you want to go all out, serve with a cold glass of milk
No Bake Peanut Butter Cheesecake Bars
- Total Time: 4 hours 55 minutes
- Yield: 16 bars 1x
Description
These No Bake Peanut Butter Cheesecake Bars feature a creamy peanut butter cheesecake filling on a buttery graham cracker crust, topped with a silky chocolate layer. Perfect for peanut butter lovers and anyone seeking an easy, impressive dessert without turning on the oven.
Ingredients
- 16 oz (450g) cream cheese, softened
- 1 cup (260g) creamy peanut butter
- 1 cup (120g) powdered sugar
- 1 cup (240ml) heavy whipping cream
- 2 cups (200g) graham crackers, crushed
- 6 tbsp (85g) unsalted butter, melted
- 1 cup (175g) semi-sweet chocolate chips
- 1/4 cup (35g) peanuts, chopped (optional)
Instructions
- Line an 8×8-inch (20x20cm) square baking pan with parchment paper, leaving an overhang on two sides for easy removal.
- Crush graham crackers into fine crumbs using a food processor or by placing them in a zip-top bag and smashing with a rolling pin. Pour crumbs into a mixing bowl, then add melted butter. Mix until the mixture looks like damp sand. Press firmly and evenly into the prepared pan. Chill in the fridge for at least 15 minutes to set.
- In a cold bowl, whip heavy cream until stiff peaks form, about 3-4 minutes with an electric mixer on medium-high. Set aside.
- In a large bowl, beat softened cream cheese until smooth and creamy, about 2 minutes. Add peanut butter and powdered sugar. Beat until fully combined and fluffy, scraping down the bowl as needed. Fold in the whipped cream gently with a spatula until no streaks remain.
- Pour the peanut butter cheesecake mixture over the chilled crust. Smooth the top with a spatula, spreading evenly into the corners. Tap the pan gently on the counter to remove any air bubbles.
- Cover the pan with plastic wrap and refrigerate for at least 4 hours, or overnight for best results. (Alternatively, chill in the freezer for 2 hours, but texture may be slightly icy.)
- After the bars are set, melt chocolate chips in a microwave-safe bowl in 30-second bursts, stirring each time, until smooth (about 1-2 minutes total). Pour over the cheesecake layer and tilt the pan to coat evenly. Sprinkle chopped peanuts over the top, if using.
- Return the pan to the fridge for 30 minutes, or until the chocolate is set. Lift the bars out using the parchment overhang. For clean slices, run a sharp knife under hot water and wipe dry between cuts.
Notes
For best results, use room-temperature cream cheese and chill the bars thoroughly before slicing. To make gluten-free, use gluten-free graham crackers. For dairy-free, substitute dairy-free cream cheese and coconut cream. Add a teaspoon of coconut oil to the chocolate if it seizes. Dip your knife in hot water for clean slices.
- Prep Time: 25 minutes
- Cook Time: 0 minutes
- Category: Dessert
- Cuisine: American
Nutrition
- Serving Size: 1 bar
- Calories: 370
- Sugar: 17
- Sodium: 180
- Fat: 27
- Saturated Fat: 12
- Carbohydrates: 27
- Fiber: 2
- Protein: 7
Keywords: no bake, peanut butter, cheesecake bars, easy dessert, layered dessert, chocolate, summer dessert, no oven, party dessert