A few months ago, I was hosting a casual game night, and I wanted something easy, shareable, and irresistibly good to snack on. I rummaged through my pantry and fridge, spotted a pack of Hawaiian rolls, and had a sudden idea: what if I made mini grilled cheese sandwiches using those sweet, fluffy rolls? I wasn’t sure how it would turn out, but curiosity won over. The result? A platter of golden, crispy-topped mini grilled cheeses that vanished faster than I could say “pass me another.”
Since then, these Mini Grilled Cheese Hawaiian Rolls with Crispy Golden Tops have become my secret weapon for impromptu get-togethers, kid-friendly lunches, and even a comforting snack when I’m craving something warm and melty. The sweet softness of the Hawaiian rolls paired with that perfectly crunchy, buttery crust and ooey-gooey cheese inside? Game changer. I’ve made them a dozen times, each batch better than the last, and I’m excited to share all my tricks so you can nail them too.
Here’s the thing: making grilled cheese on Hawaiian rolls is ridiculously simple, but getting that crispy, golden top while keeping the cheese melty inside takes a little finesse. Lucky for you, I’ve tested all the ways (including a few burnt edges and under-melted cheese) to find the method that works every time.
Why You’ll Love This Recipe
Let me be real—there are a million grilled cheese recipes out there, but this one stands out for a bunch of reasons. Here’s why I keep coming back to these mini Hawaiian roll grilled cheeses:
- Perfect Bite-Sized Comfort — These little sandwiches are the ideal size for parties, lunches, or just casual snacking. I love that you can pop a couple in your mouth and still feel like you’re indulging.
- Sweet and Savory Combo — The Hawaiian rolls add a subtle sweetness that balances the salty, melty cheese perfectly. It’s that little twist that makes these stand out from your average grilled cheese.
- Crispy Golden Tops Every Time — I’ve tried broiling, pan-frying, and baking, and this method guarantees a crunchy, buttery top without turning the bottom into a burnt mess.
- Super Easy to Customize — I usually stick to classic cheddar, but these rolls work with just about any cheese (or combo), plus you can add ham, turkey, or even a slice of pineapple for a Hawaiian vibe.
- Kid-Approved and Crowd-Pleasing — I’ve served these at family game nights, and even my picky nephew asks for seconds. They’re a hit for all ages.
- Quick and Minimal Prep — From start to finish, you’re looking at about 20 minutes. No need for fancy equipment or complicated steps.
This recipe is exactly what I reach for when I want something warm, cheesy, and just a little unexpected. It’s the kind of comfort food that feels both nostalgic and fresh at the same time.
Ingredients You’ll Need
Here’s the best part: you probably have most of these ingredients already. I’m pretty particular about the cheese and butter here because they make a huge difference in flavor and texture.
- Hawaiian rolls (1 package, usually 12 rolls) — Sweet, soft, and perfect for mini sandwiches. I use King’s Hawaiian brand because it holds up well but still melts in your mouth.
- Cheddar cheese (8 ounces / 225 grams, sliced) — Sharp cheddar works best for that bold flavor and great melt. You can mix in mozzarella or Monterey Jack for extra gooeyness.
- Butter (4 tablespoons / 60 grams, softened) — Real butter, no margarine. I spread it on the roll tops and bottoms for maximum crispiness and flavor.
- Garlic powder (1 teaspoon) — Optional, but trust me, it adds a subtle savory note that takes the tops from good to unforgettable.
- Smoked paprika (½ teaspoon) — Also optional, but it gives a lovely smoky aroma and beautiful color to the golden crust.
- Mayonnaise (2 tablespoons) — Weird, I know, but spreading mayo on the bottom buns instead of butter helps prevent sogginess and adds a tangy richness.
Substitution tip: If you don’t have Hawaiian rolls, sweet dinner rolls or brioche buns work well too. For dairy-free, swap cheese and butter for vegan versions, but you’ll lose some crispiness.
Equipment Needed
You don’t need fancy gear for this recipe. Here’s what I use and some easy alternatives if you don’t have them:
- Baking sheet — I use a rimmed cookie sheet so nothing slides off. If you don’t have one, a roasting pan also works.
- Parchment paper or silicone baking mat — Helps with cleanup and prevents sticking. I always line my baking sheet.
- Sharp knife — For slicing the rolls in half horizontally. A serrated knife works great if your rolls are super soft.
- Small bowl and spoon — To mix the butter, garlic powder, and smoked paprika.
- Oven or toaster oven — A broiler setting helps crisp the tops quickly, but you can also bake at a high temperature if your oven doesn’t have broil.
Pro tip: I sometimes use a cast iron skillet to crisp the bottoms before baking for extra crunch. Totally optional, but it’s a neat trick if you want to get creative.
How to Make Mini Grilled Cheese Hawaiian Rolls with Crispy Golden Tops: Step-by-Step

Alright, let’s get into making these! I’ll walk you through exactly how I do it so you get that perfect crispy golden top and melty cheesy center every time.
Step 1: Prep Your Rolls and Cheese (5 minutes)
Preheat your oven to 375°F (190°C) and line a baking sheet with parchment paper. Slice the Hawaiian rolls horizontally in half, keeping the tops and bottoms together in a single layer on the sheet. This helps keep them stable and easier to handle.
Layer the sliced cheddar evenly over the bottom halves. Don’t be shy—more cheese means better melty goodness.
Step 2: Mix and Spread the Butter Topping (3 minutes)
In a small bowl, combine the softened butter, garlic powder, and smoked paprika. Mix well until smooth and aromatic. Spread a thin, even layer of this mixture over the tops of the rolls. This is your secret weapon for those crispy, golden tops.
Spread mayonnaise on the bottom halves if you’re using it—this keeps the bread from getting soggy once the cheese melts.
Step 3: Assemble and Bake (10-12 minutes)
Place the baking sheet with the assembled rolls into the preheated oven. Bake for about 10 minutes, or until the cheese is melted and bubbly, and the tops are starting to turn a light golden brown.
If your oven has a broiler, switch to broil for the last 1-2 minutes to get those tops extra crispy and golden. Watch closely here! The difference between perfect and burnt is seconds.
Step 4: Cool Slightly and Serve (2-3 minutes)
Remove the baking sheet from the oven and let the mini sandwiches cool for a few minutes so the cheese firms up a bit. This also helps prevent molten cheese burns (been there, done that!). Serve warm and watch them disappear.
Expert Tips & Tricks
After making these grilled cheese rolls multiple times, here are my top tips to make sure yours come out perfect every time:
- Don’t skip the mayo on the bottom halves — It’s a simple trick I learned that keeps the bread from getting soggy with melted cheese. Plus, it adds a subtle tangy richness.
- Use softened butter for the tops — Cold butter doesn’t spread evenly and won’t crisp up as nicely. I usually take mine out 15 minutes before starting.
- Watch the broiler carefully — The tops can go from golden to burnt in seconds. I stay close and rotate the pan if needed for even browning.
- Try mixing cheeses — Sharp cheddar with mozzarella or pepper jack adds complexity and gooey stretchiness that’s next level.
- For extra crispiness on the bottom, you can pan-toast the bottom rolls lightly in butter before assembling and baking. It adds a nice crunch without burning.
- Make ahead — Assemble the rolls on the baking sheet, cover with plastic wrap, and refrigerate for up to 4 hours. Bake just before serving for fresh, hot grilled cheese.
Variations & Substitutions
Once you’ve nailed the classic version, here are some fun ways to mix things up. I’ve tested all of these and they’re delicious:
- Ham & Pineapple — Add thin slices of ham and pineapple chunks for a Hawaiian-inspired twist that fits perfectly on these rolls.
- Turkey & Swiss — Swap cheddar for Swiss cheese and add deli turkey slices. Great for a lighter, deli-style snack.
- Spicy Kick — Mix diced jalapeños or a drizzle of sriracha into the butter spread for a little heat on the tops.
- Vegan Version — Use vegan cheese slices and plant-based butter. The crust won’t be quite as crispy but still tasty.
- Herb Butter — Mix fresh chopped herbs like thyme or rosemary into the butter for an aromatic twist.
For more easy comfort food ideas with a similar vibe, you might enjoy my creamy chicken tortellini soup or the cheesy goodness of slow cooker French onion chicken. Both pair beautifully with these little grilled cheese rolls as a side or snack.
Serving & Storage
How to Serve: These mini grilled cheeses are fantastic on their own, but here are some ways I like to enjoy them:
- Alongside a fresh green salad or crunchy slaw for a balanced meal
- With a warm bowl of tomato soup for dipping (classic combo!)
- As a party platter with pickles and olives for variety
Storage: Cool leftovers completely, then store in an airtight container in the fridge for up to 3 days.
Reheating: I recommend reheating in a skillet over medium-low heat with a lid on to melt the cheese again and crisp the bread. Microwave works in a pinch but the crust won’t be as crispy.
Freezing: These aren’t the best candidates for freezing because the bread gets soggy when thawed. Better to make fresh or eat leftovers within a few days.
Nutrition Information
I’m not a nutritionist, but here’s a rough estimate per serving (2 mini sandwiches, based on 6 servings):
| Calories | 320 |
|---|---|
| Protein | 12g |
| Carbohydrates | 28g |
| Fat | 18g |
| Saturated Fat | 10g |
| Sodium | 450mg |
This recipe is definitely indulgent with the butter and cheese, but it’s a comforting treat that’s better than takeout. Adding a side of veggies or salad can boost the nutrition without extra fuss.
Final Thoughts
So that’s it—my go-to recipe for Mini Grilled Cheese Hawaiian Rolls with Crispy Golden Tops. I’ve probably made these at least 15 times, and they never get old. They’re the perfect answer when I want something quick, cheesy, and totally satisfying without a ton of effort.
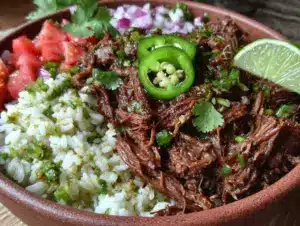
This recipe has saved me from many “what’s for snack?” emergencies and even made a few appearances at casual dinners alongside dishes like the beef barbacoa taco bowls. It’s easy to customize and hard to mess up, which is exactly what I want from a recipe.
Give it a try and don’t be afraid to make it your own—add your favorite cheeses, herbs, or extras. And hey, if you make these, drop a comment below to tell me how they turned out! I love hearing your kitchen wins (and even your “oops” moments).
Happy cooking! I hope your house smells as amazing as mine does right now.
Frequently Asked Questions
Q: Can I use regular sandwich bread instead of Hawaiian rolls?
A: You can, but Hawaiian rolls are special here because of their sweetness and softness. If you use regular bread, the flavor and texture will change, and it might not get the same crispy golden top. Brioche or sweet dinner rolls are better substitutes.
Q: How do I keep the bottoms from getting soggy?
A: Spreading a thin layer of mayonnaise on the bottom rolls before adding cheese helps create a moisture barrier. You can also lightly toast the bottoms in a pan before assembling. Both tricks help keep things crispy.
Q: Can I make these ahead of time and bake later?
A: Absolutely! Assemble the sandwiches on a baking sheet, cover tightly with plastic wrap, and refrigerate for up to 4 hours. Bake just before serving for fresh, melty grilled cheese.
Q: My tops got burnt—what happened?
A: Broilers vary in heat, so keep a close eye during the broil step. The difference between golden and burnt is seconds. If you’re unsure, bake longer at 375°F (190°C) without broiling, but it won’t be quite as crispy.
Q: Can I use shredded cheese instead of sliced?
A: You can, but sliced cheese melts more evenly and creates that classic grilled cheese texture. If you use shredded, try to press it down firmly so it melts together without falling out.
Q: What’s the best cheese for meltiness?
A: Sharp cheddar is my favorite for flavor, but mixing in mozzarella or Monterey Jack adds gooeyness and stretch. Avoid cheeses that don’t melt well like feta or halloumi.
Q: Can I freeze these sandwiches?
A: I don’t recommend freezing because the bread tends to get soggy after thawing. They’re best enjoyed fresh or refrigerated and eaten within a few days.
Pin This Recipe!


Mini Grilled Cheese Hawaiian Rolls with Crispy Golden Tops
- Total Time: 20 minutes
- Yield: 6 servings (2 mini sandwiches per serving) 1x
Description
These mini grilled cheese sandwiches made with sweet Hawaiian rolls feature crispy golden tops and melty cheddar cheese inside, perfect for parties, snacks, or kid-friendly lunches.
Ingredients
- 1 package Hawaiian rolls (usually 12 rolls)
- 8 ounces (225 grams) cheddar cheese, sliced
- 4 tablespoons (60 grams) butter, softened
- 1 teaspoon garlic powder (optional)
- ½ teaspoon smoked paprika (optional)
- 2 tablespoons mayonnaise
Instructions
- Preheat oven to 375°F (190°C) and line a baking sheet with parchment paper.
- Slice Hawaiian rolls horizontally in half, keeping tops and bottoms together in a single layer on the baking sheet.
- Layer sliced cheddar evenly over the bottom halves of the rolls.
- In a small bowl, mix softened butter, garlic powder, and smoked paprika until smooth.
- Spread the butter mixture evenly over the tops of the rolls.
- Spread mayonnaise on the bottom halves to prevent sogginess.
- Bake in the preheated oven for about 10 minutes until cheese is melted and bubbly and tops start to turn light golden brown.
- If your oven has a broiler, broil for the last 1-2 minutes to crisp and brown the tops, watching carefully to avoid burning.
- Remove from oven and let cool for 2-3 minutes before serving.
Notes
Use mayonnaise on the bottom halves to prevent sogginess. Watch the broiler carefully as tops can burn quickly. For extra crispiness on the bottom, pan-toast rolls lightly in butter before assembling. Assemble ahead and refrigerate up to 4 hours before baking.
- Prep Time: 8 minutes
- Cook Time: 12 minutes
- Category: Snack
- Cuisine: American
Nutrition
- Serving Size: 2 mini sandwiches
- Calories: 320
- Sodium: 450
- Fat: 18
- Saturated Fat: 10
- Carbohydrates: 28
- Protein: 12
Keywords: mini grilled cheese, Hawaiian rolls, snack, party food, kid-friendly, easy recipe, crispy tops, cheddar cheese