I still remember the first time I made these mini coffee cheesecakes—it was a rainy Saturday afternoon, and the smell of freshly brewed coffee was filling the kitchen. I wanted something small, indulgent, and just the right amount of creamy, not a giant cheesecake that would last forever (and tempt me daily). These mini coffee cheesecakes with that dreamy whipped topping quickly became my favorite little treat. I’ve made them so many times now, I’ve lost count, but every single time, they still feel like a tiny celebration in a cup.
What makes these mini coffee cheesecakes special? Well, it’s that perfect balance of rich, tangy cream cheese filling infused with real coffee flavor, topped with a fluffy, creamy whipped topping that melts in your mouth. Plus, they’re bite-sized, which means you can enjoy more than one without an ounce of guilt (at least that’s what I tell myself). If you love coffee and cheesecake, this easy homemade recipe is going to be your new obsession.
Why You’ll Love This Recipe
Okay, I need to be honest—this mini coffee cheesecakes recipe has completely spoiled me for regular desserts. Here are the big reasons why you’ll want to make this ASAP:
- Bite-sized perfection: These mini cheesecakes are just the right size for a quick indulgence. No cutting, no leftovers, just pure creamy joy in every spoonful. I made these for a brunch once, and everyone loved that they could have two or three without feeling overwhelmed.
- Rich coffee flavor without bitterness: Using brewed coffee and instant espresso powder gives these a deep, smooth coffee taste that’s balanced with the tanginess of cream cheese. The first time I nailed that flavor balance, I felt like a total barista.
- Dreamy whipped topping: The homemade whipped cream topping is light, not overly sweet, and ridiculously creamy. It’s the best finishing touch, making every bite feel luxurious.
- Made ahead friendly: You can prepare these a day in advance, which means less last-minute stress and more time to sip your own coffee while guests ooh and ahh.
Honestly, these mini coffee cheesecakes are the kind of recipe that makes you feel like a total kitchen rockstar without breaking a sweat. Whether you’re impressing friends or just treating yourself, they never disappoint.
What Ingredients You’ll Need
Here’s what I love about this ingredient list: you probably have most of these already in your pantry or fridge. I’ve broken them down so you get why each one matters (because that’s how you become a better baker, right?). Fair warning: I’m a bit picky about cream cheese brands, and I’ll spill the tea on that too.
- Cream cheese (16 oz / 450g, softened) — This is the star of the show. I always go for full-fat cream cheese (Philadelphia brand is my go-to). It gives that rich, creamy texture that just can’t be beat. Don’t use low-fat or whipped cream cheese here; the texture will suffer.
- Granulated sugar (3/4 cup / 150g) — Enough sweetness to balance the tang without overpowering the coffee flavor.
- Eggs (2 large, room temperature) — Helps set the cheesecake and gives it structure. Pro tip: room temperature eggs mix better and prevent curdling.
- Sour cream (1/2 cup / 120ml) — Adds creaminess and a slight tang that complements the coffee perfectly.
- Vanilla extract (1 teaspoon) — I’m a sucker for Nielsen-Massey vanilla. It’s worth every penny here.
- Instant espresso powder (1 tablespoon) — This amps up the coffee flavor without adding liquid. If you don’t have espresso powder, strong brewed coffee works too (just reduce the other liquid slightly).
- Brewed coffee (1/4 cup / 60ml, cooled) — I use my morning brew straight from the pot. It’s what makes these mini cheesecakes truly sing.
- Graham cracker crumbs (1 1/2 cups / 150g) — For the crust. I love a mix of crushed graham crackers and a pinch of cinnamon for warmth.
- Unsalted butter (6 tablespoons / 85g, melted) — Binds the crust together. Always unsalted so you can control the salt level.
- Heavy cream (1 cup / 240ml) — For the whipped topping. Use cold cream straight from the fridge for the best whip.
- Powdered sugar (2 tablespoons / 15g) — Sweetens the whipped cream just right without clumping.
Quick note: If you want to swap out the graham cracker crust for something gluten-free, crushed pecans or gluten-free cookies work great here. I’ve done it, and it’s delicious.
Equipment Needed
You don’t need a fancy kitchen to make these mini coffee cheesecakes—I’ve made them with the most basic setup and a lot of enthusiasm.
- Mini muffin pan (12-cup) — This is essential for getting that perfect mini size. Silicone or metal works; I have a trusty old metal one that’s seen better days but still does the job.
- Mixing bowls — I like two: one for the crust and one for the filling. It keeps things neat.
- Electric mixer or hand mixer — A must for getting that filling silky smooth and for whipping the cream into fluffy perfection.
- Measuring cups and spoons — Baking is science, so measuring is your friend. I use a kitchen scale for the graham cracker crumbs because I’m a little obsessed with precision.
- Spatula — For scraping down bowl sides and folding ingredients gently.
- Cup or small bowl — To brew the coffee or dissolve the espresso powder if needed.
Oh, and a toothpick for testing doneness is handy, too. Trust me, you don’t want to cut into these too early.
How to Make It: Step-by-Step

Alright, let’s make these irresistible mini coffee cheesecakes! I’m walking you through exactly how I do it, with all the little tips I’ve picked up.
- Preheat and Prep (10 minutes)
Preheat your oven to 325°F (165°C). Line your 12-cup mini muffin pan with paper liners or lightly grease each cup so the cheesecakes come out easily. - Make the Crust (5 minutes)
In a medium bowl, mix the graham cracker crumbs (1 1/2 cups / 150g) with melted unsalted butter (6 tablespoons / 85g) and a pinch of cinnamon if you’re feeling fancy. It should feel like wet sand. Press about a tablespoon of this mixture into the bottom of each muffin cup, packing it down firmly. This step makes sure you get a crispy, buttery base every time. - Prepare the Filling (10 minutes)
In a large bowl, beat the softened cream cheese (16 oz / 450g) with granulated sugar (3/4 cup / 150g) using an electric mixer on medium speed until smooth and creamy—no lumps. Add eggs (2 large, room temperature) one at a time, mixing well after each. Then mix in sour cream (1/2 cup / 120ml), vanilla extract (1 teaspoon), instant espresso powder (1 tablespoon), and cooled brewed coffee (1/4 cup / 60ml). Beat on low just until combined—overmixing can cause cracks later. - Fill and Smooth (5 minutes)
Spoon the filling evenly over each crust in the muffin pan—about 3 tablespoons per mini cheesecake. Smooth the tops gently with the back of a spoon or small spatula to make them look pretty. - Bake (18-22 minutes)
Bake in the preheated oven until the edges are set but the center still jiggles slightly—think custard consistency. This usually takes 18 to 22 minutes, but start checking at 18. The toothpick test here isn’t perfect since the center is creamy, but if it comes out with just a few moist crumbs, you’re golden. - Cool and Chill (2+ hours)
Let the cheesecakes cool in the pan for 15 minutes, then transfer to the fridge for at least 2 hours (overnight is even better). This chilling step is what firms them up and lets the flavors meld. - Make the Whipped Topping (5 minutes)
Just before serving, whip the cold heavy cream (1 cup / 240ml) with powdered sugar (2 tablespoons / 15g) using an electric mixer until soft peaks form. Spread or pipe this fluffy cream over each mini cheesecake. If you want, sprinkle a little cocoa powder or finely ground espresso on top for a fancy touch.
At this point, you’re basically a dessert hero. The best part? These mini coffee cheesecakes are as pretty as they are delicious.
My Best Tips & Techniques
Okay, here’s where I share everything I’ve learned from making these way too many times…
- Don’t skip softening the cream cheese: I’ve made that mistake. Cold cream cheese means lumps and a gritty texture. Give it at least an hour at room temp or zap it in 10-second bursts in the microwave.
- Use room temperature eggs: They blend better and prevent curdling. I leave mine on the counter while prepping other ingredients.
- Be gentle when mixing in the coffee and espresso: Overmixing after adding liquid can cause cracks. Mix just until everything is combined.
- Press the crust firmly: A loose crust means crumbly bites. I press mine down with the bottom of a small glass for even pressure.
- Don’t overbake: The center should jiggle slightly like a custard. If you wait until it’s completely firm, you’ll get dry mini cheesecakes.
- Chill them well: Patience here pays off. The cheesecake needs time to set and the flavors to develop.
- Whip cream last minute: Whipped cream can deflate or separate if made too early. I whip it right before serving every time.
Real talk: I’ve burned the edges more than once by leaving them in the oven too long, so set a timer and keep an eye on them. Also, cleaning as you go is a game-changer—less mess means more fun next time.
Ways to Mix It Up
Once you’ve nailed the basic mini coffee cheesecakes, here’s where you can get creative. I’ve tried all of these, and they all work beautifully.
- Mocha Magic: Add 1 tablespoon cocoa powder to the filling and increase espresso powder to 1.5 tablespoons. It’s like a chocolate-coffee party in your mouth.
- Caramel Swirl: Drizzle homemade or store-bought caramel sauce over the crust before adding the filling. It adds a sweet, buttery surprise in every bite.
- Chocolate Chip Surprise: Fold in ½ cup mini chocolate chips into the filling right before baking. They melt a bit and add delightful texture.
- Nutty Crust: Swap half the graham cracker crumbs with finely chopped toasted pecans or walnuts for extra crunch and flavor.
- Vanilla Bean Whipped Topping: Mix ½ teaspoon vanilla bean paste into the whipped cream for an elevated twist.
- Spiced Up: Add 1/2 teaspoon cinnamon and a pinch of nutmeg to the crust mixture for a warm, cozy flavor.
- Dairy-Free Version: Use vegan cream cheese and coconut cream for the topping. I haven’t tried this myself yet, but readers swear by it.
Trust me, these variations keep things exciting and let you customize your mini coffee cheesecakes for any occasion.
Serving Ideas & Storage
These mini coffee cheesecakes are a crowd-pleaser any time of day. Here’s how I like to serve and store them:
- Serving: I usually serve them chilled straight from the fridge with a dollop of that creamy whipped topping. If I’m feeling fancy, a light dusting of cocoa powder or a few chocolate shavings on top adds a nice touch.
- Pairings: They go insanely well with a fresh cup of coffee or an espresso shot. For brunch, I like them alongside fresh berries or sliced fruit. At dessert time, they’re perfect with a drizzle of chocolate or caramel sauce.
- Storing: Store leftovers in an airtight container in the fridge for up to 4 days. The crust stays crisp and the filling keeps its creamy texture.
- Freezing: These freeze beautifully! Pop them in a freezer-safe container, separated by parchment paper to prevent sticking. Freeze up to 2 months. Thaw overnight in the fridge and whip fresh topping just before serving.
- Reheating: I don’t recommend reheating since they’re best cold, but if you must, let them come to room temperature for about 15 minutes.
Pro tip: If they start to dry out a bit, turn leftover slices into decadent cheesecake parfaits layered with whipped cream and crushed cookies.
Nutritional Info & Health Benefits
I’m not a nutritionist, but I can tell you why I feel good about enjoying these mini coffee cheesecakes now and then.
| Nutrient | Per Mini Cheesecake (1/12th) |
|---|---|
| Calories | 190 |
| Protein | 4g |
| Carbohydrates | 15g |
| Fat | 13g |
| Sugar | 12g |
Health Highlights: The cream cheese and sour cream provide a good source of calcium and protein, which is more than your average dessert. The espresso powder adds flavor without extra sugar or calories. Of course, these are treats, so I like to enjoy them in moderation.
Compared to a typical slice of cheesecake, these minis offer portion control and less temptation to overindulge. Plus, making them at home means you can tweak the sugar and fat levels to your liking.
Final Thoughts
So that’s my mini coffee cheesecakes recipe! I know I’ve gone on about it, but when you find a dessert this creamy, coffee-flavored, and downright easy, you want to share it with everyone.
These mini cheesecakes have become my go-to for brunches, dinner parties, and those quiet moments when I just need a little pick-me-up. I hope you love making and eating them as much as my family does. Seriously, every time I pull these out, someone asks for the recipe (now you have it!).
Make it your own! Try the variations, swap ingredients based on what you have, add your favorite mix-ins. That’s how the best recipes evolve.
If you make this, I’d love to hear how it turns out! Drop a comment below and let me know what you think. Or snap a picture and tag me on Instagram @coffeecakediaries—I get genuinely excited seeing your versions.
Happy baking! Hope your kitchen smells as amazing as mine does right now.
FAQs
Q: Can I use instant coffee instead of espresso powder?
A: Yes! I’ve swapped instant coffee granules for espresso powder when I’m in a pinch. Use the same amount, but expect a slightly milder coffee flavor. If you want it stronger, add a touch more.
Q: How do I know when the mini cheesecakes are done?
A: The edges should be set and look firm, but the center will still jiggle a bit like custard. The toothpick test isn’t perfect here since the center is creamy, but if it comes out with a few moist crumbs, you’re good. Don’t wait until it’s completely firm or it might dry out.
Q: Can I make these without eggs?
A: I haven’t tried eggless versions myself, but some readers have used flax eggs (1 tablespoon ground flax + 3 tablespoons water per egg) with decent results. The texture changes slightly and might be a bit denser, but still tasty.
Q: Can I prepare these mini coffee cheesecakes ahead of time?
A: Absolutely! They actually taste better after chilling overnight. Just make sure to add the whipped cream topping right before serving so it stays fresh and fluffy.
Q: What can I substitute for the graham cracker crust?
A: Crushed digestive biscuits, shortbread cookies, or gluten-free cookie crumbs work well. You can also use finely chopped toasted nuts for a gluten-free, low-carb option. Just mix with melted butter the same way as the graham crackers.
Pin This Recipe!


Mini Coffee Cheesecakes Recipe Easy Homemade Creamy Whipped Topping
- Total Time: 2 hours 40 minutes
- Yield: 12 mini cheesecakes 1x
Description
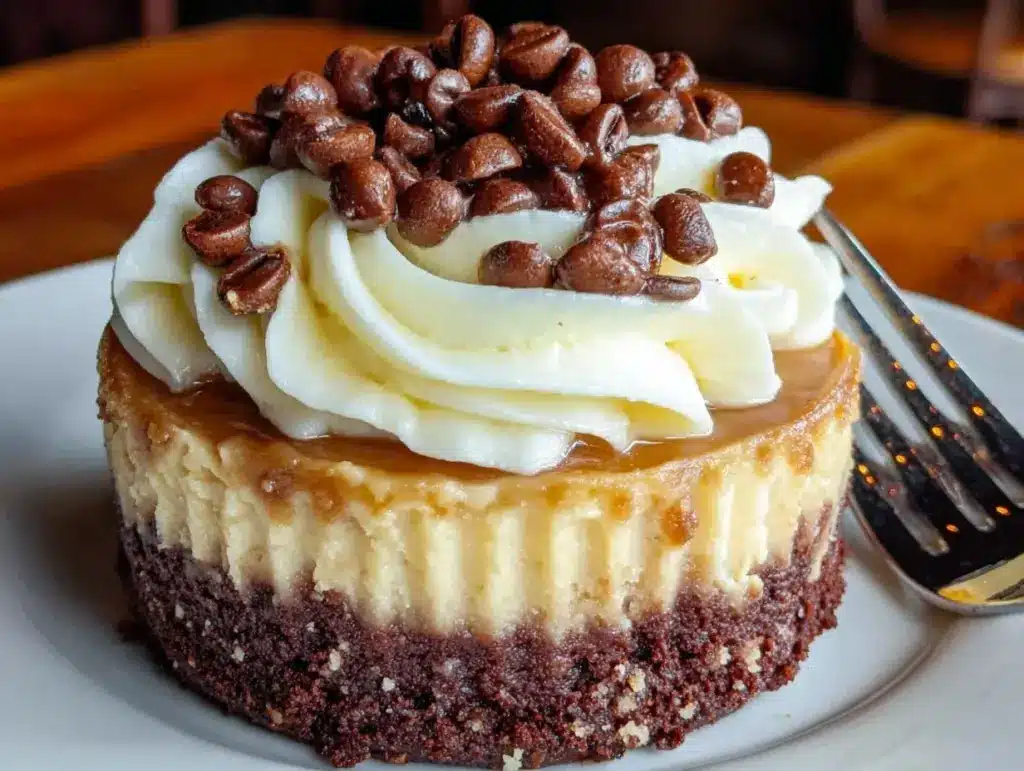
These mini coffee cheesecakes are bite-sized treats with a rich coffee-flavored cream cheese filling topped with a light, creamy homemade whipped topping. Perfect for portion control and easy indulgence.
Ingredients
- 16 oz (450g) full-fat cream cheese, softened
- 3/4 cup (150g) granulated sugar
- 2 large eggs, room temperature
- 1/2 cup (120ml) sour cream
- 1 teaspoon vanilla extract
- 1 tablespoon instant espresso powder
- 1/4 cup (60ml) brewed coffee, cooled
- 1 1/2 cups (150g) graham cracker crumbs
- 6 tablespoons (85g) unsalted butter, melted
- 1 cup (240ml) heavy cream, cold
- 2 tablespoons (15g) powdered sugar
- Pinch of cinnamon (optional, for crust)
Instructions
- Preheat your oven to 325°F (165°C). Line a 12-cup mini muffin pan with paper liners or lightly grease each cup.
- In a medium bowl, mix graham cracker crumbs with melted unsalted butter and a pinch of cinnamon if desired. Press about a tablespoon of this mixture into the bottom of each muffin cup, packing it down firmly.
- In a large bowl, beat softened cream cheese with granulated sugar using an electric mixer on medium speed until smooth and creamy. Add eggs one at a time, mixing well after each addition.
- Mix in sour cream, vanilla extract, instant espresso powder, and cooled brewed coffee. Beat on low speed just until combined to avoid overmixing.
- Spoon the filling evenly over each crust in the muffin pan, about 3 tablespoons per mini cheesecake. Smooth the tops gently.
- Bake for 18-22 minutes until edges are set but centers still jiggle slightly. Start checking at 18 minutes.
- Let cheesecakes cool in the pan for 15 minutes, then transfer to the fridge for at least 2 hours or overnight to chill and set.
- Just before serving, whip cold heavy cream with powdered sugar until soft peaks form. Spread or pipe the whipped topping over each mini cheesecake. Optionally, sprinkle cocoa powder or finely ground espresso on top.
Notes
Use full-fat cream cheese for best texture; avoid low-fat or whipped cream cheese. Soften cream cheese and use room temperature eggs to prevent lumps and curdling. Do not overmix after adding liquids to avoid cracks. Press crust firmly for a crispy base. Bake until edges are set but center jiggles slightly. Chill well before serving. Whip cream topping just before serving to keep it fluffy.
- Prep Time: 20 minutes
- Cook Time: 20 minutes
- Category: Dessert
- Cuisine: American
Nutrition
- Serving Size: 1 mini cheesecake (1
- Calories: 190
- Sugar: 12
- Fat: 13
- Carbohydrates: 15
- Protein: 4
Keywords: mini coffee cheesecakes, coffee dessert, bite-sized cheesecake, whipped topping, easy cheesecake recipe, espresso cheesecake, homemade dessert