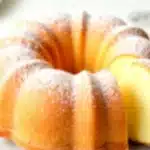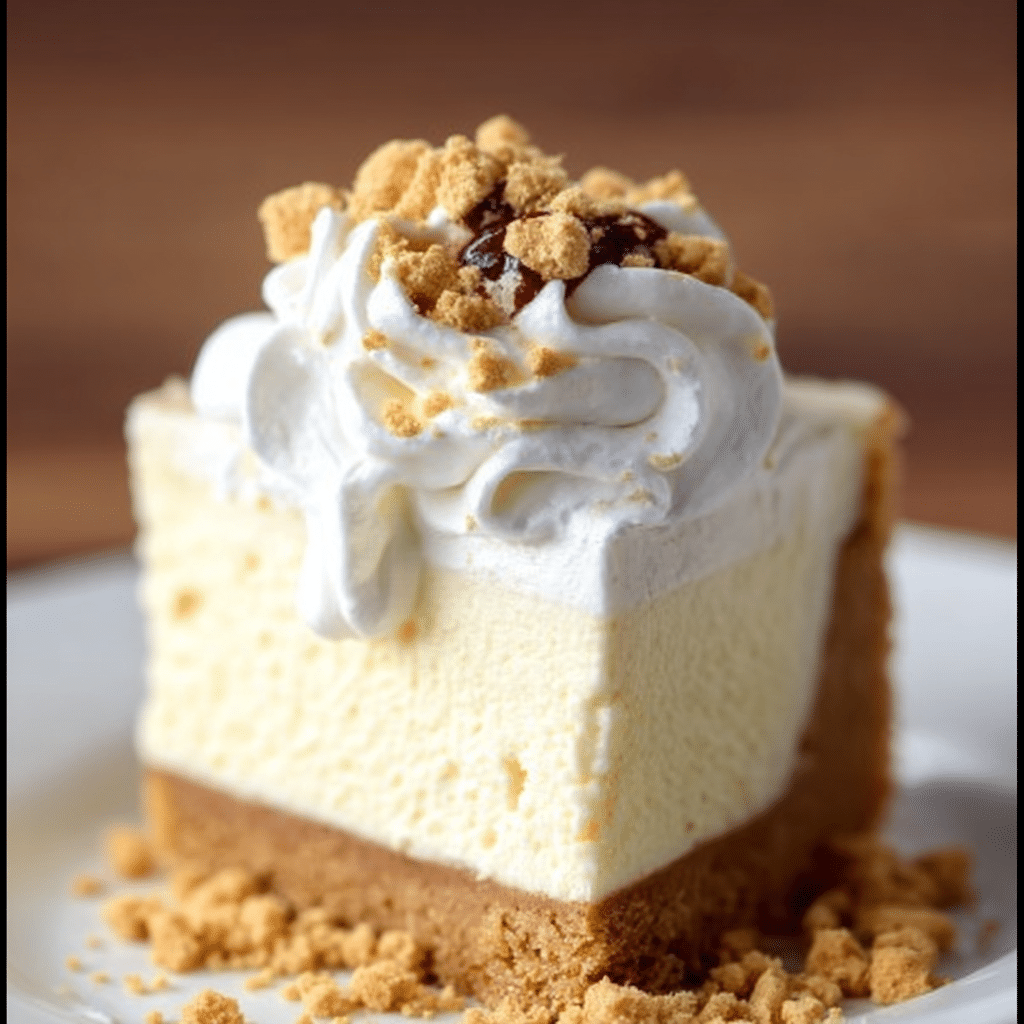
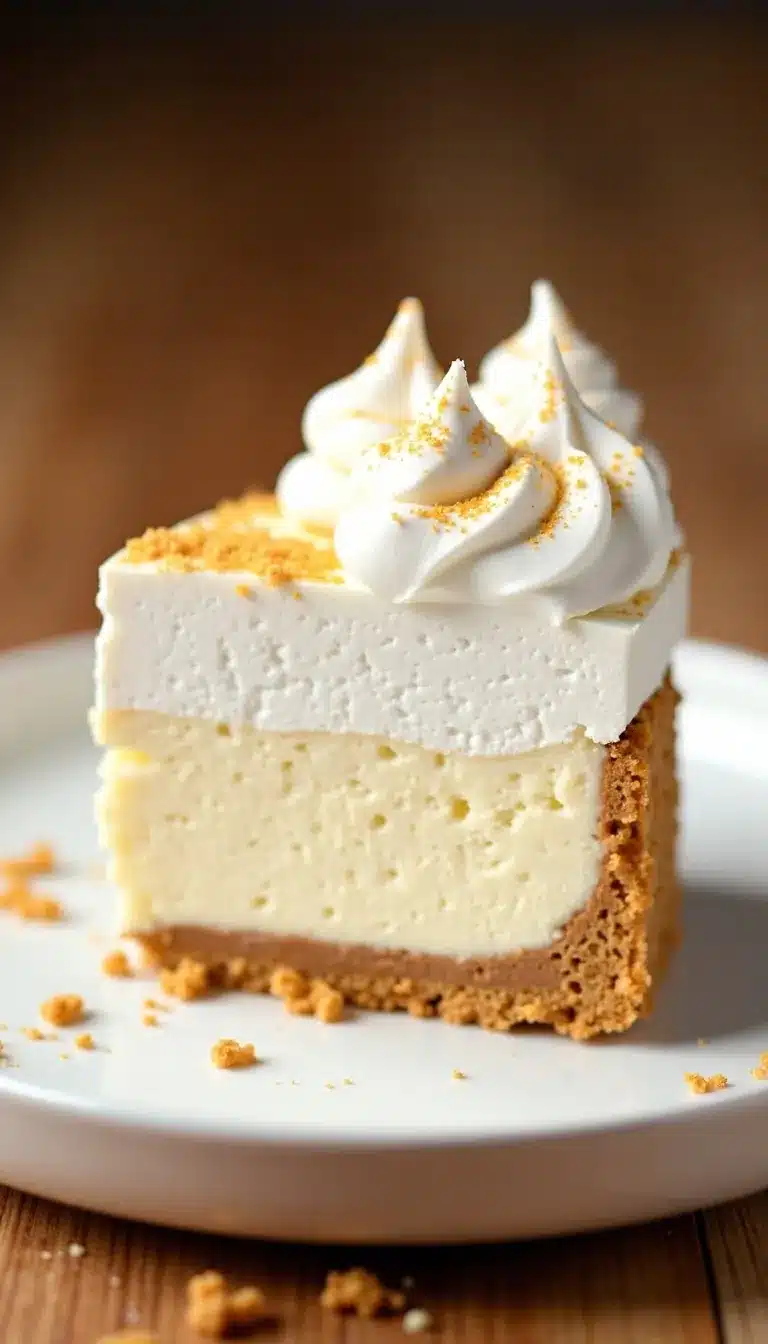
If you’re searching for a show-stopping, melt-in-your-mouth dessert that doesn’t require turning on the oven, this marshmallow cheesecake recipe easy no-bake dessert is going to be your new favorite. Imagine a dreamy, creamy cheesecake filling—light as a cloud—resting on a buttery graham cracker crust, all topped with billowy whipped cream and a sprinkle of marshmallows. It’s as simple as it is indulgent! I still remember the first time I made this for my family’s summer BBQ—no one believed it was no-bake, and the platter was wiped clean in minutes. Sometimes, the best desserts are the ones that look fancy but secretly don’t take a ton of effort.
Marshmallows do wonders here, giving the cheesecake its signature sweetness and that irresistible, fluffy texture. Why fuss with water baths and eggs when you can whip up something so divine with barely any heat? Plus, this no-bake marshmallow cheesecake fits right into any season—cool and refreshing in summer, yet comforting enough for winter celebrations. There’s a reason this recipe is a classic at potlucks and family birthdays in my house. Did you know marshmallows have been around since Ancient Egypt? Back then, they were made from the mallow plant and honey—not quite the squishy treat we know today, but still pretty awesome.
This recipe combines that bit of history with modern convenience. Whether you’re a cheesecake pro or a nervous first-timer, this easy no-bake marshmallow cheesecake is foolproof and always gets rave reviews. Ready to make a dessert that’s as fun to look at as it is to eat? Let’s dive in!
Why You Will Love This Marshmallow Cheesecake Recipe
This marshmallow cheesecake recipe easy no-bake dessert brings together the best of all worlds: creamy texture, no-fuss prep, and flavors that everyone—from picky eaters to gourmet devotees—will adore. It draws inspiration from American dessert culture, where marshmallows and cheesecakes both have a beloved place. Honestly, there’s something so nostalgic about that marshmallow flavor—reminds me of summer campfires, s’mores, and all the sticky-fingered fun of childhood.
Cheesecake itself has roots going back to Ancient Greece, but the no-bake cheesecake really took off in the U.S. around the 1950s and 60s when quick, “refrigerator” desserts became all the rage. My grandma used to make a version with Jell-O, but I’ve updated it a bit by using melted marshmallows for that airy texture. Over time, I’ve played with the ratio of marshmallow to cream cheese to get the perfect balance—light but still rich.
This dessert is a lifesaver for hot days when you don’t want to turn on the oven. But honestly, it’s just as fun in winter, when you want a dreamy, pillowy sweet treat after a hearty meal. I’ve made this for everything from baby showers to Valentine’s Day (try pink marshmallows for a festive twist!). The recipe is super flexible, too—you can dress it up for holidays or keep it simple for everyday cravings.
And let’s face it, who can resist that classic combo of marshmallows and cream cheese? It’s a crowd-pleaser with kids and adults alike. Every time I bring it to a potluck, folks ask for the recipe. It’s the kind of dessert that sparks conversation—people always want to know the secret behind that impossibly fluffy filling! If you’re looking for a dessert that feels special but doesn’t stress you out, this is it.
Ingredient Discussion: Choosing the Best for Marshmallow Cheesecake
The magic of this marshmallow cheesecake recipe easy no-bake dessert lies in the quality and harmony of its ingredients. Here’s a closer look at what you’ll need and how to pick the best of each:
- Cream Cheese: The backbone of any cheesecake. For the smoothest filling, use full-fat cream cheese, preferably the block kind (not whipped or in a tub). Room temperature is a must for easy blending. My go-to is Philadelphia, but store brands work fine too. If you need a lower-fat option, Neufchâtel cheese is an easy swap, though the texture will be slightly lighter.
- Marshmallows: Classic mini marshmallows melt quickly and evenly, making them perfect here. If you only have large ones, just chop them up. Vegan or allergy-friendly marshmallows (like Dandies) are great substitutes—just double-check the melting instructions. For a fun twist, try flavored or colored marshmallows for holidays!
- Graham Crackers: The crust’s foundation. Honey Maid is the classic choice, but you can use any brand or even digestive biscuits (for a British vibe). For gluten-free needs, there are several good GF graham-style crackers out there. Crush them finely for the best texture, and if you want a chocolatey spin, swap half for chocolate wafers.
- Butter: Salted or unsalted both work, but I prefer unsalted so I can control the flavor. Melt it gently (microwave or stovetop) and let it cool a bit before mixing with crumbs. If you’re dairy-free, coconut oil makes a decent replacement, though you’ll get a slight coconut flavor.
- Heavy Cream: This is what turns the filling from dense to dreamy. Whip it until soft peaks form—over-whipping can make the filling grainy. If you’re out of cream, stabilized whipped topping (like Cool Whip) can be used in a pinch, but fresh cream definitely tastes better.
- Vanilla Extract: Adds depth and warmth to the flavor. Real vanilla is always best, but imitation works if that’s what you have. I sometimes use vanilla bean paste for those pretty flecks.
- Optional Toppings: Whipped cream, extra marshmallows, chocolate shavings, or fresh berries. Strawberries or raspberries add a pop of color and a tangy contrast. My kids love a drizzle of chocolate sauce!
When sourcing ingredients, local grocery stores should have everything, but specialty food shops or online stores are great for vegan or unique marshmallows. I try to shop for cream cheese and cream just a day or two before making the cheesecake—they’re freshest that way. For the crust, make sure your crackers or cookies are crisp and not stale. And don’t be afraid to personalize: a dash of cinnamon in the crust, or swapping in lemon zest for a citrusy note, are both delicious twists.
Equipment Needed for No-Bake Marshmallow Cheesecake
One of the best things about this marshmallow cheesecake recipe easy no-bake dessert is that you don’t need fancy gadgets—just a few basics:
- Springform Pan (9-inch/23cm): This is ideal for easy release and pretty presentation. If you don’t have one, a pie plate or square dish works—just line it with parchment for easy removal.
- Mixing Bowls: At least two—one for the crust, one for the filling. Glass or stainless steel are easiest to clean.
- Electric Mixer: Hand or stand mixer for blending the cream cheese and whipping the cream. You can do it by hand, but it’ll take some muscle!
- Rubber Spatula: For scraping every last bit of filling out of the bowl (trust me, you don’t want to leave any behind).
- Measuring Cups and Spoons: Precise measurements matter, especially for the crust and filling ratios.
- Small Saucepan: For melting the marshmallows gently with cream. Nonstick makes cleanup easier.
- Plastic Wrap or Foil: To cover the cheesecake as it chills.
If you’re on a budget, you can easily use a deep cake pan or even a casserole dish. I’ve made this in a loaf pan for mini cheesecakes before! To keep your mixer in top shape, wipe down the beaters and body right after use—marshmallow can get sticky fast. And if you’re whipping cream by hand, a chilled metal bowl and whisk make the job a little easier (and more fun for kids to help with!).
How to Make Marshmallow Cheesecake: Step-by-Step Method
-
Prepare the Crust:
- 2 cups (200g) graham cracker crumbs
- 1/2 cup (115g) unsalted butter, melted
- 2 tbsp (25g) granulated sugar (optional for extra sweetness)
Mix graham crumbs, melted butter, and sugar in a medium bowl until you get a wet sand texture (about 2 minutes). Press firmly into the base of a 9-inch (23cm) springform pan—use the bottom of a glass for an even crust. Refrigerate for at least 20 minutes to set.
-
Melt the Marshmallows:
- 3 cups (150g) mini marshmallows
- 1/2 cup (120ml) heavy cream
In a small saucepan over low heat, combine marshmallows and 1/2 cup cream. Stir constantly until marshmallows are just melted and smooth, about 5-6 minutes. (Don’t let it boil or burn—it should stay creamy.) Let cool for 10 minutes so it doesn’t melt the cream cheese in the next step.
-
Beat the Cream Cheese:
- 16 oz (450g) full-fat cream cheese, at room temperature
- 1 tsp vanilla extract
In a large mixing bowl, beat the cream cheese and vanilla until very smooth and fluffy—about 2-3 minutes. Scrape down the bowl often to avoid lumps. If your cream cheese is too cold, you might get a few stubborn bits, but a quick microwave (5 seconds) softens it up.
-
Combine the Filling:
Slowly pour the cooled marshmallow mixture into the cream cheese, beating as you go. This step takes a little patience—add it in batches and mix well after each addition. The goal is a silky, lump-free filling.
-
Whip the Cream:
- 1 cup (240ml) heavy cream, chilled
In a separate cold bowl, whip the remaining cream to soft peaks (about 2-3 minutes with a hand mixer). Don’t overbeat or it will turn grainy. Gently fold the whipped cream into the marshmallow-cream cheese mixture—use a spatula and a light hand to keep the filling airy.
-
Assemble the Cheesecake:
Pour the filling over the chilled crust. Smooth the top with a spatula. For a fancy finish, swirl the top or tap the pan gently on the counter to release air bubbles.
-
Chill:
Cover the cheesecake with plastic wrap or foil and refrigerate for at least 6 hours, preferably overnight. The longer it chills, the easier it’ll slice.
-
Garnish and Serve:
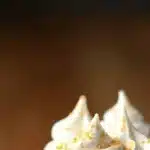
Release the cheesecake from the pan. Top with whipped cream, extra marshmallows, or berries. Slice with a hot, dry knife for clean edges (run under hot water and wipe dry between slices—trust me, it works wonders!).
Prep time: 30 minutes
Chill time: 6 hours or overnight
Serves: 12
Cooking Tips & Techniques for the Perfect No-Bake Marshmallow Cheesecake
Making this marshmallow cheesecake recipe easy no-bake dessert isn’t tricky, but a few pro moves help guarantee success. First, always use room temperature cream cheese—it blends smoother and prevents lumps. Cold cream cheese can make the filling grainy, and trust me, it’s not as dreamy.
When melting marshmallows, low and slow is the name of the game. High heat can scorch them, leaving you with a weird, chewy texture. If you notice any sticking, add a splash more cream and keep stirring. Let the melted mix cool a bit before it meets the cream cheese—otherwise, you risk a runny filling that won’t set right.
Folding the whipped cream takes a light touch. Overmixing can deflate your beautiful filling, so use gentle, sweeping motions. If you accidentally over-whip your cream and it looks a little stiff, add a tablespoon of fresh cream and gently stir to loosen it up. Been there, done that.
Patience pays off with chilling. Rushing the chill time can leave you with a soft, messy cheesecake. I once tried to serve mine after three hours and, well, let’s just say it was more like cheesecake pudding. Overnight is best for neat slices and the perfect texture.
For the crust, use the bottom of a measuring cup or glass to press the crumbs firmly—this keeps the crust from crumbling when you slice. And always line your springform pan base with parchment paper for fuss-free removal (I learned that the hard way after a few stuck crusts!).
Marshmallow Cheesecake Variations & Adaptations
This marshmallow cheesecake recipe easy no-bake dessert is incredibly flexible. Here are a few ways to make it your own:
- Gluten-Free Version: Swap regular graham crackers for gluten-free ones or use crushed gluten-free cookies. Works perfectly—no one can tell the difference!
- Total Time: 6 hours 30 minutes
- Yield: 12 servings 1x
- 2 cups graham cracker crumbs
- 1/2 cup unsalted butter, melted
- 2 tablespoons granulated sugar (optional)
- 3 cups mini marshmallows
- 1/2 cup heavy cream (for melting marshmallows)
- 16 oz full-fat cream cheese, at room temperature
- 1 teaspoon vanilla extract
- 1 cup heavy cream, chilled (for whipping)
- Optional toppings: whipped cream, extra marshmallows, chocolate shavings, fresh berries
- Mix graham cracker crumbs, melted butter, and sugar in a medium bowl until the texture resembles wet sand (about 2 minutes). Press firmly into the base of a 9-inch springform pan. Refrigerate for at least 20 minutes to set.
- In a small saucepan over low heat, combine mini marshmallows and 1/2 cup heavy cream. Stir constantly until marshmallows are just melted and smooth, about 5-6 minutes. Let cool for 10 minutes.
- In a large mixing bowl, beat the cream cheese and vanilla extract until very smooth and fluffy, about 2-3 minutes. Scrape down the bowl often.
- Slowly pour the cooled marshmallow mixture into the cream cheese, beating as you go. Add in batches and mix well after each addition until the filling is silky and lump-free.
- In a separate cold bowl, whip the remaining 1 cup heavy cream to soft peaks (about 2-3 minutes with a hand mixer).
- Gently fold the whipped cream into the marshmallow-cream cheese mixture using a spatula and a light hand to keep the filling airy.
- Pour the filling over the chilled crust and smooth the top with a spatula. Tap the pan gently to release air bubbles.
- Cover the cheesecake with plastic wrap or foil and refrigerate for at least 6 hours, preferably overnight.
- Release the cheesecake from the pan. Top with whipped cream, extra marshmallows, or berries. Slice with a hot, dry knife for clean edges.
- Prep Time: 30 minutes
- Cook Time: 6 hours (chill time)
- Category: Dessert
- Cuisine: American
- Serving Size: 1 slice (1/12 of cheesecake)
- Calories: 380
- Sugar: 22
- Sodium: 260
- Fat: 27
- Saturated Fat: 16
- Carbohydrates: 31
- Protein: 4
<
Marshmallow Cheesecake Recipe Easy No-Bake Dessert Everyone Loves
Description
This dreamy, no-bake marshmallow cheesecake features a fluffy, creamy filling atop a buttery graham cracker crust, all finished with whipped cream and marshmallow topping. It’s a crowd-pleasing dessert that’s easy to make and perfect for any occasion—no oven required!
Ingredients
Instructions
Notes
For best results, use room temperature cream cheese and chill the cheesecake overnight for clean slices. Line the pan with parchment for easy removal. You can personalize the crust with a dash of cinnamon or swap in chocolate wafers. For gluten-free, use gluten-free graham crackers. Vegan marshmallows work as a substitute. Always fold whipped cream gently to keep the filling airy.
Nutrition
Keywords: marshmallow cheesecake, no-bake cheesecake, easy dessert, summer dessert, potluck dessert, creamy cheesecake, marshmallow dessert, no oven cheesecake