I’m not sure when chicken breast became my kitchen hero, but I do know the exact moment it became a fall obsession. It was one of those chilly October evenings when, honestly, I’d planned soup for dinner but realized I was out of rotisserie chicken. I grabbed two thawed chicken breasts, tossed them in my air fryer, and—no joke—ended up with the juiciest, most flavorful chicken I’ve ever made. I sliced it up and dropped it into my cozy vegetable soup, and suddenly dinner felt way more special.
Here’s the thing: I’ve tried every way to cook chicken breast. Pan-seared (messy), baked (sometimes dry), poached (eh, bland), slow-cooked (great, but who has the time?). Air fryer chicken breast is my hands-down winner. It’s fast, consistently juicy, and gets that little bit of golden crispness on the outside that just makes you want to sneak bites before dinner.
Since then, this air fryer chicken breast recipe has become my go-to for topping autumn soups, bulking up salads, or just for meal prep. And if you’re a soup-for-dinner person once the weather turns, trust me: adding juicy air fryer chicken breast on top is a game changer. Also, if you’re pinning recipes for cozy fall meals, this one is a must-save (I’m talking Pinterest gold).
Why You’ll Love This Juicy Air Fryer Chicken Breast Recipe
Okay, I’m not exaggerating when I say this recipe has changed my fall cooking routine. Here’s why I keep coming back to it—and why you’ll probably do the same:
- Super Quick—20 Minutes Start to Finish: I can get these chicken breasts from fridge to bowl in the time it takes to chop veggies for soup. Perfect for weeknights when dinner needs to happen, like, now.
- Juiciness You Can Literally See: The air fryer locks in moisture so well that I get nervous slicing into other chicken recipes now. I mean, who wants dry chicken in their soup?
- Minimal Cleanup: No splattered pans. No sheet trays to scrub. I just rinse the air fryer basket and call it a night.
- Endlessly Customizable: I switch up the seasoning every time—sometimes smoky paprika, sometimes classic Italian. It always works.
- Protein-Packed Meal Prep: I double the batch, slice up the leftovers, and toss them into salads or sandwiches all week.
This is the kind of recipe that makes you feel like you have your life together. It’s my “I forgot to thaw dinner” solution, my “last-minute potluck contribution,” and, honestly, my secret weapon for making basic fall soups taste restaurant-worthy. Picky eaters? No problem. Food snobs? They’ll ask you for your “method.” That’s why you’ll love it.
What Ingredients You’ll Need for Juicy Air Fryer Chicken Breast
Here’s what I love about this ingredient list: it’s short, simple, and flexible. You probably have most of it already. I’m picky about a couple things, and I’ll explain why.
- Boneless, Skinless Chicken Breasts (2 large, about 1 lb / 450g) — I use fresh whenever possible, but thawed frozen works just as well. Pat them dry for best results.
- Olive Oil (1 tablespoon / 15ml) — Helps the seasonings stick and gives the chicken a gorgeous golden finish. I use California Olive Ranch for its grassy flavor, but any extra-virgin works.
- Salt (¾ teaspoon) — Kosher salt is my go-to for even seasoning. Table salt is fine, but use a little less.
- Black Pepper (½ teaspoon) — Freshly cracked if you have it. Makes all the difference!
- Garlic Powder (½ teaspoon) — Not fresh garlic, trust me. Powder gives even coverage and doesn’t burn in the air fryer.
- Smoked Paprika (½ teaspoon) — Adds color and a subtle smoky flavor. Sweet paprika works if you’re not into smoke.
- Dried Italian Herbs (½ teaspoon) — Optional, but I love the herby vibe in fall soups. Oregano, basil, thyme—whatever you have.
Ingredient Notes & Substitutions:
- Chicken thighs? Totally doable—just increase cook time by 2-3 minutes.
- No olive oil? Avocado oil is great, or even melted butter for rich flavor.
- Seasonings: Swap in taco, Cajun, Greek, or curry blends. I’ve tried everything short of cinnamon (but hey, you do you).
- Frozen chicken breasts? You can air fry straight from frozen; just add 7-8 minutes and season after the first half.
Quick tip: If you’re prepping for soup, slice the chicken before adding to your bowl—makes for perfect bites and extra flavor in every spoonful. Also, I keep pre-portioned chicken breasts in the freezer for nights when dinner is a “what can I make in 20 minutes” situation.
Fun fact: I learned the hard way that brining isn’t necessary if you use the air fryer—saves time and still comes out juicy.
Equipment Needed to Make Air Fryer Chicken Breast
You don’t need a fancy kitchen setup for this recipe. I’ve made it with the most basic tools, and it still turns out perfect.
- Air Fryer — Mine is a basic 4-quart basket style that’s survived years of heavy use. Any brand works, but if you’re shopping, I like the Ninja or Cosori models for consistent heat.
- Tongs — For flipping the chicken halfway. I use cheap silicone-tipped ones so I don’t scratch the basket.
- Small Mixing Bowl — For tossing chicken with oil and seasonings. Anything works, even a large plate in a pinch.
- Instant-Read Thermometer — Optional, but highly recommended for perfect doneness. I’m obsessed with my ThermoWorks pen.
- Cutting Board & Sharp Knife — For slicing after cooking. My wooden board has seen so much chicken action, it’s basically seasoned at this point.
No air fryer? You can bake in a regular oven at 425°F (220°C) for about 20 minutes, but the texture will be slightly different (still good, just not quite as magical). Also, dollar store tongs work just as well as the fancy ones—trust me, I’ve tried both.
If you’re a kitchen scale kind of person, weighing chicken breasts ensures even cooking. But honestly, I eyeball it most nights and it’s still juicy.
How to Make Juicy Air Fryer Chicken Breast – Step by Step

Alright, let’s make this! I’m walking you through exactly how I do it, with all the little tricks I’ve picked up.
- Prep the Chicken (5 minutes): Pat the chicken breasts dry with paper towels. This helps the oil and seasonings stick, and gives you crispier edges. If breasts are super thick, butterfly or pound them to about 1-inch (2.5cm) thickness for even cooking.
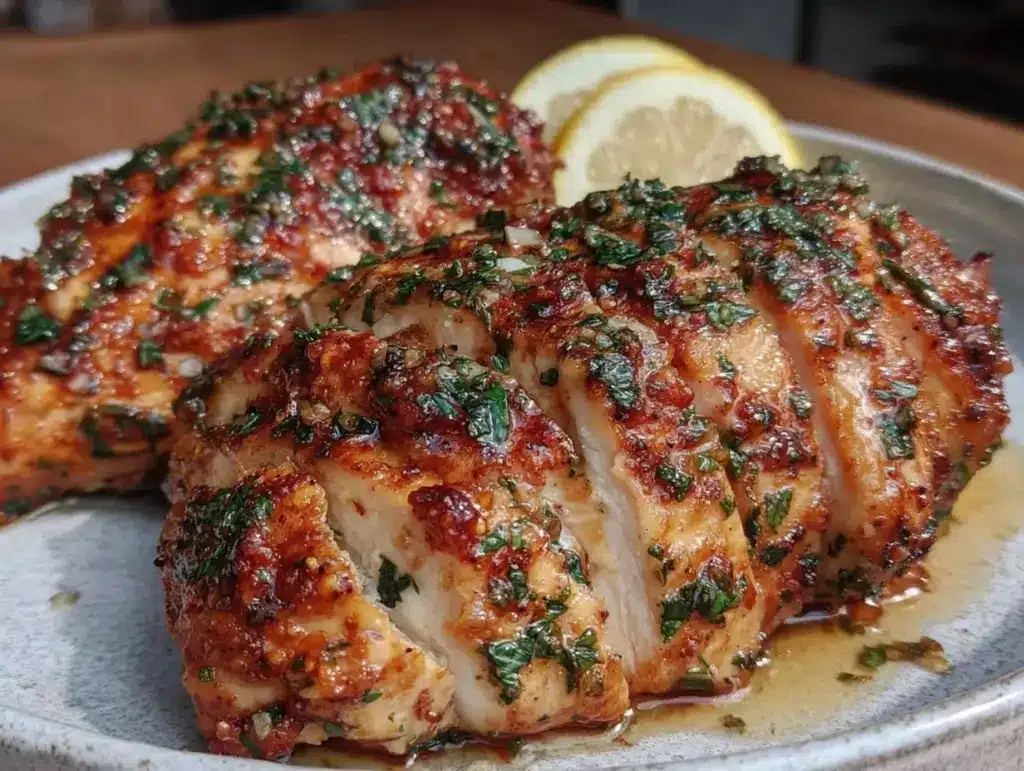
- Season Generously (2 minutes): In a bowl, toss chicken breasts with olive oil, salt, pepper, garlic powder, paprika, and herbs. Rub it all over, making sure it’s coated evenly. The color should be vibrant and the chicken a little shiny.
- Preheat the Air Fryer (2 minutes): Set your air fryer to 375°F (190°C). I always preheat for a couple minutes—it makes a difference in browning! (If you forget, don’t stress. Just add an extra minute to the cook time.)
- Arrange and Cook (12-15 minutes): Place the chicken breasts in the air fryer basket in a single layer. Don’t crowd them—space means better air circulation and more juiciness. Air fry for 7 minutes, then flip with tongs. Cook another 6-8 minutes, depending on thickness.
- Check for Doneness (1 minute): Use a thermometer in the thickest part—you’re aiming for 165°F (74°C). If you don’t have one, slice into the center. Juices should run clear, and the meat should be opaque with no pink.
- Rest (5 minutes): Remove chicken from air fryer and let it rest on a cutting board for 5 minutes. This is non-negotiable—the juices redistribute and you get that mouthwatering moistness.
- Slice and Serve (2 minutes): Slice across the grain for maximum tenderness. Admire those juicy slices and toss them into your favorite cozy fall soup (or just eat straight from the cutting board—I won’t judge).
If your chicken looks dry after air frying, you probably overcooked or skipped the oil. Don’t worry—just drizzle a little broth over slices before adding to soup. I’ve saved more than one batch this way!
Pro tip: The edges should have a little browning and the surface should glisten. You’ll know it’s perfect when your kitchen smells like roasted chicken and you’re tempted to eat dinner early.
My Best Tips & Air Fryer Chicken Techniques
Okay, here’s where I share everything I’ve learned from making this way too many times…
- Don’t Overcrowd the Basket: Air needs space to circulate. If you’re making a double batch, do it in two rounds.
- Oil Is Key: Even a little bit of olive oil makes a huge difference in texture. I once skipped it (trying to save calories) and the chicken was meh.
- Rest After Cooking: Letting the chicken sit for 5 minutes is like magic for juiciness. I used to rush this step and always wondered why my chicken was dry.
- Use a Thermometer: It’s the only way to guarantee you don’t overcook. I started using one after too many “is this done?” moments.
- Season Boldly: Don’t be shy with salt and spices—air fryer cooking can mute flavors a bit, so I go about 10% heavier than I would for oven-roasting.
- Pound Even Thickness: If your chicken breasts are uneven, pound them gently with a rolling pin or meat mallet. Even thickness = even cooking.
- Flip Halfway: This is not optional if you want all-over golden color. I set a timer because I always forget.
- Batch Cooking: Make extra and slice for salads, wraps, or just snacking. It’s meal prep magic.
Real talk: I’ve burned chicken by forgetting to flip, and I’ve underseasoned more times than I care to admit. These little tweaks are what finally got me to “juicy every time.”
Also, if you want extra crispy edges, air fry at 400°F (200°C) for the last 2 minutes. Just watch closely so it doesn’t dry out.
Ways to Mix Up Your Air Fryer Chicken Breast (Soup Edition and Beyond)
Once you’ve nailed the basic version, here’s where you can get creative. I’ve tried all of these—some are soup-specific, some just for fun.
- Lemon Herb Style: Add 1 teaspoon lemon zest and fresh chopped parsley to the seasoning. Sliced on top of chicken noodle soup? Heavenly.
- Smoky BBQ: Toss cooked chicken in a spoonful of BBQ sauce after air frying and serve on top of tomato-based soups. Kids love this one.
- Spicy Cajun: Swap paprika for Cajun seasoning and add a pinch of cayenne. Perfect for adding fire to corn chowder or gumbo.
- Honey Mustard: Brush breasts with a mix of honey and Dijon mustard before seasoning. Sweet-savory perfection in butternut squash soup.
- Gluten-Free: No changes needed—this recipe is naturally gluten-free. Just double-check your spice blends if you’re sensitive.
- Dairy-Free: All good here—no dairy in sight. If you want extra richness, drizzle with a little olive oil before serving.
- Low-Sodium: Cut salt in half and amp up herbs and garlic powder. Tastes just as good.
- Meal Prep Pro: Slice cooked chicken and freeze in small bags—pull out a portion for soup, salad, or quick tacos.
Flavor add-ins I’ve tested: chili powder for heat, rosemary for earthiness, cumin for a Tex-Mex vibe. You can even brine the chicken for an hour before air frying, but honestly, I skip it most nights and it’s juicy anyway.
And if you’re feeling wild, sprinkle shredded cheese on the chicken for the last 2 minutes in the air fryer. Instant melt and a little bit of crust—kind of like a soup gratin topper!
Serving Ideas & Storage for Juicy Air Fryer Chicken Breast
How to Serve
- Soup Topper: Slice and layer on top of any fall soup—potato leek, minestrone, pumpkin, you name it. The warmth of the chicken plus the hot broth is peak comfort.
- Salads: Cool and cube for salads. I do this for lunch all week.
- Sandwiches & Wraps: Chop and mix with a little mayo, mustard, and herbs for easy chicken salad sandwiches.
- On Its Own: Sometimes I just eat slices with a sprinkle of flaky salt. No shame.
Presentation Tips
- Slice against the grain for super tender bites.
- Garnish with fresh herbs or a squeeze of lemon for color (Pinterest trick: pile slices on soup, sprinkle with parsley, and snap a pic!).
- For parties, serve sliced chicken breast on a board with dipping sauces—ranch, honey mustard, or sriracha mayo.
Storage Instructions
- Room Temp: Not recommended for more than 2 hours (food safety).
- Refrigerator: Store in an airtight container for up to 4 days. I reheat slices in the microwave for about 30 seconds (works great) or toss straight into hot soup to warm.
- Freezer: Slice and freeze in single layers—lasts 2 months. Reheat straight from frozen in the microwave or air fryer (3-4 minutes at 350°F).
If it starts getting dry after a few days, drizzle with a little broth or olive oil before reheating. I also love making chicken quesadillas with leftovers—seriously delicious.
Pro tip: If you want to make soup ahead, add the sliced chicken at the very end so it stays juicy. Overcooked chicken in soup is just sad.
Nutritional Info & Health Benefits of Air Fryer Chicken Breast
I’m not a nutritionist, but here’s why I feel good about serving this recipe on repeat.
| Per 4-oz (113g) Serving | Amount |
|---|---|
| Calories | ~155 |
| Protein | 26g |
| Carbs | 0g |
| Fat | 5g |
| Sodium | 420mg (with salt) |
- Lean Protein: Chicken breast is king for high protein, low fat. Keeps you full and energized.
- No Added Sugar or Carbs: Great for low-carb or keto-friendly diets.
- Lower Calories: Air frying means no heavy breading or deep frying.
- Micronutrients: Chicken breast is a solid source of B vitamins and selenium.
Personally, I love knowing dinner is healthy and satisfying without feeling “diet-y.” This recipe is perfect for meal prep and helps me avoid the 5pm “snack attack” that always comes with cold weather.
Dietary notes: Contains no gluten, dairy, or nuts. Can be made low-sodium (just reduce the salt). Not vegetarian, but you probably guessed that.
Real talk: Compared to store-bought rotisserie chicken (which is delicious, don’t get me wrong), this homemade air fryer version is lower in sodium and way juicier.
Final Thoughts – Why This Air Fryer Chicken Breast Is My Fall Staple
So that’s my juicy air fryer chicken breast recipe—my not-so-secret weapon for easy, cozy fall soups (and pretty much every other meal). I know I’ve gone on about it, but when you find a recipe this reliable, you want to shout about it from the rooftops.
This has become my go-to for weeknights, last-minute guests, and meal prep. It never lets me down—always juicy, always flavorful, and always ready to make a basic soup feel special.
Make it your own! Change up the seasoning, use it for salads, sandwiches, or just pile it on soup like I do. The variations are endless, and that’s half the fun.
If you make this, I’d love to hear how it turns out! Drop a comment below, or snap a picture and tag me on Instagram @mycozykitchen—seeing your versions honestly makes my day. Got questions? Ask away in the comments. I check them every day and will happily help you troubleshoot.
Happy cooking! Hope your kitchen smells as good as mine does right now (and that your soup game gets a major upgrade).
FAQs About Juicy Air Fryer Chicken Breast
Q: Can I use frozen chicken breasts in the air fryer?
A: Yep! I’ve done this plenty of times when I forget to thaw. Just add 7-8 minutes to the cook time and season after the first half (so spices stick). The texture is still juicy—just make sure to check for doneness with a thermometer.
Q: What’s the best seasoning for fall soups?
A: My go-to is garlic powder, smoked paprika, and Italian herbs. But honestly, a pinch of sage or thyme gives chicken a true autumn vibe. I switch it up depending on the soup—curry for pumpkin, rosemary for potato leek.
Q: How do I know when air fryer chicken breast is done?
A: The foolproof way is using an instant-read thermometer—165°F (74°C) in the thickest part. If you don’t have one, slice into the center; it should be opaque with clear juices. I trust my nose, too—when it smells roasted, it’s usually ready.
Q: Can I meal prep with air fryer chicken breast?
A: Absolutely. I make a double batch, slice, and store in airtight containers for up to 4 days. It’s perfect for tossing into soups, salads, wraps, or just snacking. Freezes great, too!
Q: What if my chicken breast turns out dry?
A: Usually means it was overcooked or not enough oil was used. Next time, check the temp earlier and don’t skip the resting step. If it’s already cooked, drizzle with broth or olive oil before serving—works every time.
Pin This Recipe!


Juicy Air Fryer Chicken Breast
- Total Time: 20 minutes
- Yield: 2 servings 1x
Description
This easy air fryer chicken breast recipe delivers juicy, flavorful chicken in just 20 minutes—perfect for topping cozy fall soups, salads, or meal prep. Minimal cleanup and endlessly customizable with your favorite seasonings.
Ingredients
- 2 large boneless, skinless chicken breasts (about 1 lb)
- 1 tablespoon olive oil
- 3/4 teaspoon kosher salt
- 1/2 teaspoon black pepper
- 1/2 teaspoon garlic powder
- 1/2 teaspoon smoked paprika (or sweet paprika)
- 1/2 teaspoon dried Italian herbs (optional: oregano, basil, thyme)
Instructions
- Pat chicken breasts dry with paper towels. If thick, butterfly or pound to about 1-inch thickness for even cooking.
- In a bowl, toss chicken breasts with olive oil, salt, pepper, garlic powder, paprika, and herbs. Rub to coat evenly.
- Preheat air fryer to 375°F (190°C) for 2 minutes.
- Place chicken breasts in air fryer basket in a single layer. Air fry for 7 minutes.
- Flip chicken breasts with tongs. Air fry another 6-8 minutes, depending on thickness.
- Check for doneness: internal temperature should reach 165°F (74°C) or juices run clear and meat is opaque.
- Remove chicken from air fryer and let rest on a cutting board for 5 minutes.
- Slice across the grain and serve as desired (on soup, salad, sandwiches, or alone).
Notes
For extra crispy edges, air fry at 400°F for the last 2 minutes. Don’t skip the resting step for juiciness. Season boldly, and flip halfway for even browning. Can use chicken thighs (add 2-3 minutes cook time) or swap seasonings for different flavor profiles. Store leftovers in airtight container up to 4 days or freeze up to 2 months.
- Prep Time: 5 minutes
- Cook Time: 15 minutes
- Category: Main Course
- Cuisine: American
Nutrition
- Serving Size: 1 chicken breast (ab
- Calories: 155
- Sodium: 420
- Fat: 5
- Saturated Fat: 1
- Protein: 26
Keywords: air fryer chicken breast, juicy chicken, fall soup topper, easy chicken recipe, meal prep, gluten-free, dairy-free, healthy chicken, weeknight dinner