When I was a kid, nothing said “Christmas” quite like the wobble of my grandma’s famous Jello mold coming to the table. It wasn’t just a dessert—it was a centerpiece, a conversation starter, and honestly, a work of art. Bright, colorful, and full of surprises, this vintage Christmas Jello Mold Salad is a recipe that feels like unwrapping a gift with every bite. Trust me, if you’ve never made one before, you’re in for a treat—both for your taste buds and your holiday table.
There’s something delightfully retro about a Jello mold, isn’t there? It’s a little nostalgic, a little kitschy, and completely charming. And the best part? It’s a guaranteed crowd-pleaser. You don’t need fancy cooking skills to make this, but it’ll look like you spent hours on it (your secret’s safe with me).
If you’re ready to impress your family and friends with a dessert that’s as fun as it is delicious, let’s dive right in. This is the recipe your Christmas table has been waiting for.
Why You’ll Love This Recipe
Okay, let’s talk about why this is going to be the star of your holiday spread. I could go on forever, but here are my top reasons:
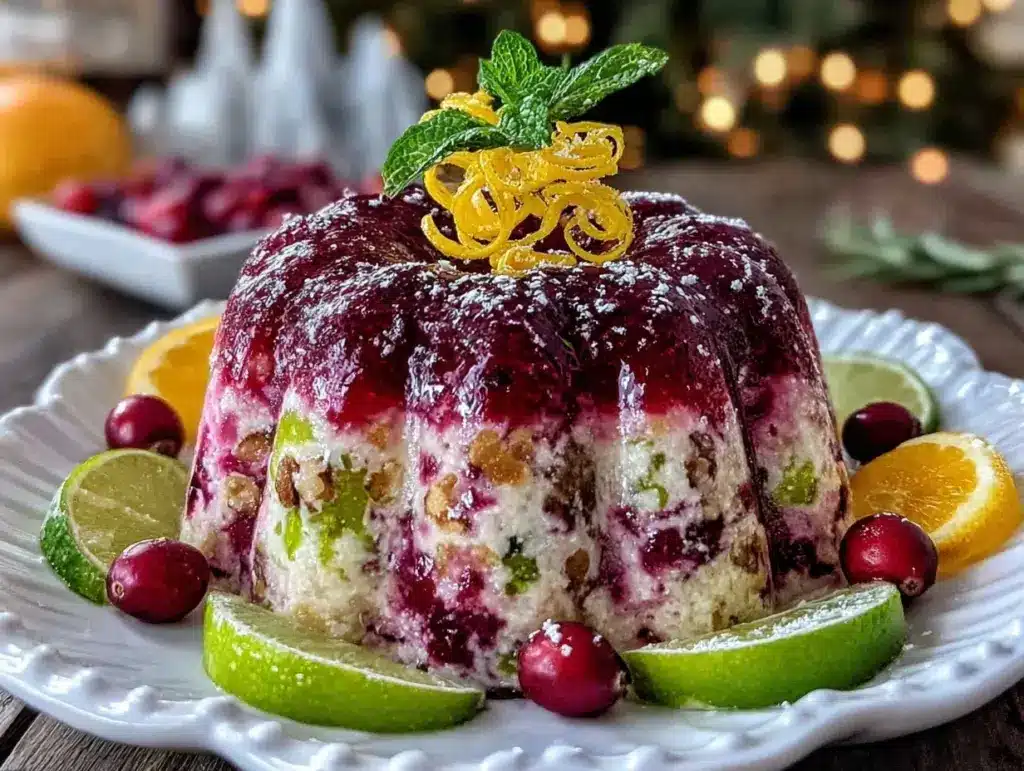
- A Showstopper: This Jello mold is almost too pretty to eat, with layers of vibrant colors and textures that scream Christmas cheer. It’s like edible art!
- Easy to Make: Don’t let the fancy look fool you—this recipe is incredibly simple. If you’ve got a mold and some patience, you’ve got this.
- <strongperfect family: Whether you have picky eaters or adventurous foodies at the table, everyone loves the sweet and tangy layers of this salad.
- Make-Ahead Magic: You can whip this up the day before, refrigerate it overnight, and check one more item off your Christmas to-do list.
This recipe has become my go-to for festive gatherings—it’s nostalgic, joyful, and has just the right amount of whimsy. Plus, it’s a great way to honor holiday traditions while creating new ones.
What Ingredients You’ll Need
Here’s why I love this recipe: the ingredients are simple, affordable, and easy to find. With just a few items, you’ll be able to create something that looks like it came straight out of a vintage holiday cookbook.
- Red Jello (Strawberry, Cherry, or Raspberry) — You’ll need about 6 ounces. I personally love using strawberry for its festive color and flavor.
- Green Jello (Lime) — Another 6 ounces. This is a classic choice for Christmas Jello molds—hello, holiday vibes!
- Boiling Water — 2 cups per Jello flavor. The heat activates the gelatin, so don’t skimp on this.
- Cold Water — 2 cups per Jello flavor. This helps set the gelatin and gives it that perfect wobble.
- Crushed Pineapple — About 1 cup, drained well. Trust me, you don’t want a watery Jello layer.
- Mini Marshmallows — 1 cup. They melt into the warm Jello and add that creamy, dreamy texture.
- Whipped Topping — 1 cup. I love using stabilized whipped cream or even Cool Whip for ease.
- Cream Cheese — 8 ounces, softened. This is the secret to the luscious creamy layer.
- Chopped Pecans — Optional, but they add great texture and flavor.
Quick tip: Make sure your pineapple is well-drained, or it can mess with the Jello setting. I’ve learned this the hard way—and let’s just say, a soggy Jello mold is not cute.
Equipment Needed
You don’t need a fancy kitchen for this recipe, but there are a few key tools that make the process smoother.
- Jello Mold — A vintage-style mold is perfect for this recipe. Mine is an heirloom from my grandma, but you can find similar ones online or at thrift stores.
- Mixing Bowls — You’ll need at least two: one for each Jello flavor.
- Whisk — For mixing the Jello until it’s fully dissolved.
- Hand Mixer — For blending the cream cheese and whipped topping into a perfectly smooth mixture.
- Rubber Spatula — For scraping every last bit of goodness out of the bowls.
- Measuring Cups and Spoons — Precision matters with Jello recipes, so don’t eyeball it.
Pro tip: If you don’t have a Jello mold, you can use a bundt pan or even a glass bowl—just make sure to grease it lightly for easy removal.
How to Make It: Step-by-Step

Ready to make some magic? Here’s exactly how I do it:
- Prepare the Red Jello Layer: Dissolve 6 ounces of red Jello in 2 cups of boiling water, stirring until completely dissolved. Add 2 cups of cold water and mix well. Pour half the mixture into your mold and refrigerate for 30 minutes, until slightly set.
- Add the Marshmallows: Sprinkle mini marshmallows over the semi-set red Jello layer and refrigerate for another 15 minutes. This creates a fun texture when sliced.
- Prepare the Lime Jello Layer: Dissolve 6 ounces of lime Jello in 2 cups of boiling water, then add 2 cups of cold water. Stir in the drained crushed pineapple. Set aside to cool slightly.
- Make the Creamy Layer: Beat softened cream cheese with the whipped topping until smooth and fluffy. Fold in optional chopped pecans for added texture.
- Layer the Lime Jello: Pour the lime Jello mixture over the marshmallow layer in the mold. Refrigerate for 30 minutes.
- Add the Creamy Layer: Spoon the cream cheese mixture carefully over the set lime Jello. Smooth it out with a spatula, then refrigerate for at least 4 hours or overnight.
- Unmold and Serve: To unmold, dip the Jello mold briefly into warm water, then invert onto a serving plate. Slice and enjoy the festive layers!
Time-saving tip: You can prepare the Jello layers simultaneously in separate bowls to speed things up. Just don’t skip the chilling time—it’s what makes the layers distinct.
My Best Tips & Techniques
Here’s where I share everything I’ve learned from making this recipe (and a few mishaps along the way):
- Grease Your Mold: A light coating of cooking spray ensures your Jello releases cleanly. Trust me, nothing’s worse than a stuck mold.
- Chill Between Layers: Don’t rush the chilling process—each layer needs to be partially set before adding the next. Otherwise, you’ll end up with a soupy mess.
- Drain the Pineapple: Excess liquid can prevent the Jello from setting properly. I usually squeeze mine in a fine mesh strainer.
- Be Gentle with the Creamy Layer: Spoon it on carefully to avoid disturbing the Jello layers underneath.
- Use Room Temperature Cream Cheese: It blends so much better and ensures a smooth texture.
And if you’re worried about the mold breaking apart while unmolding, just let it sit at room temperature for 5 minutes before serving—it helps stabilize it.
Ways to Mix It Up
Want to give this classic recipe your own twist? Here are some ideas:
- Fruit Explosion: Add mandarin oranges or canned cherries to the red Jello layer for extra fruitiness.
- Nut-Free Option: Skip the pecans and sprinkle crushed graham crackers on top instead.
- Holiday Sparkle: Mix in edible glitter or star-shaped sprinkles for a festive touch.
- Tropical Version: Use pineapple and coconut-flavored Jello instead of lime for a tropical twist.
- Mini Molds: Pour the layers into individual silicone molds for single-serving Jello salads—perfect for a buffet table.
Don’t be afraid to experiment—half the fun of vintage recipes is making them your own!
Serving Ideas & Storage
This Jello mold salad is as versatile as it is beautiful. Here’s how I serve and store it:
Serving Suggestions:
- Slice it into wedges and serve as a festive dessert.
- Pair with whipped cream or a dollop of sour cream for contrast.
- Use as a centerpiece for your holiday table—no one will guess how easy it was to make!
Storage Tips:
- Keep it in the fridge, covered, for up to 3 days. The layers stay beautifully intact.
- Leftovers? Chop them into cubes and serve as a fun snack in mini cups!
Pro tip: If you’re making it ahead, don’t unmold until just before serving—it keeps its shape better that way.
Nutritional Info & Health Benefits
This Jello mold salad is more about festive fun than health food, but here’s the breakdown per serving:
| Calories | Protein | Carbs | Fat |
|---|---|---|---|
| ~210 | 4g | 28g | 8g |
Health Highlights:
- Contains calcium from the cream cheese and whipped topping.
- Includes fruit for natural sweetness (pineapple).
- Low in fat compared to traditional desserts like pie or cake.
It’s a treat, not a superfood—but hey, it’s Christmas!
Final Thoughts
So there you have it—my Irresistible Vintage Christmas Jello Mold Salad Recipe! It’s retro, festive, and guaranteed to bring a smile to everyone’s face.
This recipe is like a little piece of holiday nostalgia, and I hope it becomes a tradition in your home just like it is in mine. Make it your own, share it with loved ones, and don’t forget to snap photos of those gorgeous layers!
If you give this a try, let me know how it turns out—drop a comment below! Or tag me on Instagram @[your handle] so I can see your creations.
Happy holidays and happy wobbling!
FAQs
Q: Can I use sugar-free Jello?
A: Absolutely! Sugar-free Jello works great if you’re trying to cut back on sugar. The flavor is still spot-on.
Q: What if I don’t have a Jello mold?
A: No problem! You can use a bundt pan, a glass bowl, or even a square baking dish. Just grease it lightly for easy removal.
Q: Can I make this dairy-free?
A: Yes! Use dairy-free cream cheese and whipped topping substitutes. The texture will be slightly different, but it’s still delicious.
Q: How long does it take to set?
A: Each layer needs about 30 minutes to partially set, and the whole mold should chill for at least 4 hours or overnight.
Q: Can I freeze leftovers?
A: I wouldn’t recommend freezing this—it changes the texture of the Jello. It’s best enjoyed fresh from the fridge!
Pin This Recipe!


Irresistible Vintage Christmas Jello Mold Salad Recipe
- Total Time: 4 hours 30 minutes
- Yield: 8 servings 1x
Description
A festive, retro dessert centerpiece featuring vibrant layers of Jello, creamy textures, and holiday cheer. Perfect for impressing family and friends during Christmas gatherings.
Ingredients
- 6 ounces red Jello (Strawberry, Cherry, or Raspberry)
- 6 ounces green Jello (Lime)
- 2 cups boiling water per Jello flavor
- 2 cups cold water per Jello flavor
- 1 cup crushed pineapple, drained
- 1 cup mini marshmallows
- 1 cup whipped topping (stabilized whipped cream or Cool Whip)
- 8 ounces cream cheese, softened
- Optional: chopped pecans
Instructions
- Dissolve 6 ounces of red Jello in 2 cups of boiling water, stirring until completely dissolved. Add 2 cups of cold water and mix well. Pour half the mixture into your mold and refrigerate for 30 minutes, until slightly set.
- Sprinkle mini marshmallows over the semi-set red Jello layer and refrigerate for another 15 minutes.
- Dissolve 6 ounces of lime Jello in 2 cups of boiling water, then add 2 cups of cold water. Stir in the drained crushed pineapple. Set aside to cool slightly.
- Beat softened cream cheese with the whipped topping until smooth and fluffy. Fold in optional chopped pecans for added texture.
- Pour the lime Jello mixture over the marshmallow layer in the mold. Refrigerate for 30 minutes.
- Spoon the cream cheese mixture carefully over the set lime Jello. Smooth it out with a spatula, then refrigerate for at least 4 hours or overnight.
- To unmold, dip the Jello mold briefly into warm water, then invert onto a serving plate. Slice and enjoy the festive layers!
Notes
[‘Grease your mold lightly with cooking spray for easy removal.’, ‘Chill each layer partially before adding the next to ensure distinct layers.’, ‘Drain pineapple thoroughly to prevent a watery Jello layer.’, ‘Use room temperature cream cheese for a smooth texture.’, ‘Let the mold sit at room temperature for 5 minutes before serving to stabilize.’]
- Prep Time: 30 minutes
- Cook Time: 4 hours (chilling time)
- Category: Dessert
- Cuisine: American
Nutrition
- Serving Size: 1 slice
- Calories: 210
- Fat: 8
- Carbohydrates: 28
- Protein: 4
Keywords: Christmas, Jello mold, vintage recipe, holiday dessert, festive centerpiece


