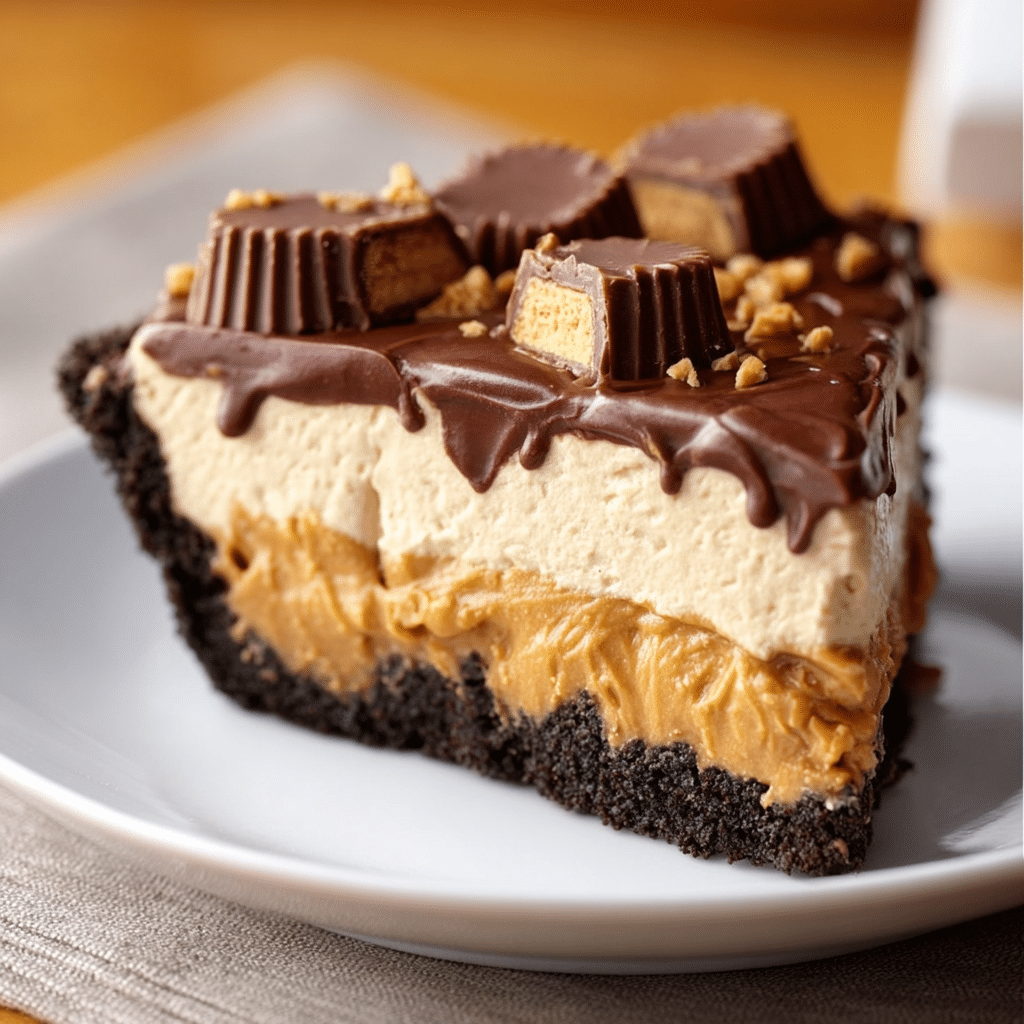
If you’ve ever dreamed of sinking your fork into a massive, creamy, chocolatey Reese’s treat, you’re in the right spot. This giant Reese’s Peanut Butter Cup Pie recipe is a dessert fantasy come true—think of your favorite candy, but supersized, sliceable, and perfect for sharing (or not!). The first time I made this, the aroma of melted chocolate and roasted peanuts filled my kitchen, and honestly, I felt like a kid in a candy store. It’s rich, indulgent, and has the wow factor to make any celebration or holiday gathering unforgettable. Trust me, if you love that classic peanut butter cup flavor, this decadent showstopper dessert will have everyone swooning.
I first whipped up this recipe for a birthday party, and let’s just say it disappeared faster than you can say “Reese’s.” The combination of silky peanut butter filling and a thick, snappy chocolate shell is completely irresistible. Plus, it only takes a handful of ingredients and some simple steps—no baking required! It’s the kind of dessert that makes people’s eyes go wide and has them lining up for seconds. And let’s face it, who can resist a dessert that basically looks like a candy bar straight from a dream?
So, if you’re looking for an easy, crowd-pleasing treat that’ll steal the show at any event, you’re about to fall in love with this giant Reese’s Peanut Butter Cup Pie. I’ll walk you through every step, share my best tips, and even let you in on a few little secrets I’ve learned along the way. Ready to create a dessert masterpiece? Let’s get started!
Why You Will Love This Giant Reese’s Peanut Butter Cup Pie
This pie has roots in everyone’s favorite candy aisle treat—the classic Reese’s Peanut Butter Cup. Originating in the 1920s, peanut butter cups have become a staple sweet in American culture, known for their perfect harmony of chocolate and peanut butter. There’s something nostalgic about that combination, and I remember trading Halloween candy just to get my hands on extra Reese’s cups. The giant Reese’s Peanut Butter Cup Pie takes those beloved flavors and amps them up to party size, making it the ultimate showstopper for birthdays, holidays, or whenever you want to treat yourself.
What I love about this recipe is how it brings people together. There’s always a sense of excitement when you unveil a dessert this big—kids and adults both get wide-eyed and a little giddy. It’s become a go-to at our house for Thanksgiving and even summer BBQs (because who says you can’t enjoy peanut butter and chocolate year-round?). The pie is simple to make, but the payoff is huge. Every bite is creamy, crunchy, sweet, and salty all at once—a true crowd-pleaser.
Over the years, I’ve tweaked the recipe to get just the right ratio of chocolate to peanut butter. Sometimes I’ll add a sprinkle of sea salt on top or swirl in a little honey. It’s fun to play with, and honestly, it never fails to impress. Whether you have fond childhood memories of peanut butter cups or you’re just a fan of over-the-top desserts, this pie is worth every single calorie. You’ll love making it, sharing it, and maybe sneaking a few extra bites when no one’s looking.
Ingredient Discussion
Let’s break down what goes into this giant Reese’s Peanut Butter Cup Pie and how to make each ingredient shine. The best part? You only need a handful of pantry staples, but each one makes a big impact on the final flavor and texture.
- Semi-Sweet Chocolate (16 oz / 450 g): Choose high-quality chocolate bars or chips for the shell. I like Ghirardelli or Guittard, but everyday brands like Hershey’s work too. Avoid using baking chocolate—it’s a bit too bitter and not as smooth. If you want a sweeter pie, you can swap in milk chocolate, but I think semi-sweet gives the best balance. Always store your chocolate in a cool, dry place, and chop it finely for even melting.
- Creamy Peanut Butter (1 1/2 cups / 375 g): The heart of this recipe! I recommend using a no-stir, shelf-stable peanut butter like Jif or Skippy for the best texture. Natural peanut butters tend to separate and can make the filling too oily or gritty. If you’re dealing with nut allergies, sunflower seed butter is a great alternative—just make sure it’s unsweetened so your pie doesn’t get overly sweet.
- Powdered Sugar (1 1/2 cups / 180 g): This sweetens the filling and helps it set. Sift it to avoid lumps. If you’re out, you can pulse granulated sugar in a blender until fine, but the texture might be a bit different. For a slightly less sweet pie, reduce by 1/4 cup, but don’t skip it entirely—it’s needed for structure.
- Butter (4 tbsp / 56 g, unsalted, melted): This makes the filling extra creamy. I love using European-style butters for their richness, but any unsalted butter will do. If you need a dairy-free version, swap in vegan butter or coconut oil (though coconut oil will add a hint of coconut flavor).
- Vanilla Extract (1 tsp / 5 ml): Adds warmth and rounds out the flavors. Pure vanilla is best, but imitation works in a pinch. Store it in a dark, cool spot for the longest shelf life.
- Pinch of Salt: A little salt (about 1/4 tsp) brings out the peanutty goodness and keeps the sweetness in check. If you’re using salted butter, you can skip the extra salt.
Optional add-ins include a handful of chopped roasted peanuts or a sprinkle of flaky sea salt on top for contrast. Sometimes, I even swirl a little honey into the filling for a deeper flavor. If you want to make this pie gluten-free, double-check all your ingredients for hidden gluten (most major brands of peanut butter and chocolate are safe, but it’s always good to check). And when berries are in season, a few fresh raspberries on the side make a lovely garnish!
Equipment Needed
Making this giant Reese’s Peanut Butter Cup Pie doesn’t require any fancy gadgets, but a few tools make things easier:
- 9-inch Fluted Tart Pan with Removable Bottom: This gives the pie its signature ridged edge. If you don’t have one, a standard 9-inch pie plate or even a springform pan works. I’ve even used a deep-dish cake pan in a pinch, though it’s harder to get those candy bar vibes.
- Medium Heatproof Mixing Bowls: For melting chocolate and mixing the filling. Glass or stainless steel bowls are perfect.
- Spatula: For spreading the chocolate and smoothing the filling. Silicone spatulas are my go-to because they scrape every last bit from the bowl.
- Microwave or Double Boiler: Melting chocolate is easiest in the microwave, but a double boiler works if you’re worried about scorching.
- Measuring Cups and Spoons: Accuracy is key for the filling’s texture.
- Knife and Cutting Board: For portioning the pie and chopping chocolate if needed.
Pro tip: If you don’t have a tart pan, line your pie dish with parchment for easy removal. I’ve learned (the hard way) that a removable bottom makes serving much less stressful—no one wants to pry dessert out of the pan while guests are watching! For budget-friendly options, you can find tart pans at most big box stores or online for under $10, and they last forever if you hand wash them.
Preparation Method
- Prepare Your Pan (5 minutes): Lightly grease a 9-inch (23 cm) fluted tart pan with a removable bottom. If you’re using a pie plate, line it with parchment paper for easy removal. Trust me, don’t skip this step—chocolate shells love to stick!
- Melt the Chocolate (5-7 minutes): Chop 16 oz (450 g) of semi-sweet chocolate and place in a microwave-safe bowl. Heat in 30-second bursts, stirring each time, until smooth and fully melted (usually 1.5-2 minutes total). If using a double boiler, place the bowl over simmering water and stir until melted. Be careful—water and chocolate are not friends!
- Form the Bottom Shell (10 minutes active, 20 minutes chilling): Pour half of the melted chocolate into the prepared pan. Tilt and rotate the pan, using a spatula to coax the chocolate up the sides and into the fluted edges. You want a thick, even layer for stability. Chill in the fridge or freezer for 20 minutes until firm. If your kitchen is warm, the freezer works best.
- Make the Peanut Butter Filling (5 minutes): In a separate bowl, combine 1 1/2 cups (375 g) creamy peanut butter, 1 1/2 cups (180 g) powdered sugar (sifted), 4 tbsp (56 g) melted butter, 1 tsp (5 ml) vanilla extract, and a pinch of salt. Use a spatula or wooden spoon to mix until smooth and creamy. The filling should hold its shape but still be spreadable—add a splash of milk if it’s too stiff.
- Fill the Pie (5 minutes): Once the chocolate shell is set, spoon the peanut butter filling into the shell. Gently press it into an even layer, smoothing the top with a spatula. Leave a little space at the edge for the top chocolate layer to seal the pie.
- Top with More Chocolate (5 minutes active, 30 minutes chilling): Rewarm the remaining chocolate if needed (10-15 seconds in the microwave). Pour over the peanut butter layer, spreading to the edges and sealing the filling. Tap the pan gently on the counter to burst any air bubbles. Chill in the fridge for at least 30 minutes, or until completely set. The pie can also be made a day ahead and kept chilled.
- Unmold and Slice (5 minutes): Carefully remove the pie from the tart pan. If using a pie plate, lift it out by the parchment. Use a sharp, warmed knife (run under hot water and dry) to slice—it helps the chocolate shell cut cleanly without cracking.
Preparation Notes: If your chocolate is too thick to pour, add 1-2 tsp (5-10 ml) neutral oil (like canola) to thin it slightly. If you notice the filling is crumbly, a splash of milk or an extra spoonful of melted butter will fix it. And if you’re in a rush, the freezer is your friend—just don’t forget about it, or the chocolate can get too hard and crack when sliced.
Cooking Tips & Techniques
Making a giant Reese’s Peanut Butter Cup Pie might seem intimidating, but it’s really just about paying attention to the details. One key trick is to let your chocolate cool just slightly before spreading it in the pan—if it’s piping hot, it can warp the shell or even melt the filling. I learned this the hard way after a few “meltdown” disasters!
If you’re using a microwave to melt your chocolate, short bursts are best. Chocolate burns fast, and once it seizes up, there’s no going back. Always stir between each interval, and if it looks partly melted, just keep stirring—it’ll finish melting from the residual heat.
When spreading the chocolate, go slow and use the back of a spoon or an offset spatula to really press it into the fluted edges. This helps prevent cracks or thin spots in the shell. If you notice gaps after chilling, you can “patch” them with a little extra melted chocolate (nobody will notice, I promise!).
For the peanut butter filling, room temperature ingredients blend together more smoothly. If your powdered sugar is lumpy, sift it first for a silky texture. And don’t overmix, or the filling can get oily. If you’re multitasking, you can make the shell and filling ahead, then assemble right before serving. It’s one of those desserts that gives you lots of wiggle room for timing, which is a lifesaver during busy holidays.
Lastly, when slicing, warm your knife for a super clean cut. Wipe it between each slice for picture-perfect wedges. If you’re serving a crowd, cut smaller pieces—this pie is rich and a little goes a long way!
Variations & Adaptations
This giant Reese’s Peanut Butter Cup Pie is endlessly customizable. Here are a few of my favorite twists:
- Gluten-Free Version: Double-check your chocolate and peanut butter for gluten, but otherwise this pie is naturally gluten-free. For extra crunch, add a layer of gluten-free graham crackers at the base before the chocolate.
- Nut-Free Alternative: Swap the peanut butter for sunflower seed butter or soy nut butter to make it safe for nut allergies. Just be aware that the flavor will change a bit, but it’s still delicious!
- Dark Chocolate Lover’s Pie: Use 70% dark chocolate for a more intense, grown-up flavor. Sometimes I’ll swirl a bit of espresso powder into the chocolate to bring out its richness.
- Seasonal Swaps: In the fall, sprinkle the filling with cinnamon or a touch of pumpkin spice. Around the holidays, add crushed peppermint on top for a festive touch.
- Mini Pies: Use a muffin tin lined with cupcake papers to create individual peanut butter cup pies—these are perfect for parties or gift baskets!
One of my favorite personal variations is adding a thin
Print
Giant Reese’s Peanut Butter Cup Pie
- Total Time: 1 hour 20 minutes (includes chilling time)
- Yield: 10-12 servings 1x
Description
This Giant Reese’s Peanut Butter Cup Pie is a decadent, no-bake dessert that transforms the classic candy into a rich, sliceable treat perfect for parties and celebrations. With a creamy peanut butter filling and thick chocolate shell, it’s a showstopper that’s easy to make and sure to impress any crowd.
Ingredients
- 16 oz semi-sweet chocolate (about 2 2/3 cups chocolate chips or chopped bars)
- 1 1/2 cups creamy peanut butter (no-stir, shelf-stable recommended)
- 1 1/2 cups powdered sugar, sifted
- 4 tbsp unsalted butter, melted
- 1 tsp vanilla extract
- Pinch of salt (about 1/4 tsp)
- Optional: chopped roasted peanuts, flaky sea salt, or honey for garnish or flavor variation
Instructions
- Lightly grease a 9-inch fluted tart pan with a removable bottom, or line a pie plate with parchment paper.
- Chop the chocolate and melt in a microwave-safe bowl in 30-second bursts, stirring each time, until smooth (about 1.5-2 minutes total). Alternatively, melt over a double boiler.
- Pour half of the melted chocolate into the prepared pan. Tilt and rotate the pan, using a spatula to coat the bottom and sides evenly. Chill in the fridge or freezer for 20 minutes until firm.
- In a separate bowl, mix together the peanut butter, powdered sugar, melted butter, vanilla extract, and salt until smooth and creamy. Add a splash of milk if the filling is too stiff.
- Spoon the peanut butter filling into the chilled chocolate shell. Spread evenly and smooth the top, leaving a little space at the edge.
- Rewarm the remaining chocolate if needed. Pour over the peanut butter layer, spreading to the edges to seal. Tap the pan gently to remove air bubbles. Chill in the fridge for at least 30 minutes, or until set.
- Carefully remove the pie from the pan. Use a sharp, warmed knife to slice and serve.
Notes
Let the chocolate cool slightly before spreading to avoid melting the filling. If the chocolate is too thick, add 1-2 tsp neutral oil to thin. For clean slices, warm your knife and wipe between cuts. The pie can be made a day ahead and kept chilled. For gluten-free, double-check all ingredients. Variations include using dark chocolate, nut-free butters, or adding spices or toppings.
- Prep Time: 20 minutes
- Cook Time: 0 minutes
- Category: Dessert
- Cuisine: American
Nutrition
- Serving Size: 1 slice (1/12 of pie)
- Calories: 520
- Sugar: 38
- Sodium: 170
- Fat: 34
- Saturated Fat: 13
- Carbohydrates: 48
- Fiber: 4
- Protein: 9
Keywords: Reese's, peanut butter cup, pie, no-bake dessert, chocolate, party dessert, easy dessert, candy bar pie, peanut butter, tart
