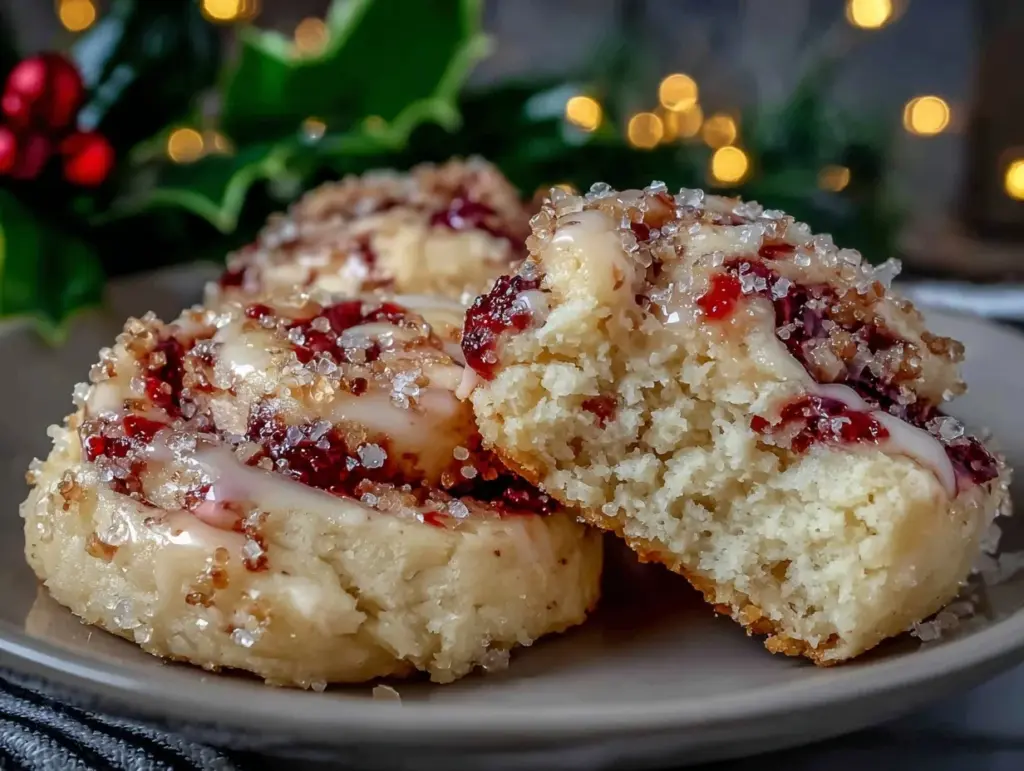
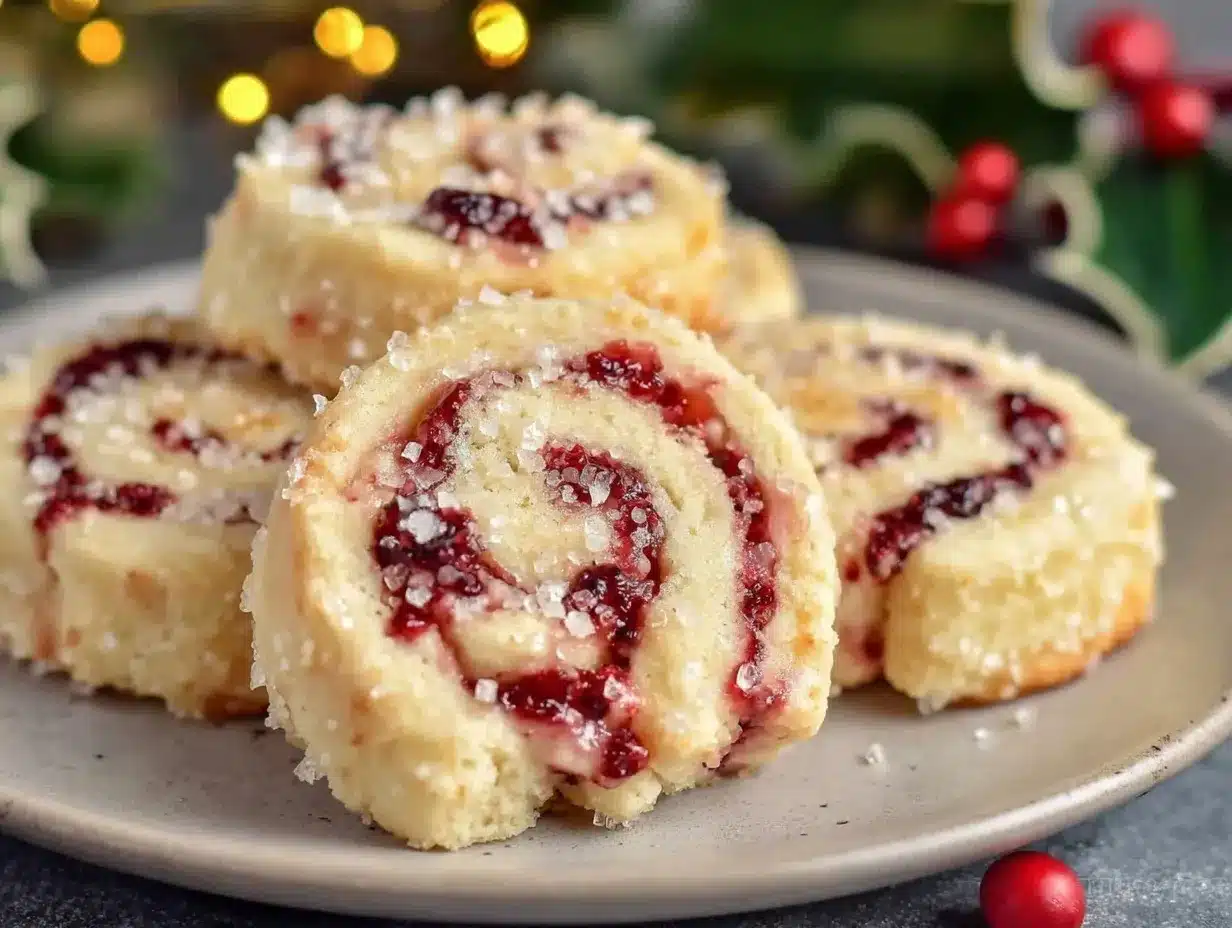
The first time I made these festive poinsettia cookies, my kitchen turned into a holiday wonderland. Picture this: swirls of red and white dough, the smell of vanilla and cream cheese, and that magical moment when the cookies came out of the oven looking like tiny edible poinsettias. These pinwheel cookies have become a staple in my holiday baking lineup, and I’m so excited to share them with you!
If you’re looking for a cookie that screams “holiday cheer” and tastes as good as it looks, this recipe is it. With a rich cream cheese dough and a pop of festive color, these cookies are perfect for gifting, cookie swaps, or just snacking with a mug of hot cocoa. Let’s dive in!
Why You’ll Love This Recipe
Okay, real talk—these cookies are as fun to make as they are to eat. Here’s why they’ve earned a permanent spot on my holiday baking list:
- Show-Stopping Design: These cookies look like tiny poinsettias, making them the star of any dessert table. Perfect for impressing your holiday guests!
- Easy to Customize: You can play with colors, add sprinkles, or even a touch of edible glitter (because who doesn’t love sparkly cookies?).
- Rich Cream Cheese Dough: The cream cheese in the dough adds a soft, melt-in-your-mouth texture that sets these cookies apart from regular sugar cookies.
- Great for Gifting: Wrap them up in cellophane with a cute ribbon, and you’ve got a homemade gift that everyone will love.
These cookies are perfect for anyone who loves baking with a creative twist. Trust me, you’ll have fun making them—and even more fun eating them!
What Ingredients You’ll Need
Here’s the best part: the ingredients are simple, and you probably have most of them in your kitchen already. Let’s break them down:
- All-purpose flour (2 ½ cups / 300g) – This is the base of the dough. Make sure to measure accurately for the best texture.
- Unsalted butter (¾ cup / 170g) – Softened to room temperature. I always use unsalted to control the salt in the recipe.
- Cream cheese (4 oz / 115g) – The secret ingredient for a tender, rich dough. Full-fat cream cheese works best.
- Granulated sugar (¾ cup / 150g) – Just enough to sweeten the dough without overpowering the cream cheese flavor.
- Vanilla extract (1 tsp) – Adds warmth and depth. Use the real stuff if you can—it’s worth it.
- Salt (½ tsp) – Balances the sweetness and enhances the other flavors.
- Gel food coloring (red or your favorite festive colors) – Gel works best because it doesn’t alter the texture of the dough.
Quick note: If you don’t have gel food coloring, you can use liquid food coloring, but add it gradually to avoid making the dough too wet.
Optional Add-Ins:
- Sprinkles: A fun way to add extra holiday sparkle.
- Edible glitter: Perfect for a touch of magic.
I’ve tested this recipe with different brands of cream cheese and food coloring, and it’s pretty forgiving. Just make sure your butter and cream cheese are soft but not melted—this is key for a smooth dough.
Equipment Needed
Don’t worry—you don’t need a fancy kitchen to make these cookies. Here’s what you’ll need:
- Mixing bowls: One for wet ingredients, one for dry. Saves time on cleanup.
- Hand mixer or stand mixer: This dough is thick, so a mixer helps get it smooth.
- Measuring cups and spoons: Baking is all about precision, so measure carefully.
- Rolling pin: Essential for rolling out the dough evenly.
- Cookie cutters: A small star or flower-shaped cutter works best for the poinsettia design.
- Baking sheets: Line them with parchment paper or silicone mats for easy cleanup.
- Plastic wrap: For chilling the dough.
Pro tip: If you don’t have cookie cutters, you can use the rim of a small glass or even freehand the design with a knife. It’s rustic, but it works!
How to Make Festive Poinsettia Pinwheel Cookies
Alright, let’s get into it! Follow these step-by-step instructions, and you’ll have gorgeous cookies in no time.
- Make the Dough (10 minutes): In a large bowl, beat the butter, cream cheese, and sugar until light and fluffy (about 2 minutes). Add the vanilla extract and salt, then gradually mix in the flour until combined. The dough should be soft but not sticky.
- Divide and Color (5 minutes): Split the dough into two equal portions. Leave one plain, and color the other with red gel food coloring. Knead the food coloring into the dough until evenly colored.
- Chill the Dough (30 minutes): Wrap each portion in plastic wrap and refrigerate until firm. This step is crucial for rolling out the dough smoothly.
- Roll and Layer (10 minutes): Roll out both portions of dough into rectangles about ¼ inch thick. Place the red dough on top of the plain dough and gently press them together.
- Shape the Pinwheels (10 minutes): Starting at one edge, roll the layered dough into a tight log. Wrap the log in plastic wrap and chill again for 15 minutes to firm up.
- Cut and Shape (10 minutes): Slice the dough log into ¼-inch rounds. Use a small star or flower-shaped cookie cutter to create the poinsettia design. Arrange the cookies on a lined baking sheet, leaving space between each one.
- Bake (12-14 minutes): Preheat the oven to 350°F (175°C). Bake the cookies until the edges are just starting to turn golden. Let them cool on the baking sheet for 5 minutes before transferring to a wire rack.
Your kitchen will smell like pure holiday magic while these bake. Trust me—you’ll need serious willpower not to eat them straight from the oven!
My Best Tips & Techniques
Here’s everything I’ve learned from making these cookies year after year:
- Chill, chill, chill: Don’t skip the chilling steps! Cold dough is easier to roll, slice, and shape.
- Use gel food coloring: It gives a vibrant color without altering the texture of the dough.
- Work quickly: Warm dough can get sticky, so keep everything cool and work in small batches.
- Practice your pinwheel roll: The tighter the roll, the more defined your pinwheel design will be.
- Don’t overbake: These cookies are best when slightly soft in the center. Overbaking can make them dry.
Bonus tip: If you’re making these with kids, let them help with the rolling and shaping—it’s messy, but so fun!
Ways to Mix It Up
Want to put your own spin on these cookies? Here are some ideas:
- Color Swap: Use green instead of red for a holly-inspired look.
- Flavor Boost: Add ½ teaspoon almond extract for a nuttier flavor or a pinch of cinnamon for a warm, spicy twist.
- Sprinkle Magic: Roll the dough log in holiday sprinkles before slicing.
- Chocolate Version: Add 2 tablespoons unsweetened cocoa powder to the plain dough for a chocolate layer.
These cookies are super versatile, so don’t be afraid to experiment!
Serving Ideas & Storage
How to Serve:
- Pair them with hot cocoa or eggnog for the ultimate holiday treat.
- Arrange them on a festive platter with other holiday cookies for a colorful display.
- Wrap them in decorative tins or bags for gifting.
Storage Tips:
- Room Temperature: Store in an airtight container for up to 5 days.
- Freezer: Freeze the sliced cookies on a baking sheet, then transfer to a freezer bag. Bake straight from frozen, adding 2-3 minutes to the bake time.
Pro tip: These cookies taste amazing when warmed slightly, so pop them in the microwave for 10 seconds before serving.
Nutritional Info & Health Benefits
These cookies are more about indulgence than nutrition, but here’s the breakdown per cookie:
| Calories | 120 |
|---|---|
| Fat | 6g |
| Carbs | 15g |
| Protein | 2g |
Quick note: The cream cheese adds a little protein and calcium, but let’s be honest—these are cookies. Enjoy them as a treat!
Final Thoughts
These festive poinsettia pinwheel cookies are everything I love about holiday baking: creative, fun, and delicious. Whether you’re making them for a party, a gift, or just yourself (no judgment), they’re sure to brighten your day.
If you try this recipe, I’d love to hear how it turns out! Leave a comment below or tag me on Instagram @yourhandle with your cookie creations. Happy baking and happy holidays!
FAQs
Q: Can I use low-fat cream cheese?
A: Yes, but the texture might be slightly less rich. Full-fat cream cheese gives the best results.
Q: My dough is too sticky—what do I do?
A: Chill it longer! Sticky dough is usually just too warm. You can also dust your rolling pin and surface with a little flour.
Q: Can I make these ahead of time?
A: Absolutely! You can make the dough a day ahead and keep it wrapped in the fridge. Or slice and freeze the cookies to bake fresh later.
Q: Can I use liquid food coloring instead of gel?
A: Yes, but use it sparingly so the dough doesn’t get too wet. Gel food coloring is highly recommended for vibrant color.
Q: How can I make the design more precise?
A: Roll the dough layers as evenly as possible and chill the log thoroughly before slicing. A sharp knife also helps!
Pin This Recipe!

Festive Poinsettia Cookies Recipe Easy Holiday Treat
- Total Time: 39 minutes
- Yield: Approximately 24 cookies 1x
Description
These festive poinsettia cookies are a holiday favorite with a rich cream cheese dough and vibrant colors, perfect for gifting or enjoying with hot cocoa.
Ingredients
- 2 ½ cups (300g) all-purpose flour
- ¾ cup (170g) unsalted butter, softened
- 4 oz (115g) cream cheese, softened
- ¾ cup (150g) granulated sugar
- 1 tsp vanilla extract
- ½ tsp salt
- Red gel food coloring
Instructions
- Make the Dough (10 minutes): In a large bowl, beat the butter, cream cheese, and sugar until light and fluffy (about 2 minutes). Add the vanilla extract and salt, then gradually mix in the flour until combined. The dough should be soft but not sticky.
- Divide and Color (5 minutes): Split the dough into two equal portions. Leave one plain, and color the other with red gel food coloring. Knead the food coloring into the dough until evenly colored.
- Chill the Dough (30 minutes): Wrap each portion in plastic wrap and refrigerate until firm. This step is crucial for rolling out the dough smoothly.
- Roll and Layer (10 minutes): Roll out both portions of dough into rectangles about ¼ inch thick. Place the red dough on top of the plain dough and gently press them together.
- Shape the Pinwheels (10 minutes): Starting at one edge, roll the layered dough into a tight log. Wrap the log in plastic wrap and chill again for 15 minutes to firm up.
- Cut and Shape (10 minutes): Slice the dough log into ¼-inch rounds. Use a small star or flower-shaped cookie cutter to create the poinsettia design. Arrange the cookies on a lined baking sheet, leaving space between each one.
- Bake (12-14 minutes): Preheat the oven to 350°F (175°C). Bake the cookies until the edges are just starting to turn golden. Let them cool on the baking sheet for 5 minutes before transferring to a wire rack.
Notes
[‘Chill the dough thoroughly for easier rolling and shaping.’, ‘Use gel food coloring for vibrant colors without altering the dough texture.’, ‘Work quickly with cold dough to prevent stickiness.’, ‘Avoid overbaking to keep the cookies soft and tender.’]
- Prep Time: 25 minutes
- Cook Time: 14 minutes
- Category: Dessert
- Cuisine: American
Nutrition
- Serving Size: 1 cookie
- Calories: 120
- Fat: 6
- Carbohydrates: 15
- Protein: 2
Keywords: holiday cookies, festive cookies, cream cheese cookies, poinsettia cookies, Christmas cookies, pinwheel cookies


