The first time I made this creamy peppermint fudge, I was in full holiday panic mode—think last-minute teacher gifts, company arriving in two hours, and exactly zero plans for dessert. I had a bag of white chocolate chips, half a can of sweetened condensed milk in the fridge, and a peppermint extract that I’d bought on impulse (because it was on sale, obviously).
I tossed everything together, crossed my fingers, and hoped for the best. The smell—oh my gosh, it’s like sticking your face in a mug of hot cocoa with a candy cane swirl. And when I cut that first square, it was so creamy, so perfectly pepperminty, I knew I’d stumbled onto something I’d be making every single December.
Since then, this creamy peppermint fudge recipe has become my go-to homemade holiday candy. I’ve tweaked it, tested it, and made it at least 30 times (not exaggerating). It’s the kind of treat that makes people go “Wait, YOU made this?” And the best part? It’s crazy easy. No candy thermometer, no fuss, just pure holiday magic in every bite.
Why You’ll Love This Creamy Peppermint Fudge Recipe
Okay, I’m a little obsessed with this fudge. Here’s why I keep making it, and why you’ll want to, too:
- Ridiculously Easy: No boiling sugar, no candy thermometer, no stress. You basically melt, mix, and chill. I’ve made this with a toddler tugging my apron and still nailed it.
- Ultra Creamy Texture: Thanks to the sweetened condensed milk and a sneaky bit of butter. It’s not chalky or dry like some fudge—think smooth, luscious, melt-in-your-mouth.
- Big Peppermint Flavor: The combo of extract and crushed candy canes gives it that classic holiday punch. Not toothpaste-y, just Christmas-sweater cozy.
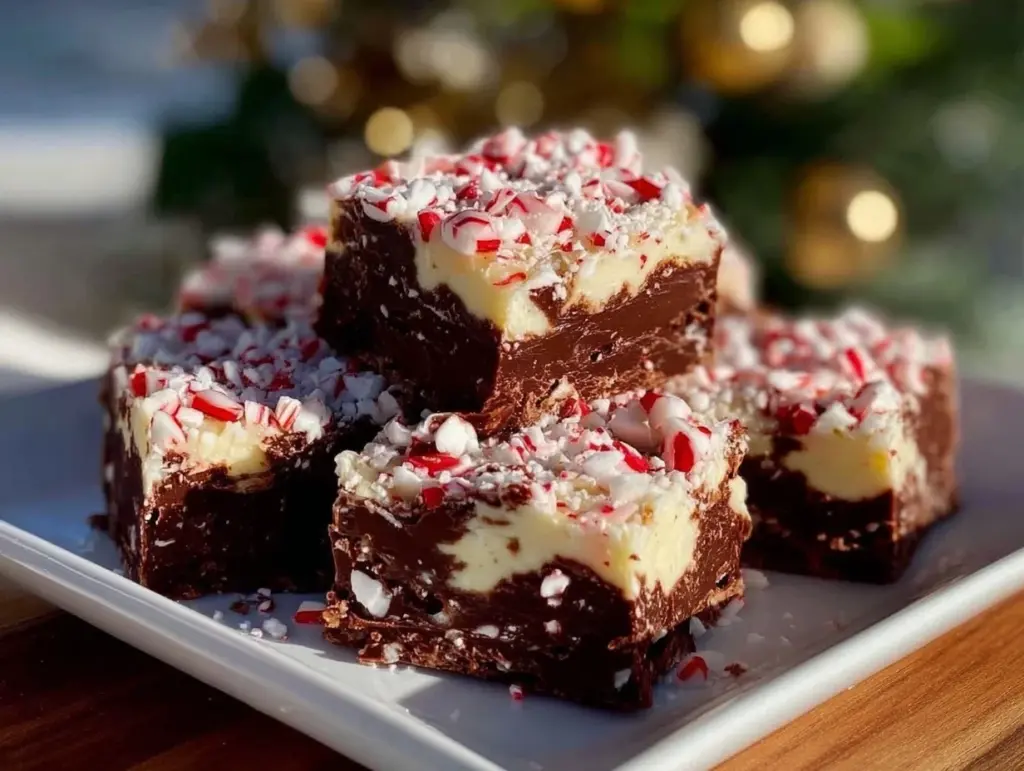
- Festive Look: Sprinkle those crushed candy canes on top and it’s instantly Pinterest-worthy. I bring this to every cookie swap, and it’s always the first plate to disappear.
- Perfect for Gifting: Stays soft and creamy for days, wraps up beautifully in little boxes or bags. I gave this out last year and got three requests for the recipe before New Year’s.
- Customizable: You can swap white chocolate for semi-sweet, swirl in some dark chocolate, or even add a dash of almond extract for a twist. I’ll share my favorite variations below!
This creamy peppermint fudge is my secret weapon for holiday parties, gifting, or just when you need a little winter cheer. It’s the kind of recipe that makes your kitchen smell amazing and your friends ask for seconds.
Honestly, it’s become my comfort treat—the one I whip up when December feels a little too busy. One bite and suddenly everything feels more festive. You’ll see.
What Ingredients You’ll Need for Creamy Peppermint Fudge
Here’s what I love about this ingredient list: you probably have most of it already, and there’s zero fuss involved. I’m picky about a couple of things, so I’ll spill all my secrets below.
- White chocolate chips (3 cups / 510g) — I’ve tried every brand under the sun. Ghirardelli melts the smoothest, but Nestle or store-brand work fine. If you want an extra luxe texture, use half chips and half chopped white chocolate bars.
- Sweetened condensed milk (1 can, 14 oz / 396g) — Not evaporated milk! Learned that the hard way. This is what makes the fudge creamy and foolproof.
- Unsalted butter (3 tbsp / 42g) — Adds richness and keeps things silky. I use Kerrygold when I’m feeling fancy, but any unsalted butter works.
- Peppermint extract (1 to 1 ½ tsp) — Start with 1 tsp and taste (seriously, the difference between “mmm” and “whoa” is just a few drops). I use McCormick or Nielsen-Massey. Don’t use spearmint—it tastes weird in fudge.
- Salt (¼ tsp) — Balances out the sweetness. I use kosher salt, but table salt is fine in a pinch.
- Crushed candy canes (½ cup / 60g, plus more for topping) — I put mine in a zip-top bag and whack them with a rolling pin. You want a mix of big and small pieces for crunch and sparkle.
Optional Mix-ins:
- Mini chocolate chips (¼ cup / 45g) — For added texture and a bit of chocolate swirl. Sometimes I sprinkle these on top instead of candy canes for a “cookies & cream” vibe.
- Red food coloring (just a few drops) — Swirl it in for a marbled effect. Totally optional, but kids love it.
Ingredient FAQ:
- Can I use dark or milk chocolate chips? Yes, but the fudge won’t be pure white. Still delicious though!
- Where do I find peppermint extract? Usually in the baking aisle, near the vanilla. Around the holidays, it’s everywhere. I buy an extra bottle just in case.
- What if I only have regular candy canes? Totally fine. I’ve used the big ones, the mini ones, even leftover peppermint bark once.
- Can I use coconut condensed milk? I’ve tried it—works great for dairy-free, but the flavor is a little different. Still creamy, though!
Real talk: I once ran out of white chocolate chips and used half white, half semi-sweet. It turned out like a peppermint mocha fudge, and my husband declared it “the best accident ever.” So don’t stress if you need to improvise.
Equipment Needed for Creamy Peppermint Fudge
You don’t need a fancy kitchen to whip up this fudge—I’ve made it in dorm rooms, rental cabins, and once during a kitchen remodel (on a hot plate!).
- 8×8-inch square baking pan — Mine is ancient and a little dented, but it does the job. Metal or glass both work.
- Medium saucepan — You’ll melt everything together here. Just make sure it’s big enough for some stirring room.
- Mixing spoon or silicone spatula — I’m team spatula (easier to scrape out every last bit), but a wooden spoon works too. Silicone is best for sticky fudge.
- Parchment paper or aluminum foil — For lining your pan. Trust me, this makes removal a breeze and keeps your fudge looking neat.
- Measuring cups and spoons — You want to be precise with the extract and salt. I use my old Pyrex set and a tablespoon I found at a yard sale.
- Zip-top bag and rolling pin — For crushing candy canes. If you don’t have a rolling pin, a heavy mug or even your hand works.
Tool Tips:
- No parchment paper? Foil works, just grease it lightly. Wax paper is a no-go (learned this the sticky way).
- No saucepan? Microwave method works: melt chips, condensed milk, and butter in 30-second bursts, stirring as you go.
- Budget options? Dollar store pans and utensils work just fine—this fudge is not fussy.
Quick note: The only “extra” thing I use is a small offset spatula for smoothing the top. Not essential, but it makes your fudge look bakery-level. If you don’t have one, the back of a spoon works perfectly.
How to Make Creamy Peppermint Fudge: Step-by-Step

Alright, let’s do this! I’m walking you through every step, with all the little tips I’ve learned along the way.
- Prep Your Pan (5 minutes)
Line your 8×8-inch pan with parchment paper, leaving enough to hang over the sides (makes lifting out the fudge so much easier). Lightly grease if you want super clean edges. - Melt the Base (5 minutes)
In a medium saucepan over low heat, add 3 cups (510g) white chocolate chips, 1 can (14 oz / 396g) sweetened condensed milk, and 3 tbsp (42g) unsalted butter. Stir constantly until smooth and melted—don’t walk away! White chocolate burns fast. The mixture should be glossy and thick, almost like frosting. - Add the Peppermint (1 minute)
Remove the pan from heat. Stir in 1 tsp (or up to 1 ½ tsp) peppermint extract and ¼ tsp salt. Taste a tiny bit—too mild? Add another ¼ tsp extract. Too strong? You can mellow it out with a splash of milk (rare, but it happens). - Fold in Candy Canes (2 minutes)
Add ½ cup (60g) crushed candy canes and stir gently. Don’t overmix—they’ll melt a little, but some chunks are perfect for crunch. If you want chocolate chips or food coloring, add them now. Swirl a few drops of red coloring with a toothpick for a marbled look. - Spread and Top (2 minutes)
Pour the mixture into your prepared pan. Use a spatula (or spoon) to smooth the top. Sprinkle extra crushed candy canes on top for sparkle. Press them in gently so they stick. - Chill (2+ hours)
Pop the pan in the fridge and let it set for at least 2 hours, or until firm. Overnight is even better—flavors deepen and the texture gets even creamier. - Cut and Serve (5 minutes)
Lift the fudge out using the parchment overhang. Cut into small squares—this stuff is rich, so bite-size pieces are best. Wipe your knife between cuts for sharp edges.
Troubleshooting Tips:
- If your fudge seems grainy: It probably got too hot. Next time, melt everything on the lowest heat and stir constantly.
- If it won’t set: Double-check your condensed milk (did you accidentally use evaporated?). Chilling longer usually helps.
- If the top looks “sweaty”: Sometimes the candy canes release moisture. Just blot with a paper towel before serving—still tastes great.
By this point, your kitchen will smell like a candy shop, and you’ll probably want to sneak a taste. I always do. No shame.
My Best Tips & Techniques for Perfect Creamy Peppermint Fudge
Okay, here’s where I spill everything I’ve learned from making this fudge way too many times…
- Low and Slow is Key: Don’t rush the melting step. White chocolate is fussy—if it seizes, your fudge will be grainy. Gentle heat and constant stirring are your friends.
- Measure Peppermint Carefully: I’ve overdone it and ended up with fudge that tastes like mouthwash. Start small, taste, and adjust. Every brand is a little different.
- Blend for Extra Creaminess: If your chips aren’t melting smoothly, use an immersion blender to finish. This makes the fudge silky, especially if you’re using a lower-end chocolate.
- Crush Candy Canes by Hand: I tried a food processor once—ended up with peppermint dust. The zip-top bag + rolling pin method gives the best mix of big and small pieces.
- Chill Overnight: The fudge sets enough to cut after 2 hours, but overnight makes it slice like a dream. I always make it a day ahead for parties.
- Sharp Knife for Clean Cuts: Run your knife under hot water and wipe between slices. Makes your fudge look like it came from a candy shop.
- Don’t Skip the Salt: That tiny bit balances the sweetness and makes the peppermint pop. I forgot it once—never again.
- Layer Mix-ins: For a pretty look, reserve some candy cane chunks to sprinkle on top right before chilling.
Common Mistakes:
- I once tried to “eyeball” the extract. Regret. Measure it out every time.
- Don’t use imitation white chocolate (the kind labeled “white morsels”). They don’t melt properly and the fudge comes out chalky.
- Using wax paper instead of parchment—major sticky mess. Learned that lesson and never looked back.
Honestly, the biggest game-changer was realizing how much better this fudge is when you use good chocolate. But even with store-brand chips, it’s still a showstopper. So don’t stress—just stir, chill, and enjoy.
Ways to Mix It Up: Peppermint Fudge Recipe Variations
Once you’ve made the classic, here’s where you get to play. I’ve tried all these twists, and they’re all winners.
- Chocolate Swirl Peppermint Fudge: Melt ½ cup (85g) semi-sweet chocolate chips separately. Dollop on top of the fudge before chilling, then swirl with a toothpick. Looks beautiful and tastes like a peppermint mocha.
- Double Mint Fudge: Add ¼ cup chopped Andes mints along with the candy canes. Extra creamy, extra minty. My husband requests this version every year.
- Vegan/Dairy-Free Swap: Use coconut condensed milk and vegan butter. Sub dairy-free chocolate chips. The texture is softer, but still creamy and delicious.
- Dark Chocolate Peppermint Fudge: Swap white chocolate chips for dark chocolate. Use the same method and top with crushed peppermint. It’s richer and less sweet—good for grown-up palates.
- Nutty Peppermint Fudge: Fold in ½ cup toasted pecans or walnuts for crunch. My aunt loves this version—she says it’s like a holiday rocky road.
- Gluten-Free Version: The base recipe is naturally gluten-free! Just check your candy canes and extracts to make sure they’re safe.
Flavor Add-ins I’ve Tested:
- Almond extract (¼ tsp) for a “peppermint bark” vibe
- Mini marshmallows (½ cup) stirred in right before chilling—like peppermint s’mores fudge!
- Chocolate-covered espresso beans (¼ cup) for a little zing
Make this fudge your own. The base is so forgiving—mix, match, and let your creativity shine. I love seeing the combos people come up with!
Serving Ideas & Storage for Creamy Peppermint Fudge
This fudge is a total crowd-pleaser, whether you’re serving it at a party or sneaking a piece after dinner.
How to Serve
- Cut into small squares and stack on a festive platter. Looks like a winter wonderland with those candy cane bits.
- Wrap pieces in wax paper or cellophane bags for homemade gifts. I tie mine with a red ribbon—instant holiday joy.
- Pair with a mug of hot cocoa, coffee, or even milk. The peppermint flavor makes everything feel extra cozy.
- For a dessert tray: Mix with chocolate-dipped pretzels and snowball cookies (my party trick).
Storage Tips
- Room Temperature: Store in an airtight container for up to 1 week. It stays creamy and doesn’t dry out.
- Refrigerator: Keeps for 2 weeks. I actually prefer it a little chilled—it’s firmer and even more indulgent.
- Freezer: Slice and freeze pieces with parchment between layers. Lasts 3 months. Thaw at room temp or enjoy straight from the freezer (I do this for emergency sweets).
Reheating Tips:
- Let chilled fudge sit at room temp for 10 minutes before serving for best texture.
- If it gets a little hard, microwave for 5 seconds per piece—just enough to soften, not melt.
Pro tip: If you have leftovers that are getting a bit dry, chop them up and stir into homemade ice cream or brownie batter. Waste not!
Nutritional Info & Health Benefits
I’m not a nutritionist, but here’s why I feel good about eating this creamy peppermint fudge (in moderation, obviously).
| Per Piece (1-inch square) | Calories | Protein | Carbs | Fat | Fiber |
|---|---|---|---|---|---|
| Approximate | 110 | 1g | 17g | 4g | 0g |
- Lower fat than classic fudge (thanks to white chocolate vs. cream or butter-heavy recipes)
- Natural peppermint oil can help with digestion and freshen breath (bonus!)
- Gluten-free base (just double-check candy canes and extract for allergies)
I love that this fudge gives you all the holiday joy without feeling super heavy. One square is so satisfying—perfect with a cup of coffee, honestly.
Honest take: It’s still candy, and it’s still sweet. But compared to store-bought fudge with weird preservatives or hydrogenated oils? This homemade version wins every time.
Final Thoughts: My Holiday Candy Secret Weapon
So that’s my creamy peppermint fudge recipe! I know I’ve gone on about it, but when you find a recipe this good, you want to share it with everyone.
This has become my go-to for holiday parties, last-minute gifts, or just when I need a little pick-me-up in December. It never lets me down—easy, creamy, and always festive.
I hope you love it as much as my family does. Seriously, my kids fight over the last piece every year. Make it your own! Try the chocolate swirl, toss in some nuts, or go classic. That’s how the best recipes evolve.
If you make this, I’d love to hear how it turns out! Drop a comment below and let me know what you think. Snap a picture and tag me on Instagram @yourcookingbuddy—I get genuinely excited seeing your versions. Got questions? Ask away in the comments. I check them every day and love helping troubleshoot.
Happy candy making! Hope your kitchen smells as amazing as mine does right now.
FAQs About Creamy Peppermint Fudge
Q: Can I use regular chocolate instead of white chocolate chips?
A: Totally! I’ve swapped in milk or dark chocolate chips and the result is a richer, less sweet fudge. The peppermint flavor pairs perfectly with both. Just keep the measurements the same.
Q: My fudge didn’t set—what went wrong?
A: Usually this means the mixture got too hot or you accidentally used evaporated milk instead of sweetened condensed. Chill it longer—it should firm up after a few hours. If not, serve it as “peppermint truffle spread”—it’s still delicious on cookies!
Q: Can I make this ahead for a party?
A: Absolutely! I always make it a day (or even two) ahead. The fudge actually gets creamier as it sits, and the flavors deepen. Just store tightly covered in the fridge.
Q: How do I crush candy canes without making a mess?
A: I put mine in a zip-top bag and use a rolling pin (or the bottom of a mug) to gently whack them. You want some chunks and some dust. It’s loud, but weirdly satisfying.
Q: Can I double this recipe?
A: Yep! Use a 9×13-inch pan, double all ingredients, and chill as usual. I do this for big holiday gatherings, and it’s always a hit. Just make sure to stir well so everything melts evenly.
Pin This Recipe!


Creamy Peppermint Fudge
- Total Time: 2 hours 25 minutes
- Yield: 36 pieces 1x
Description
This creamy peppermint fudge is an easy, festive homemade holiday candy with a luscious texture and big peppermint flavor. No candy thermometer needed—just melt, mix, chill, and enjoy rich, pepperminty squares perfect for gifting or parties.
Ingredients
- 3 cups white chocolate chips (about 18 oz)
- 1 can (14 oz) sweetened condensed milk
- 3 tablespoons unsalted butter
- 1 to 1 1/2 teaspoons peppermint extract
- 1/4 teaspoon salt
- 1/2 cup crushed candy canes, plus more for topping
- Optional: 1/4 cup mini chocolate chips
- Optional: a few drops red food coloring
Instructions
- Line an 8×8-inch baking pan with parchment paper, leaving an overhang for easy removal. Lightly grease if desired.
- In a medium saucepan over low heat, combine white chocolate chips, sweetened condensed milk, and butter. Stir constantly until smooth and melted.
- Remove from heat. Stir in peppermint extract and salt. Taste and adjust peppermint extract if needed.
- Fold in crushed candy canes (and optional mini chocolate chips or food coloring). Swirl food coloring with a toothpick for a marbled effect if using.
- Pour mixture into prepared pan. Smooth the top with a spatula or spoon. Sprinkle extra crushed candy canes on top and press gently.
- Chill in the refrigerator for at least 2 hours, or until firm. Overnight is best for flavor and texture.
- Lift fudge out using parchment overhang. Cut into small squares, wiping knife between cuts for clean edges.
Notes
For best results, use good-quality white chocolate chips. Measure peppermint extract carefully—start with less and add to taste. Chill overnight for clean slices and deeper flavor. The base recipe is naturally gluten-free; check candy canes and extract labels if needed. Fudge can be customized with chocolate chips, nuts, or food coloring. Store in an airtight container at room temperature for 1 week, in the fridge for 2 weeks, or freeze for up to 3 months.
- Prep Time: 15 minutes
- Cook Time: 10 minutes
- Category: Dessert
- Cuisine: American
Nutrition
- Serving Size: 1 piece (1-inch squa
- Calories: 110
- Sugar: 16
- Sodium: 35
- Fat: 4
- Saturated Fat: 2.5
- Carbohydrates: 17
- Protein: 1
Keywords: peppermint fudge, holiday candy, Christmas dessert, easy fudge, homemade gifts, white chocolate fudge, creamy fudge, festive treats


