If you’re anything like me, coffee isn’t just a drink—it’s a way of life. Whether it’s my morning cup or my afternoon pick-me-up, I’m always looking for ways to enjoy it in new forms. That’s how this Creamy Coffee Mousse came to life. It’s light, velvety, and packs all the rich coffee flavor you love in a dessert that feels like a sweet little luxury.
Let me tell you, this recipe is a game-changer. Last weekend, I made it for a family dinner, and it was the star of the show. My cousin actually asked for seconds before she even finished her first serving. Yep, it’s that good.
And here’s the best part: you don’t need any fancy equipment or rare ingredients. If you’ve got coffee, cream, and a few pantry staples, you’re halfway there. Let’s dive in!
Why You’ll Love This Recipe
Okay, this Creamy Coffee Mousse isn’t just good—it’s dangerously good. Here’s why:
- Light and airy texture: It’s like a cloud of coffee-flavored joy. Whipping the cream gives it that dreamy, melt-in-your-mouth feel.
- Rich coffee flavor: Perfect for coffee lovers. The espresso powder adds a bold, deep taste without being overwhelming.
- Super simple to make: You don’t need to be a pastry chef to pull this off. It’s beginner-friendly and foolproof.
- Impressive yet effortless: Serve it in little cups or jars, and it instantly looks fancy—perfect for dinner parties or date nights.
This is the kind of dessert that makes you feel like you just ordered it at a fancy café, but you made it in your own kitchen. And trust me, everyone will ask for the recipe.
What Ingredients You’ll Need
Here’s the thing: this Creamy Coffee Mousse is all about simplicity. You probably have most of these ingredients already. Let me break it down:
- Heavy cream (1 cup / 240 ml) – This is what gives the mousse its creamy, airy texture. Don’t skimp here—full-fat is essential.
- Espresso powder (1 tbsp / 7 g) – The star of the show. If you don’t have espresso powder, instant coffee works, but the flavor won’t be as rich.
- Granulated sugar (¼ cup / 50 g) – Adds just the right amount of sweetness without overpowering the coffee flavor.
- Vanilla extract (1 tsp) – A little vanilla rounds out the coffee and makes the flavor feel extra special.
- Gelatin powder (1 tsp / about 5 g) – For structure. It helps the mousse hold its shape while staying light and fluffy.
- Water (2 tbsp) – To bloom the gelatin and bring it to life.
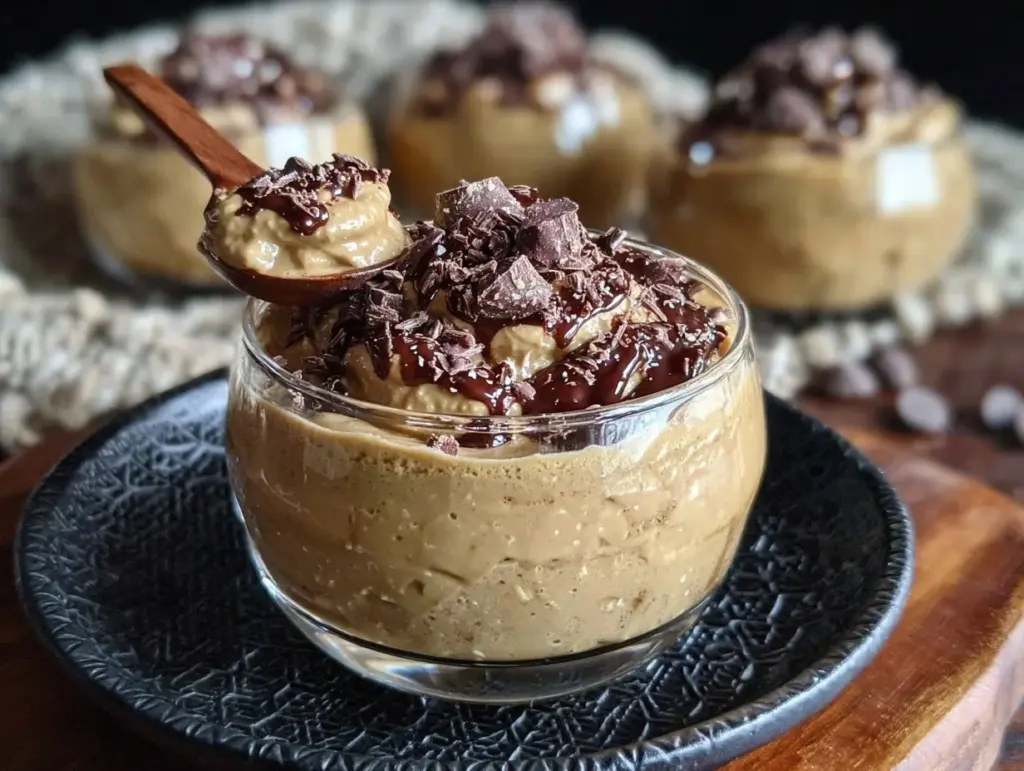
- Optional toppings: Shaved chocolate, whipped cream, or a sprinkle of cocoa powder. These are the little details that take it over the top.
Quick note: If you want to make this extra indulgent, you can swap the granulated sugar for brown sugar—it adds a subtle caramel note that pairs beautifully with coffee.
Equipment Needed
You don’t need a professional setup to make this mousse. Here’s what you’ll need:
- Mixing bowls – One for whipping the cream and one for mixing the coffee base.
- Hand mixer or stand mixer – Whipping cream by hand is possible but takes forever. A mixer makes life easier.
- Small saucepan – For warming the gelatin and coffee mixture.
- Whisk – For combining ingredients smoothly.
- Serving cups or jars – I love using cute little glass jars—they show off the mousse layers beautifully.
That’s it—no fancy gadgets required. If you’ve got a whisk and a bowl, you’re good to go.
How to Make It: Step-by-Step

Let’s get down to business. Here’s exactly how I make this Creamy Coffee Mousse, step by step:
- Bloom the gelatin (5 minutes): In a small bowl, combine the gelatin powder with 2 tablespoons of water. Let it sit for about 5 minutes until it looks like a thick gel.
- Heat the coffee mixture (3 minutes): In a small saucepan, combine the espresso powder, granulated sugar, vanilla extract, and 2 tablespoons of water. Heat over low, stirring until the sugar dissolves. Add the bloomed gelatin and stir until fully dissolved. Let cool to room temperature.
- Whip the cream (5 minutes): In a large mixing bowl, whip the heavy cream with a hand mixer until soft peaks form. It should look fluffy but not stiff.
- Combine the coffee and cream (2 minutes): Gently fold the cooled coffee mixture into the whipped cream. Don’t overmix—you want to keep the airy texture.
- Chill and set (2+ hours): Spoon the mousse into serving cups or jars. Cover and chill in the fridge for at least 2 hours, or until set. Overnight works too.
- Serve and enjoy!: Add your favorite toppings—whipped cream, shaved chocolate, or a dusting of cocoa powder—and dig in!
Pro tip: If you’re making this for a party, prep it the night before. That way, you’re not rushing around last minute.
My Best Tips & Techniques
Here’s the deal: I’ve made this mousse at least a dozen times, and I’ve learned a lot along the way. Let me share:
- Don’t skip the gelatin: It’s what gives the mousse its structure. Without it, you’ll end up with coffee cream soup—a delicious disaster, but still a disaster.
- Chill your cream: Cold cream whips faster and holds its shape better. I pop mine in the fridge for at least an hour before starting.
- Fold gently: When combining the coffee mixture with the whipped cream, use a light hand. Overmixing will deflate the mousse and make it dense.
- Use quality espresso powder: The flavor of the mousse depends heavily on the coffee. I use Medaglia d’Oro—it’s bold and rich without being bitter.
- Get creative with toppings: I’ve tried it with caramel drizzle, crushed hazelnuts, and even a dollop of mascarpone. You can’t go wrong.
Real talk: I’ve burned the coffee mixture once by cranking up the heat too high. Keep the heat low, stir constantly, and you’ll be fine.
Ways to Mix It Up
Once you’ve mastered the classic version, try these fun variations:
- Chocolate Coffee Mousse: Add 2 tablespoons of cocoa powder to the coffee mixture before heating. It’s like a mocha dream in mousse form.
- Caramel Latte Mousse: Swap the granulated sugar for brown sugar and drizzle caramel sauce on top before serving.
- Spiced Coffee Mousse: Add a pinch of cinnamon and cardamom to the coffee mixture for a warm, spiced flavor.
- Alcohol-Infused Version: Stir in 1 tablespoon of coffee liqueur (like Kahlúa) to the coffee mixture. Adults only!
- Nutty Twist: Fold in ¼ cup of finely chopped toasted hazelnuts or almonds for texture.
Make it yours—this recipe is super versatile!
Serving Ideas & Storage
Here’s how to serve and store your Creamy Coffee Mousse:
Serving Suggestions
- Simple and elegant: Serve in clear glass jars with a dollop of whipped cream and shaved chocolate on top.
- Pairings: This mousse goes perfectly with almond biscotti, butter cookies, or fresh berries.
- Special occasions: Layer the mousse with crushed cookies or cake crumbs for a trifle-style dessert.
Storage Tips
- Fridge: Keep covered in the fridge for up to 3 days. It stays light and fluffy!
- Freezer: Freeze in airtight containers for up to 2 months. Thaw in the fridge overnight.
Pro tip: If you’re freezing leftovers, scoop them into individual portions for easy grab-and-go treats.
Nutritional Info & Health Benefits
Here’s the rundown on what you’re eating (per serving):
| Calories | Protein | Carbs | Fat |
|---|---|---|---|
| 180 | 3g | 10g | 15g |
Health highlights:
- Low sugar: Sweetened just enough to balance the coffee flavor.
- High in healthy fats: Heavy cream provides satiety and richness.
Real talk: This isn’t exactly kale salad, but it’s a treat worth enjoying.
Final Thoughts
So there you have it—my Creamy Coffee Mousse recipe! If you’re a coffee lover like me, this dessert will quickly become one of your favorites. It’s easy, light, and makes you feel like a total pro in the kitchen.
Give it a try, and don’t be afraid to experiment with the variations I shared. You never know—you might even come up with your own signature twist!
If you make this, I’d love to hear how it turned out! Drop a comment below or tag me on Instagram @[your handle] so I can see your mousse magic.
Happy dessert-making! Hope your kitchen smells amazing right now.
FAQs
Q: Can I use instant coffee instead of espresso powder?
A: Yes, but keep in mind the flavor won’t be as bold. Use the same amount, or more if you want a stronger coffee taste.
Q: Can I make this without gelatin?
A: If you skip the gelatin, the mousse won’t hold its shape as well—it’ll be more like a custard. You could try agar-agar as a substitute, but I haven’t tested it myself.
Q: Can I use non-dairy cream?
A: Absolutely! Coconut cream works great as a replacement for heavy cream. Just make sure to chill it before whipping.
Q: How do I know if the mousse is set?
A: After chilling for 2 hours, the mousse should be firm but still have a soft, creamy texture. If it jiggles too much, it needs more time.
Q: Can I make this ahead of time?
A: Definitely! This mousse is actually better when made ahead. Prepare it the night before and let it chill overnight for the best texture.
Pin This Recipe!


Creamy Coffee Mousse Recipe – Easy Light Dessert Idea
- Total Time: 2 hours 18 minutes
- Yield: 4 servings 1x
Description
A light, velvety dessert packed with rich coffee flavor, perfect for coffee lovers and special occasions.
Ingredients
- 1 cup heavy cream (240 ml)
- 1 tbsp espresso powder (7 g)
- 1/4 cup granulated sugar (50 g)
- 1 tsp vanilla extract
- 1 tsp gelatin powder (about 5 g)
- 2 tbsp water
- Optional toppings: shaved chocolate, whipped cream, or cocoa powder
Instructions
- Bloom the gelatin: Combine gelatin powder with 2 tablespoons of water in a small bowl and let sit for 5 minutes until thickened.
- Heat the coffee mixture: In a small saucepan, combine espresso powder, granulated sugar, vanilla extract, and 2 tablespoons of water. Heat over low, stirring until sugar dissolves. Add bloomed gelatin and stir until fully dissolved. Let cool to room temperature.
- Whip the cream: In a large mixing bowl, whip heavy cream with a hand mixer until soft peaks form.
- Combine the coffee and cream: Gently fold the cooled coffee mixture into the whipped cream, keeping the airy texture.
- Chill and set: Spoon mousse into serving cups or jars, cover, and chill in the fridge for at least 2 hours or overnight.
- Serve and enjoy: Add toppings like whipped cream, shaved chocolate, or cocoa powder before serving.
Notes
[‘Chill your cream before whipping for better texture.’, ‘Use quality espresso powder for a richer flavor.’, “Fold gently to maintain the mousse’s airy texture.”, ‘Prep the mousse the night before for convenience.’]
- Prep Time: 15 minutes
- Cook Time: 3 minutes
- Category: Dessert
- Cuisine: American
Nutrition
- Serving Size: 1 serving
- Calories: 180
- Sugar: 10
- Sodium: 20
- Fat: 15
- Saturated Fat: 9
- Carbohydrates: 10
- Protein: 3
Keywords: coffee mousse, creamy dessert, easy dessert, coffee recipe, mousse recipe, light dessert, coffee lover dessert