One chilly Thursday evening, I found myself staring blankly at the fridge, completely uninspired and pressed for time. The kind of night where you just want something comforting, filling, and fast—without the usual scramble. That’s when I threw together what would become my go-to cheesy chili mac and cheese. It wasn’t fancy at first; just some pantry staples, leftover chili, and a handful of cheese. But after testing and tweaking it 15+ times, I finally nailed the perfect balance of creamy, spicy, and cheesy that hits all the comfort-food notes in just 30 minutes. Since then, it’s saved countless weeknight dinners and earned a permanent spot on our family menu.
Here’s the thing about this cheesy chili mac and cheese recipe: it’s ridiculously easy, uses ingredients you probably already have, and you can customize it however you like. Plus, it’s all done in about half an hour, so it’s perfect for those nights when you want something hearty without the hassle. I’ve even made it when friends popped in unexpectedly, and it never fails to impress.
After years of juggling dinner ideas, this recipe is my reliable shortcut to cozy, satisfying meals. And if you love dishes like cream cheese Alfredo bowties with ground beef or the comforting vibes of crockpot kielbasa and green beans, you’re going to want to keep reading.
Why You’ll Love This Recipe
This cheesy chili mac and cheese has turned into one of my favorite quick dinners, and here’s why:
- Super Quick and Easy — You’ll have dinner ready in 30 minutes, with about 15 minutes of active cooking time. Perfect for busy weeknights when you don’t want to spend forever in the kitchen.
- Pantry and Fridge-Friendly — Most of the ingredients are pantry staples or things you can keep in the fridge, like canned chili, pasta, and shredded cheese. I love that I can whip this up without a full grocery run.
- Crowd-Pleasing Comfort — This cheesy chili pasta hits all the right notes—rich, spicy, and cheesy. I’ve served it to picky eaters, friends who love Tex-Mex flavors, and even my super picky nephew, and everyone keeps coming back for more.
- Customizable — Want it spicier? Add more chili powder or hot sauce. Need it meatless? Swap the chili for a bean chili or a veggie chili. This recipe is a great base to make your own.
- Leftovers Are Even Better — The flavors deepen overnight, making this an ideal make-ahead or lunch meal. Just reheat gently and add a splash of milk or cream to bring back the creaminess.
- Budget-Friendly — Feeds 4-6 people for under $15, which is way better than takeout and way tastier.
Honestly, this recipe is my answer to those nights when I want comfort food that doesn’t require an elaborate plan. It’s like a warm hug on a plate, but without the guilt of ordering pizza—unless you want to pair it with garlic bread, of course.
Ingredients You’ll Need
Here’s the best part: you probably already have most of these ingredients sitting in your pantry or fridge. I’m picky about a few things here, and I’ll tell you why as we go.
- Macaroni or Elbow Pasta (1 pound / 450g) — Classic choice for mac and cheese. I like elbow pasta because it holds onto the sauce well. Penne or shells work great too.
- Canned Chili (about 1 ½ cups / 350ml) — I use a good quality chili with or without beans, depending on mood. Store-bought or homemade, just make sure it’s flavorful. Vegetarian chili works if you want to skip meat.
- Cheddar Cheese (2 cups shredded / 200g) — Sharp cheddar for that classic tangy cheesiness. Don’t use pre-shredded if you can help it; it melts better when freshly shredded.
- Milk (1 ½ cups / 360ml) — Whole milk is best for creaminess, but 2% works in a pinch.
- Butter (3 tablespoons / 45g) — Adds richness to the cheese sauce and helps create a smooth texture.
- All-Purpose Flour (3 tablespoons / 24g) — For thickening the cheese sauce. Don’t skip this step—otherwise, the sauce will be runny.
- Onion Powder (1 teaspoon) — Boosts flavor without needing to chop fresh onions.
- Garlic Powder (1 teaspoon) — Adds depth and warmth to the sauce.
- Chili Powder (1 tablespoon) — Enhances the chili flavor and adds a subtle kick.
- Salt and Black Pepper — To taste. Season gradually and adjust at the end.
- Optional Toppings — Sliced jalapeños, chopped green onions, crushed tortilla chips, or a dollop of sour cream. These add texture and fresh flavor.
If you want to mix things up, try adding cooked ground beef or turkey to the chili for extra protein. I’ve also tossed in some diced bell peppers or corn for a veggie boost. And if you’re into spicy, a few dashes of hot sauce go a long way.
Equipment Needed
You don’t need fancy gadgets for this. Here’s what I use every time:
- Large Pot — For boiling the pasta. A 6-quart pot works perfectly to give the pasta room to cook evenly.
- Medium Saucepan — To make the cheese sauce. I use a heavy-bottomed saucepan so the sauce doesn’t scorch.
- Whisk — Essential for making the roux and cheese sauce smooth.
- Colander — For draining the pasta.
- Wooden Spoon or Silicone Spatula — For stirring everything together without scratching your pans.
- Measuring Cups and Spoons — Accuracy helps, especially with flour and spices.
If you don’t have a whisk, a fork works in a pinch, but the sauce will be smoother with a whisk. And if you’re looking for a shortcut, you can make the cheese sauce in the same pot after draining the pasta to cut down on dishes.
How to Make It: Step-by-Step

Alright, let’s make this cheesy chili mac and cheese! I’m walking you through exactly how I do it, including the little tricks that make it come together perfectly every time.
Step 1: Cook the Pasta (8-10 minutes)
Bring a large pot of salted water to a boil. I use about 1 tablespoon of salt here because you want the pasta to be seasoned from the inside out. Add your macaroni and cook according to the package instructions until al dente—usually around 8 minutes. Drain the pasta and set it aside.
Step 2: Make the Cheese Sauce Base (5 minutes)
In a medium saucepan, melt the butter over medium heat. Once melted, whisk in the flour until it forms a smooth paste (roux). Cook this for about 1-2 minutes, stirring constantly, until it’s lightly golden and smells nutty. This step cooks out the raw flour taste, so don’t rush it.
Step 3: Add Milk and Spices (5 minutes)
Slowly whisk in the milk, a little at a time, to avoid lumps. Once fully combined, add the onion powder, garlic powder, chili powder, and a pinch of salt and pepper. Keep whisking over medium heat until the sauce thickens and coats the back of a spoon—this usually takes 3-4 minutes.
Step 4: Melt in the Cheese (3 minutes)
Reduce heat to low. Gradually add the shredded cheddar cheese, stirring constantly until melted and smooth. If the sauce gets too thick, add a splash of milk to loosen it up. Taste and adjust seasoning—add more chili powder if you want extra kick.
Step 5: Combine Pasta and Chili (2 minutes)
Stir the drained pasta and chili into the cheese sauce. Mix until everything is evenly coated and heated through. The chili adds a hearty, flavorful layer that makes this mac and cheese stand out.
Step 6: Serve and Garnish
Serve your cheesy chili mac immediately, topped with your favorite optional add-ons like sliced jalapeños, chopped green onions, or crushed tortilla chips for crunch. A dollop of sour cream on top brings a cool, creamy contrast that’s irresistible.
Quick tip: If the sauce thickens too much as it sits, stir in a splash of milk when reheating to bring back its creamy texture.
Expert Tips & Tricks
- Don’t Skip the Roux — Making the butter and flour base is key to a creamy, thick sauce. It’s worth the small extra step.
- Use Sharp Cheddar — It melts beautifully and gives the best flavor. Mild cheddar just won’t cut it here.
- Season Gradually — Because chili and cheese both have salt, add salt a little at a time and taste as you go to avoid over-salting.
- Boost the Chili Flavor — Stir in a teaspoon of cumin or smoked paprika for a smoky twist.
- Make It Ahead — You can prepare the cheese sauce a day ahead and store it in the fridge. Reheat gently, then stir in freshly cooked pasta and chili.
- Leftover Magic — This dish tastes even better the next day. Just reheat with a splash of milk on the stovetop.
Pro tip: For a restaurant-quality finish, sprinkle some extra shredded cheddar on top and broil it for 2 minutes until bubbly and golden.
Variations & Substitutions
Once you’ve nailed the classic version, here are some ideas to mix things up:
- Spicy Beef Chili Mac — Brown 1 pound of ground beef with taco seasoning and mix it into the chili base for a meaty version.
- Vegetarian — Use a bean-based chili or a homemade veggie chili. Add roasted bell peppers or corn for extra texture.
- Slow Cooker Twist — If you want to try a no-fuss version, check out this crockpot kielbasa and green beans recipe for a similar easy dinner idea that cooks slowly while you relax.
- Cheese Swap — Mix in Monterey Jack or pepper jack for a creamier, spicier kick.
- Gluten-Free — Use gluten-free pasta and substitute all-purpose flour with cornstarch or a gluten-free blend for the roux.
- Lighter Version — Swap half the cheese for reduced-fat varieties and use 2% milk instead of whole.
Serving & Storage
How to Serve: I love serving this dish with a simple green salad dressed in vinaigrette to balance the richness. Garlic bread or corn muffins are perfect sidekicks for soaking up any leftover sauce. When I’m feeling fancy, I throw together a quick batch of roasted broccoli or green beans to add some green to the plate.
If you want a fun twist for a casual gathering, set up a toppings bar with chopped jalapeños, green onions, crushed tortilla chips, and sour cream—everyone loves customizing their bowl.
Storing Leftovers: Store any leftovers in an airtight container in the fridge for up to 4 days. The sauce will thicken, so reheat gently on the stovetop with a splash of milk to bring back the creaminess. I don’t recommend freezing this one because the cheese sauce tends to separate when thawed.
For meal prep, I often make the cheese sauce ahead, then cook fresh pasta when I’m ready to eat. It takes just 10 minutes and tastes way better than fully reheated mac and cheese.
Nutrition Information
I’m not a nutritionist, but here’s a rough idea of the nutrition per serving (based on 6 servings):
| Calories | 480 |
|---|---|
| Protein | 20g |
| Carbohydrates | 50g |
| Fiber | 4g |
| Sugar | 5g |
| Fat | 22g |
| Saturated Fat | 13g |
| Cholesterol | 65mg |
| Sodium | 600mg |
| Calcium | 300mg |
This dish packs decent protein from the cheese and chili, and you can boost fiber and vitamins by adding veggies. It’s definitely comfort food with some indulgence from the cheese, but it’s also homemade, budget-friendly, and far better than takeout.
Final Thoughts
So that’s my go-to cheesy chili mac and cheese recipe! I’ve probably shared enough to fill a book, but when you make this dish as often as I have, you learn all the little things that make it shine.
This recipe has saved me on more than one busy night when I wanted something warm, filling, and effortless. It’s the perfect answer to “what’s for dinner” when you don’t want to order in but also don’t want to spend hours cooking. The best part? Everyone loves it—kids, adults, and even my least adventurous eaters.
Feel free to make it your own: swap in your favorite chili, add extra heat, toss in veggies, or go meatless. The beauty of this recipe is how flexible it is.
If you decide to try it, drop a comment below and let me know how it turned out! And if you hit any bumps, I’m here to help troubleshoot. Happy cooking—and may your kitchen smell as amazing as mine does right now!
Frequently Asked Questions
Q: Can I use milk instead of heavy cream in the cheese sauce?
A: Absolutely! This recipe actually uses milk instead of heavy cream to keep it lighter and easier to make at home. Whole milk gives you good creaminess, but 2% works too. If you want it richer, feel free to swap half the milk for cream.
Q: My cheese sauce turned out grainy—what did I do wrong?
A: Grainy sauce usually means the cheese was added over too-high heat or all at once. Always reduce the heat to low or remove the pan from heat before adding cheese slowly. Whisk constantly to get that smooth, creamy texture.
Q: Can I make this recipe ahead of time?
A: You can make the cheese sauce and chili mixture a day ahead and keep it refrigerated. Cook the pasta fresh when you’re ready to eat and combine everything just before serving. It saves time and tastes almost as good as fresh.
Q: Can I use fresh chili instead of canned?
A: Definitely! Homemade chili or leftover chili works great here. Just make sure it’s not too watery, or the mac and cheese might be too loose. If needed, simmer your chili a bit to thicken before adding to the pasta.
Q: How spicy is this chili mac and cheese? Can I adjust the heat?
A: It’s mildly spicy thanks to the chili powder and chili base, but you can easily adjust. Add more chili powder, cayenne, or hot sauce for extra heat. Or skip the spicy seasonings if you’re cooking for kids.
Q: Can I freeze leftovers?
A: I don’t recommend freezing because the cheese sauce tends to separate and become grainy when thawed. It’s best enjoyed fresh or stored in the fridge for a few days.
Q: Can I double this recipe for a crowd?
A: Absolutely! Double all ingredients and use your largest pots and pans. Cooking times stay about the same, but you might want to use two saucepans for the cheese sauce if you’re making a lot at once.
Pin This Recipe!


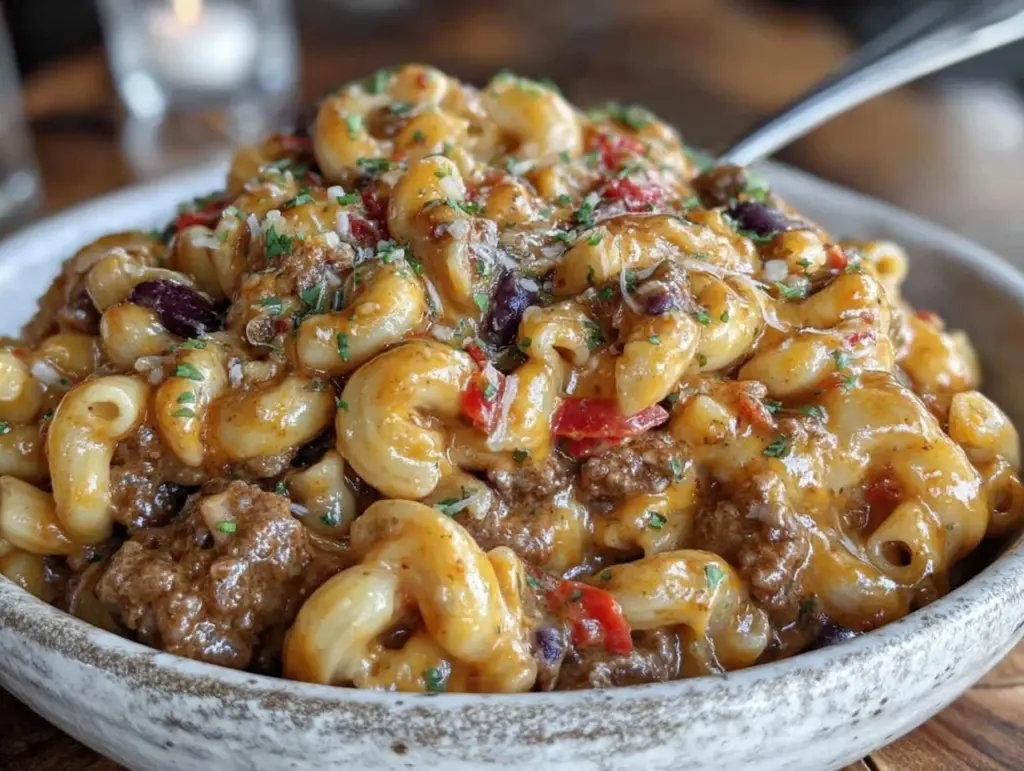
Cheesy Chili Mac and Cheese
- Total Time: 30 minutes
- Yield: 6 servings 1x
Description
A quick, comforting, and customizable cheesy chili mac and cheese recipe ready in 30 minutes, perfect for busy weeknights and using pantry staples.
Ingredients
- 1 pound (450g) macaroni or elbow pasta
- 1 ½ cups (350ml) canned chili (with or without beans)
- 2 cups (200g) shredded sharp cheddar cheese
- 1 ½ cups (360ml) whole milk (2% milk works too)
- 3 tablespoons (45g) butter
- 3 tablespoons (24g) all-purpose flour
- 1 teaspoon onion powder
- 1 teaspoon garlic powder
- 1 tablespoon chili powder
- Salt and black pepper to taste
- Optional toppings: sliced jalapeños, chopped green onions, crushed tortilla chips, sour cream
Instructions
- Bring a large pot of salted water to a boil. Add macaroni and cook according to package instructions until al dente, about 8-10 minutes. Drain and set aside.
- In a medium saucepan, melt butter over medium heat. Whisk in flour to form a smooth roux. Cook for 1-2 minutes until lightly golden and nutty-smelling.
- Slowly whisk in milk a little at a time to avoid lumps. Add onion powder, garlic powder, chili powder, salt, and pepper. Whisk over medium heat until sauce thickens and coats the back of a spoon, about 3-4 minutes.
- Reduce heat to low. Gradually add shredded cheddar cheese, stirring constantly until melted and smooth. Add a splash of milk if sauce is too thick. Adjust seasoning as needed.
- Stir drained pasta and canned chili into the cheese sauce until evenly coated and heated through.
- Serve immediately topped with optional toppings like sliced jalapeños, green onions, crushed tortilla chips, or sour cream.
Notes
Do not skip the roux step to ensure a creamy, thick sauce. Use sharp cheddar cheese for best flavor and melting. Season gradually to avoid over-salting. Leftovers taste better the next day; reheat gently with a splash of milk. For a restaurant-style finish, sprinkle extra cheddar on top and broil for 2 minutes until bubbly and golden. Freezing is not recommended as cheese sauce may separate.
- Prep Time: 10 minutes
- Cook Time: 20 minutes
- Category: Main Course
- Cuisine: American
Nutrition
- Serving Size: 1 serving (approxima
- Calories: 480
- Sugar: 5
- Sodium: 600
- Fat: 22
- Saturated Fat: 13
- Carbohydrates: 50
- Fiber: 4
- Protein: 20
Keywords: cheesy chili mac and cheese, quick dinner, comfort food, easy recipe, weeknight meal, chili mac, mac and cheese, Tex-Mex