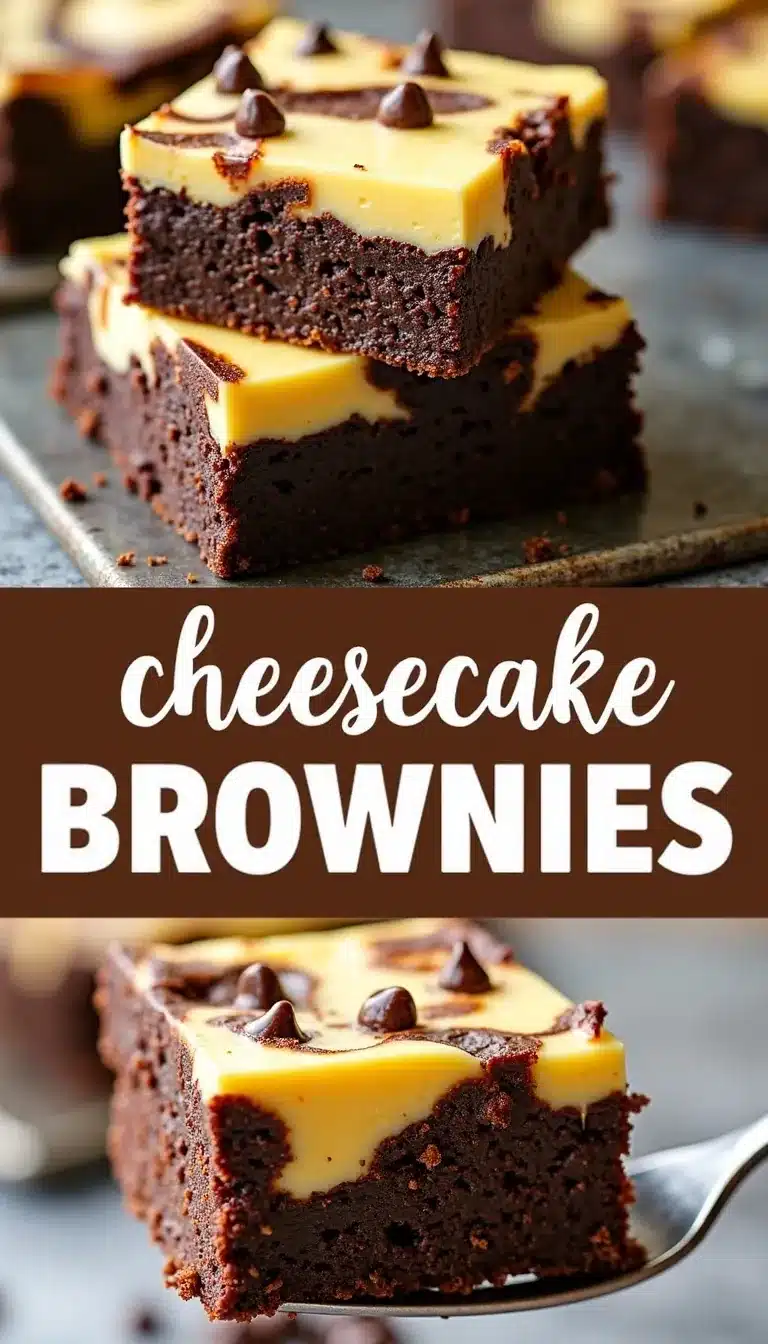
If you’re already dreaming about your next dessert, let me tell you: this cheesecake brownies recipe is about to make your taste buds do a happy dance. Imagine a rich, fudgy brownie swirled with creamy, tangy cheesecake—each bite is a little slice of bliss. I remember the first time I tried cheesecake brownies at a school bake sale, and honestly, they left me hooked! The marbled pattern is always a showstopper, and the flavor mashup is just unbeatable.
What’s so special about these marbled dessert bars? It’s the way the deep chocolate flavor of the brownie base plays off the smooth, slightly sweet cheesecake top. You get the best of both worlds in one easy homemade treat. Whether you’re baking for a family gathering, a potluck, or just because you’re craving something decadent, this recipe is reliable, simple, and—let’s face it—totally irresistible.
Plus, there’s a certain magic in that marbled look. Every batch comes out as its own edible artwork, making these bars perfect for Pinterest-worthy dessert spreads. I’ll share tips to get a beautiful swirl (even if you’re a total beginner), and little tricks I’ve picked up after years of brownie experiments. Trust me, once you try these, you’ll want to make them again and again!
Why You Will Love This Cheesecake Brownies Recipe
Cheesecake brownies have deep roots in American baking culture. The classic brownie, said to have originated in Chicago in the late 19th century, met its match when creative home bakers started swirling in cheesecake batter. It’s a mashup that feels like it was always meant to be. I first tasted a marbled brownie at my grandma’s house on a rainy afternoon—she had a knack for turning simple ingredients into something magical, and this dessert was always her favorite to share.
Through the years, I’ve tried countless versions. Some used boxed brownie mixes, others were from scratch, but all had one thing in common: they disappeared fast! What makes this particular cheesecake brownies recipe stand out is the balance. The chocolate isn’t too overpowering, and the cheesecake layer is just the right amount of tangy and sweet. The marbling, by the way, is not just for looks—it actually helps the flavors blend together in every bite.
You can make these year-round, but they’re especially perfect during the cooler months when you want something cozy and indulgent. For holiday parties, bake sales, or even a casual movie night, these brownies always hit the spot. And if you’re like me and love a bit of food history, you’ll find it fun to know that marbled desserts have been popular for centuries, first seen in cakes made by German bakers. Now, they’re a Pinterest favorite, and for good reason!
Ingredient Discussion
- Chocolate: I’m a big fan of using semi-sweet chocolate chips or a good quality baking chocolate bar (at least 60% cocoa). For best results, pick chocolate that you’d enjoy eating on its own. If you’re dairy-free, there are vegan chocolate varieties that melt beautifully. I always store my chocolate in a cool, dry place (not the fridge—humidity ruins it!).
- Butter: Unsalted butter gives you more control over the final flavor. Look for butter with a high fat content if you want a richer brownie. If you’re avoiding dairy, coconut oil works, but it does add a slight coconut flavor. Softened butter blends more easily, so leave it out for about 30 minutes before starting.
- Sugar: Regular granulated sugar is perfect here, but you can swap in light brown sugar for an extra hint of caramel. For a lower-glycemic version, try coconut sugar—it works but changes the color a bit. I keep my sugars in airtight containers to keep them from clumping.
- Eggs: Fresh, large eggs help with structure and richness. Room temperature eggs mix better and create a silkier batter. For egg allergies, a flaxseed egg (1 tbsp ground flax + 2.5 tbsp water per egg) is a decent substitute, though the texture is slightly denser.
- Flour: All-purpose flour keeps these brownies dense and fudgy. If you need gluten-free, use a cup-for-cup gluten-free blend. For a slightly chewier texture, I sometimes mix in a tablespoon of bread flour—just don’t overmix the batter!
- Cream Cheese: Full-fat block cream cheese is a must for that creamy, tangy cheesecake layer. Avoid the whipped tubs—they’re too soft. If you like a milder taste, try Neufchâtel cheese. Let it soften at room temp for easy mixing.
- Vanilla Extract: Pure vanilla extract really brings out the flavors. I love using Madagascar vanilla for its bold taste, but any pure extract works. For a fun twist, almond extract can be swapped in for a different vibe.
- Salt: Just a pinch brings out the chocolate flavor. I prefer kosher salt because it dissolves evenly.
- Optional Add-Ins: You can throw in chocolate chips, nuts, or even swirl in some raspberry jam for a fruity kick. I’ve used toasted pecans before, and they add a great crunch!
Sourcing these ingredients isn’t tricky—you’ll find most at any grocery store. For specialty chocolates or vanilla, check online or your local bakery supply. If you’re baking in the summer, keep your chocolate and cream cheese refrigerated until needed to prevent melting. And don’t be afraid to mix up add-ins based on what’s in season or what you have on hand—fresh berries in summer, peppermint chips in winter, you get the idea!
Equipment Needed
- 8×8-inch (20x20cm) Baking Pan: This size gives you thick, bakery-style brownies. A 9×9-inch pan works, but the bars will be a bit thinner. If you only have a rectangular pan, watch your baking time, as brownies may cook faster.
- Mixing Bowls: Two medium bowls—one for the brownie batter, one for the cheesecake mixture. Glass bowls make it easier to see if everything’s mixed properly.
- Electric Mixer or Whisk: An electric hand mixer is a lifesaver for the cheesecake layer. A sturdy whisk gets the job done too, but be ready for a little arm workout.
- Measuring Cups and Spoons: Accuracy matters with brownies—especially with the flour. Digital scales are even better for spot-on measurements.
- Rubber Spatula: Essential for scraping every bit of batter and swirling the marbled top. I keep a couple around to avoid mixing flavors.
- Parchment Paper: Lining your pan makes for easy removal and pretty edges. In a pinch, you can butter and flour the pan but parchment is best.
- Toothpick or Skewer: For that marbled pattern. You can use the handle of a spoon if you don’t have either on hand.
Honestly, you don’t need fancy gadgets for this cheesecake brownies recipe. If you’re just starting out, thrift stores often have good pans and bowls for cheap. Keep your mixer clean—cheesecake batter sticks!—and replace spatulas if they get too worn out. Good tools make baking these marbled bars a lot more fun.
How to Make Cheesecake Brownies: Step-by-Step Method
-
Prep the Pan & Oven (10 minutes):
Preheat your oven to 350°F (175°C). Line your 8×8-inch (20x20cm) baking pan with parchment paper, letting the edges hang over for easy lifting. Lightly grease the paper. This step helps prevent sticking and guarantees those neat, Instagram-ready bars. -
Melt Chocolate & Butter (5 minutes):
In a microwave-safe bowl, combine 1 cup (170g) semi-sweet chocolate chips and 1/2 cup (115g) unsalted butter. Microwave in 30-second bursts, stirring after each, until smooth and glossy. If melting over the stove, use a double boiler and stir constantly. Let it cool a bit before adding to the batter—hot chocolate can scramble your eggs! -
Make Brownie Batter (5 minutes):
Add 1 cup (200g) granulated sugar to the chocolate mixture. Stir until well blended. Beat in 2 large eggs (room temperature), one at a time. Add 1 teaspoon vanilla extract and a pinch of salt. Fold in 2/3 cup (85g) all-purpose flour, mixing just until combined. The batter will be thick and shiny. Don’t overmix, or you’ll get cakey brownies. -
Make Cheesecake Layer (5 minutes):
In a separate bowl, beat 8 oz (225g) softened cream cheese until smooth. Add 1/4 cup (50g) granulated sugar, 1 large egg, and 1/2 teaspoon vanilla extract. Beat until creamy and lump-free. You want a pourable, smooth consistency—if it’s too thick, add a splash of milk. -
Layer & Marble (5 minutes):
Pour about 2/3 of the brownie batter into the prepared pan and spread evenly. Dollop the cheesecake batter by the spoonful over the brownie layer. Drop remaining brownie batter in between. Use a toothpick or skewer to gently swirl the layers together, creating a marbled effect. Don’t overdo it—too much swirling mixes the batters completely. -
Bake (35-40 minutes):
Bake for 35-40 minutes, or until the center is just set and a toothpick inserted comes out with a few moist crumbs. If the edges are browning too quickly, cover loosely with foil for the last 10 minutes. The cheesecake should look slightly puffed and not jiggly in the center. -
Cool & Chill (1-2 hours):
Let the brownies cool completely in the pan. For best results, refrigerate for at least 1 hour before cutting—this helps the layers set and makes for cleaner slices. Use the parchment edges to lift the brownies out and cut into squares with a sharp knife (wipe between cuts for picture-perfect bars).
Tip: If your cheesecake layer cracks, don’t worry—marbling hides imperfections! If the brownie seems underbaked, let it cool fully; it’ll firm up. I always do a quick tap test on the pan—if it jiggles a lot, it needs more time. And if you like gooey brownies, pull them a minute or two early. There’s a little flexibility, and that’s part of the fun!
Cooking Tips & Techniques for Perfect Cheesecake Brownies
Here’s where experience comes in handy. If you want that classic marbled look, don’t swirl too aggressively—gentle figure-eights with a toothpick do the trick. Over-swirling mixes the batters and you’ll lose the pattern. Trust me, I’ve done it more than once and ended up with a tasty but not-so-pretty pan!
Timing is everything. If you’re multitasking, set a timer for 5-minute increments after the 30-minute mark so you don’t overbake. Cheesecake brownies can go from fudgy to dry pretty quickly. I usually start checking at 32 minutes, especially if my oven’s running a bit hot.
Let’s talk about mixing. For the cheesecake layer, beat until smooth but avoid overmixing once the egg goes in—overbeating can lead to cracks. For the brownie batter, stir in the flour just until you can’t see it anymore. Overmixing here makes brownies tough (I learned this the hard way—nobody likes rubbery brownies).
For consistent results, measure your ingredients carefully. Baking is a science, and even a little extra flour can change the texture. If you’re using a metal pan, brownies bake faster than in glass, so check a couple minutes early. And always cool the brownies before cutting—they’re much easier to slice and taste even better chilled.
Variations & Adaptations
One of the reasons I love this cheesecake brownies recipe is how versatile it is. Here are some ways to mix things up:
- Gluten-Free: Swap in a 1:1 gluten-free flour blend. I’ve used Bob’s Red Mill and King Arthur with good results. The texture stays fudgy, and nobody seems to notice the difference!
- Vegan: Use vegan butter, dairy-free cream cheese, and flax eggs. There are some great vegan chocolate chips out there, too. The flavor is a bit different but still super satisfying.
- Flavor Swaps: Add a swirl of raspberry or strawberry jam to the cheesecake layer for a fruity twist. For a mocha vibe, dissolve a teaspoon of instant espresso in the melted chocolate. A sprinkle of sea salt on top before baking adds a gourmet touch.
- Nuts & Add-Ins: Fold in 1/2 cup (60g) chopped walnuts or pecans for crunch. Peanut butter fans—drop spoonfuls of peanut butter on top and swirl for PB&J vibes.
- Cooking Method: If you’re in a hurry, bake in muffin tins for individual cheesecake brownie cups—just reduce the baking time to 18-22 minutes.
Personally, I love using orange zest in the cheesecake layer for a citrusy surprise. The combination of chocolate and orange is so good! Don’t be afraid to experiment and make these bars your own—half the fun is discovering your favorite combo.
Serving & Storage Suggestions
Che
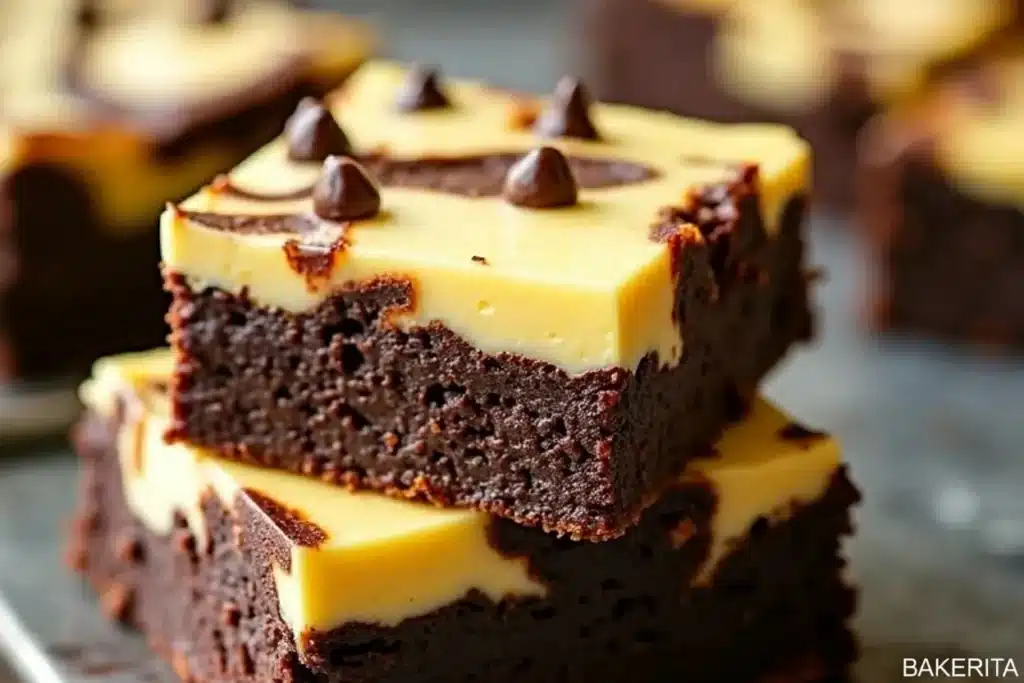
Cheesecake Brownies
- Total Time: 1 hour 15 minutes
- Yield: 16 bars 1x
Description
These easy homemade cheesecake brownies feature a rich, fudgy chocolate base swirled with creamy, tangy cheesecake for a decadent marbled dessert bar. Perfect for gatherings, bake sales, or whenever you crave a showstopping treat.
Ingredients
- 1 cup (170g) semi-sweet chocolate chips or chopped baking chocolate (at least 60% cocoa)
- 1/2 cup (115g) unsalted butter, plus more for greasing
- 1 cup (200g) granulated sugar
- 2 large eggs, room temperature
- 1 teaspoon vanilla extract
- Pinch of kosher salt
- 2/3 cup (85g) all-purpose flour
- 8 oz (225g) cream cheese, softened (full-fat block style)
- 1/4 cup (50g) granulated sugar (for cheesecake layer)
- 1 large egg (for cheesecake layer)
- 1/2 teaspoon vanilla extract (for cheesecake layer)
- Optional: splash of milk (if cheesecake batter is too thick)
- Optional add-ins: 1/2 cup chocolate chips, chopped nuts, or swirl of raspberry jam
Instructions
- Preheat oven to 350°F (175°C). Line an 8×8-inch (20x20cm) baking pan with parchment paper, leaving overhang for easy removal. Lightly grease the paper.
- In a microwave-safe bowl, combine chocolate chips and butter. Microwave in 30-second bursts, stirring after each, until melted and smooth. Let cool slightly.
- Stir 1 cup sugar into the melted chocolate mixture. Beat in 2 eggs, one at a time. Add 1 teaspoon vanilla extract and a pinch of salt. Fold in flour just until combined. Do not overmix.
- In a separate bowl, beat cream cheese until smooth. Add 1/4 cup sugar, 1 egg, and 1/2 teaspoon vanilla extract. Beat until creamy and lump-free. If too thick, add a splash of milk.
- Spread about 2/3 of the brownie batter evenly in the prepared pan. Dollop cheesecake batter by spoonfuls over the brownie layer. Drop remaining brownie batter in between.
- Use a toothpick or skewer to gently swirl the batters together for a marbled effect. Do not over-swirl.
- Bake for 35-40 minutes, or until the center is just set and a toothpick inserted comes out with a few moist crumbs. If edges brown too quickly, cover loosely with foil for the last 10 minutes.
- Cool completely in the pan. For best results, refrigerate at least 1 hour before cutting. Use parchment to lift brownies out and slice with a sharp knife, wiping between cuts.
Notes
For best marbling, swirl gently with a toothpick in figure-eights. Do not overmix the batters. Cool and chill brownies before slicing for clean edges. Add-ins like nuts, chocolate chips, or fruit jam can be swirled in for variety. For gluten-free, use a 1:1 gluten-free flour blend. Brownies can be stored in an airtight container in the fridge for up to 5 days.
- Prep Time: 20 minutes
- Cook Time: 35-40 minutes
- Category: Dessert
- Cuisine: American
Nutrition
- Serving Size: 1 bar (1/16 of pan)
- Calories: 220
- Sugar: 17
- Sodium: 80
- Fat: 13
- Saturated Fat: 7
- Carbohydrates: 24
- Fiber: 1
- Protein: 3
Keywords: cheesecake brownies, marbled brownies, chocolate dessert bars, easy brownies, homemade brownies, cream cheese brownies, fudgy brownies, bake sale recipes, potluck desserts