I still remember the first time I accidentally ate cheesecake for breakfast. It was a lazy Sunday, and I’d woken up to the smell of something rich, sweet, and utterly irresistible wafting from the kitchen. My partner had whipped up this creamy classic cheesecake recipe, and before I knew it, I was sneaking a slice right out of the fridge. It was like breakfast met dessert, and honestly? I was hooked.
This creamy classic cheesecake recipe isn’t your typical morning fare, but it’s become my go-to treat when I want something special that feels indulgent without being overly complicated. After making it a dozen times (not even exaggerating), I’ve nailed down the perfect balance of creaminess and tang, with a buttery crust that’s just right. If you think cheesecake is only for after dinner, wait till you try this for breakfast—it might just change your weekend mornings forever.
Why You’ll Love This Creamy Classic Cheesecake Recipe
Okay, I need to be honest—this cheesecake has completely spoiled all other breakfast options for me. Here’s why it’s worth waking up early for:
- ✅ Silky smooth texture: I’ve tweaked this recipe until it’s melt-in-your-mouth creamy without being dense or heavy. The secret? A slow water bath bake that keeps it perfectly moist.
- ✅ Simple ingredients, big flavors: You probably have most of these in your fridge already—cream cheese, eggs, a bit of sugar, and vanilla. No crazy stuff.
- ✅ Versatile treat: Whether you want to keep it classic or jazz it up with fresh berries or a drizzle of honey, this cheesecake fits the bill.
- ✅ Breakfast that feels like a celebration: It’s like giving your morning a little luxury, without hours of fuss.
This cheesecake has become my comfort food and my party pleaser. There’s something about that creamy richness paired with a crunchy crust that just makes mornings feel special. Honestly, it’s the kind of recipe that makes you want to slow down, savor each bite, and maybe even have a second slice (no judgment here).
What Ingredients You’ll Need for the Creamy Classic Cheesecake
Here’s what I love about this ingredient list: it’s straightforward and forgiving. Plus, I’ll share why each part matters so you can feel confident swapping things out if you need to.
- Cream cheese (24 oz / 680g, full-fat) — The star of the show. I always use full-fat because it gives that rich, creamy texture. Make sure it’s softened to room temperature for the smoothest batter.
- Granulated sugar (1 cup / 200g) — For that perfect sweet balance. I stick with plain white sugar, but you can experiment with coconut sugar for a deeper flavor.
- Large eggs (3) — Bring these to room temperature before mixing. Cold eggs can cause lumps, and nobody wants that.
- Sour cream (1 cup / 240g) — Adds tang and moisture, keeping the cheesecake from being too dense. Full-fat is best here too.
- Pure vanilla extract (1 ½ teaspoons) — I swear by Nielsen-Massey for vanilla, but any good quality will do. It’s what gives that subtle warmth.
- All-purpose flour (2 tablespoons / 15g) — Just a bit to help structure without making it cakey.
- Butter (6 tablespoons / 85g, melted) — For the crust. I use unsalted butter so I can control the salt myself.
- Graham cracker crumbs (1 ½ cups / 150g) — The base that gives a buttery crunch. I crush my own with a rolling pin for that perfect texture.
Pro tip: If you don’t have graham crackers, digestive biscuits or even crushed vanilla wafers work great. Just aim for about the same amount by weight.
Equipment Needed
You don’t need a fancy kitchen to make this creamy classic cheesecake recipe—I’ve made it with the most basic setup, and it still turned out amazing.
- 9-inch springform pan — This is a must. The removable sides make it way easier to get your cheesecake out without any cracks.
- Mixing bowls — Two works best: one for the crust and one for the filling.
- Electric mixer (hand or stand) — You want to beat the cream cheese until smooth and fluffy. I’ve done this by hand in a pinch, but it’s a workout.
- Measuring cups and spoons — Baking is a science, so I recommend measuring precisely. A kitchen scale is even better if you have one.
- Spatula — For scraping down the bowl and folding in ingredients gently.
- Aluminum foil — To wrap the pan for the water bath (don’t skip the water bath—it’s a game changer).
Quick note: If you don’t have a springform pan, a regular cake pan lined with parchment works in a pinch, but the sides won’t come off, so be gentle when serving.
How to Make This Creamy Classic Cheesecake Recipe: Step-by-Step

- Preheat and prep (10 minutes)
Preheat your oven to 325°F (160°C). Wrap the outside of your 9-inch springform pan with two layers of heavy-duty aluminum foil to prevent leaks during the water bath. Grease the pan lightly with butter or non-stick spray. - Make the crust (5 minutes)
In a bowl, combine 1 ½ cups (150g) graham cracker crumbs with 6 tablespoons (85g) melted butter. Stir until the crumbs are evenly coated and look like wet sand. Press this mixture firmly into the bottom of your prepared pan, creating an even layer. Pop it in the fridge while you make the filling. - Beat the cream cheese (5-7 minutes)
In a large mixing bowl, beat the softened cream cheese with an electric mixer on medium speed until smooth and creamy—no lumps. This step is key for that silky texture. - Add sugar and eggs (3-5 minutes)
Gradually add 1 cup (200g) sugar, beating until combined. Then add eggs one at a time, mixing well after each addition. Scrape down the sides as needed to keep things even. - Mix in sour cream, vanilla, and flour (2 minutes)
Add 1 cup (240g) sour cream, 1 ½ teaspoons vanilla extract, and 2 tablespoons (15g) all-purpose flour. Beat on low speed until just combined. Don’t overmix here—you want to keep it light and creamy. - Pour & prep for baking (2 minutes)
Pour your filling over the chilled crust in the springform pan. Smooth the top with a spatula. Place the pan inside a larger baking dish or roasting pan, then carefully pour hot water into the outer pan until it reaches halfway up the sides of the springform pan. This water bath prevents cracking and helps the cheesecake bake evenly. - Bake (1 hour 10 minutes)
Bake at 325°F (160°C) for about 70 minutes. The edges should be set, and the center will still jiggle slightly when you gently shake the pan—that’s perfect. - Cool gradually (2-3 hours)
Turn off the oven, slightly crack the oven door, and let the cheesecake cool inside for 1 hour. This slow cooldown helps prevent cracks. Then remove from the oven and water bath, unwrap the foil, and cool completely on a wire rack. - Chill overnight (8 hours+)
Cover the cheesecake with plastic wrap and refrigerate for at least 8 hours or overnight. This step is what sets the creamy texture and deepens the flavors.
Heads up: I’ve burned the edges a couple of times by skipping the water bath, so please don’t skip it. It really makes a difference!
My Best Tips & Techniques for Perfect Cheesecake Every Time
Okay, here’s where I share everything I’ve learned from making this way too many times…
- Don’t rush the cream cheese beating. I once tried to cut corners and ended up with lumps that ruined the texture. Beat it until silky smooth for a flawless batter.
- Room temperature ingredients are your friend. Cold eggs or sour cream can cause the batter to split or be lumpy. Set them out 30 minutes before starting.
- Water bath is non-negotiable. It keeps the cheesecake moist and crack-free. Wrap your pan tightly with foil to avoid leaks.
- Don’t overbake. I check mine around 65 minutes and then every 5 minutes after. The center should jiggle like gelatin, not be firm.
- Slow cooling is key. Letting the cheesecake cool gradually in the oven helps avoid cracks. Patience here pays off.
- Use a thin, sharp knife to loosen the edges before removing the springform. It helps prevent the sides from sticking and cracking.
Ways to Mix It Up: Cheesecake Variations You’ve Got to Try
Once you’ve nailed the classic, here’s where you can get playful. I’ve tried all of these and they’re all winners.
- Berry Swirl: Fold in ½ cup fresh raspberry or blueberry puree gently into the batter before baking for a beautiful marbled effect. My kids love the pop of color and tartness.
- Chocolate Cheesecake: Add ½ cup cocoa powder to the filling and mix well. Sprinkle ¼ cup mini chocolate chips over the crust before pouring in the batter. Rich, indulgent, and perfect for chocoholics.
- Lemon Zest: Add 2 teaspoons of finely grated lemon zest and 1 tablespoon lemon juice to brighten the flavor. It’s fresh and zingy—great for spring mornings.
- Salted Caramel Topping: Drizzle homemade or store-bought salted caramel sauce over chilled slices. Sweet and salty magic.
- Gluten-Free Crust: Swap graham crackers for gluten-free cookies or almond flour mixed with butter. I’ve done this for friends with no complaints.
- Vegan Version: I haven’t perfected this yet, but readers have had success using cashew cream and vegan cream cheese alternatives.
Serving Ideas & Storage for Your Creamy Classic Cheesecake
This cheesecake is fantastic both fresh and chilled. I typically slice it after it’s been in the fridge overnight—makes for clean cuts and perfect texture.
- Serving suggestions: I love it plain with a cup of black coffee for breakfast, or topped with fresh berries and a dollop of whipped cream when I want a fancier touch.
- Breakfast treat idea: Try a slice alongside scrambled eggs and crispy bacon for a sweet-savory combo that never gets old.
- Storage: Keep the cheesecake covered tightly with plastic wrap in the fridge for up to 5 days. It actually tastes better after a day or two as the flavors meld.
- Freezing: Cheesecake freezes well! Slice it, wrap each piece individually in plastic wrap, then foil, and freeze for up to 3 months. Thaw overnight in the fridge and enjoy.
- Reheating: I prefer it chilled, but you can microwave a slice for 10-15 seconds if you want it a bit warm (just don’t overdo it or it turns greasy).
Nutritional Info & Health Benefits
I’m not a nutritionist, but here’s why I feel good about indulging in this creamy classic cheesecake recipe.
| Nutrient | Per Slice (1/12th) |
|---|---|
| Calories | 320 |
| Protein | 7g |
| Carbohydrates | 26g |
| Fat | 22g |
| Fiber | 1g |
Why it’s not just empty calories: The cream cheese and sour cream give you a nice dose of protein and calcium, which helps keep you full longer than your average sugary breakfast pastry. Plus, with no artificial ingredients or preservatives, you’re getting a homemade treat that feels indulgent but real.
Real talk: It’s still cheesecake, so enjoy it as a treat rather than a daily habit. But when you do, you’re getting something that tastes like a million bucks and fills you up.
Final Thoughts on This Creamy Classic Cheesecake Recipe
So that’s my creamy classic cheesecake recipe! I know I’ve gone on about it, but when you find a breakfast treat this good, you want to shout it from the rooftops.
This cheesecake has become my go-to when I want to impress guests, treat myself, or just make a lazy weekend feel extra special. It’s creamy, tangy, and buttery all at once—comfort food that actually feels elegant.
Make it your own! Add berries, chocolate, lemon zest—whatever your heart desires. And if you’re nervous about the water bath or baking times, don’t be. I’ve been there, made the mistakes, and I’m here to help.
If you make this, I’d love to hear how it turns out! Drop a comment below or tag me on Instagram @[yourhandle]. Your kitchen is about to smell amazing, and I can’t wait for you to taste the magic.
Happy baking, friends!
FAQs About Creamy Classic Cheesecake Recipe
Q: Can I use low-fat cream cheese for this recipe?
A: You can, but I don’t recommend it if you want that ultra-creamy texture. Low-fat cream cheese tends to be a bit grainy and can affect the richness. If you’re okay with a lighter, less silky cheesecake, go for it!
Q: How do I know when my cheesecake is done baking?
A: Great question! The edges should look set and slightly puffed, but the center should still jiggle gently when you shake the pan. It’s a little like gelatin—too firm means you overbaked it, and too loose means it needs more time. Don’t worry if it jiggles; it will firm up as it cools.
Q: Can I make this cheesecake ahead of time?
A: Absolutely! In fact, it tastes better after chilling overnight. I often bake it the day before a party or breakfast and keep it refrigerated until serving. Just keep it covered tightly to prevent it from drying out.
Q: What can I substitute for graham cracker crumbs?
A: If you can’t find graham crackers, digestive biscuits, vanilla wafers, or even crushed pretzels work well. Just make sure to keep the same amount by weight and mix with butter as usual for that perfect crust.
Q: My cheesecake cracked on top—what did I do wrong?
A: Cracks usually happen when the batter is overmixed or the oven temperature is too high. The water bath helps prevent this by providing gentle, even heat. Also, avoid opening the oven door during baking. Don’t worry though—cracked cheesecake still tastes amazing, and a topping like fruit or whipped cream can hide cracks perfectly.
Pin This Recipe!


Creamy Classic Cheesecake
- Total Time: 9 hours 30 minutes
- Yield: 12 servings 1x
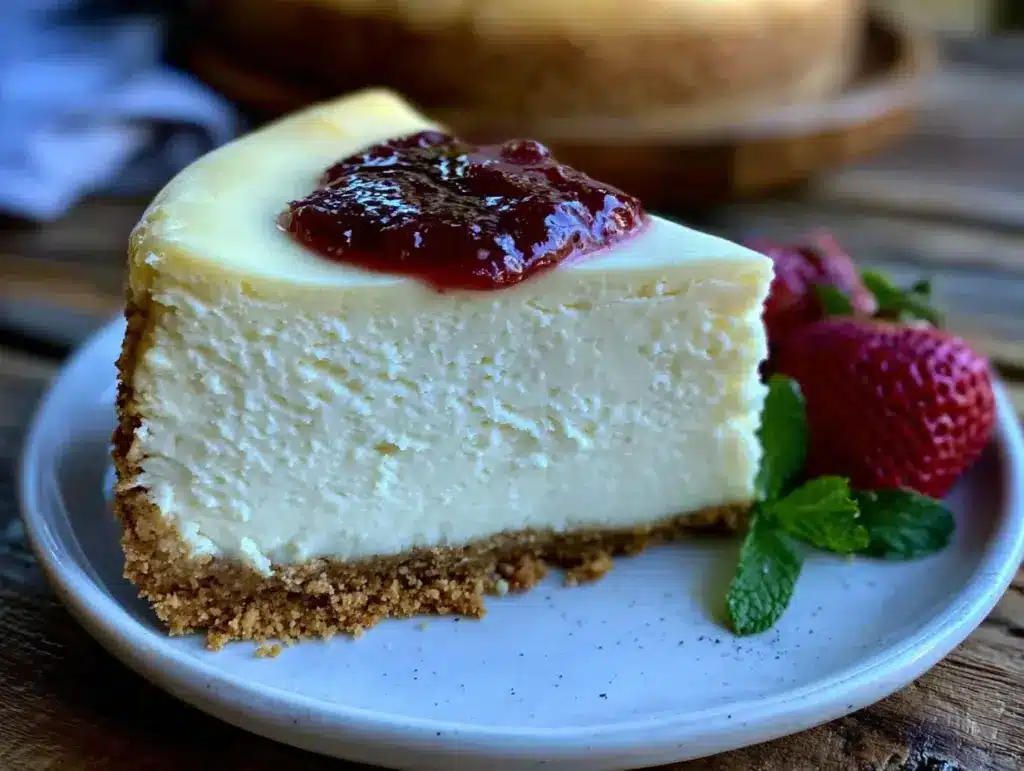
Description
A silky smooth, creamy classic cheesecake with a buttery graham cracker crust, perfect for breakfast or dessert. This recipe features a slow water bath bake for a moist, crack-free finish.
Ingredients
- 24 oz (680g) full-fat cream cheese, softened to room temperature
- 1 cup (200g) granulated sugar
- 3 large eggs, room temperature
- 1 cup (240g) full-fat sour cream
- 1 ½ teaspoons pure vanilla extract
- 2 tablespoons (15g) all-purpose flour
- 6 tablespoons (85g) unsalted butter, melted
- 1 ½ cups (150g) graham cracker crumbs
Instructions
- Preheat oven to 325°F (160°C). Wrap the outside of a 9-inch springform pan with two layers of heavy-duty aluminum foil to prevent leaks during the water bath. Lightly grease the pan with butter or non-stick spray.
- In a bowl, combine graham cracker crumbs and melted butter. Stir until crumbs are evenly coated and look like wet sand. Press mixture firmly into the bottom of the prepared pan. Refrigerate while making the filling.
- Beat softened cream cheese with an electric mixer on medium speed until smooth and creamy, about 5-7 minutes.
- Gradually add sugar, beating until combined. Add eggs one at a time, mixing well after each addition. Scrape down sides as needed.
- Add sour cream, vanilla extract, and flour. Beat on low speed until just combined. Do not overmix.
- Pour filling over chilled crust and smooth the top with a spatula. Place the springform pan inside a larger baking dish or roasting pan. Pour hot water into the outer pan until it reaches halfway up the sides of the springform pan.
- Bake for about 70 minutes. Edges should be set and center should jiggle slightly when shaken.
- Turn off oven, crack oven door slightly, and let cheesecake cool inside for 1 hour. Remove from oven and water bath, unwrap foil, and cool completely on a wire rack.
- Cover cheesecake with plastic wrap and refrigerate for at least 8 hours or overnight before serving.
Notes
[‘Use full-fat cream cheese and sour cream for best texture and flavor.’, ‘Room temperature ingredients prevent lumps and ensure smooth batter.’, ‘Water bath is essential to prevent cracks and keep cheesecake moist.’, ‘Do not overbake; the center should jiggle slightly when done.’, ‘Cool cheesecake gradually in the oven to avoid cracks.’, ‘Use a thin, sharp knife to loosen edges before removing springform pan.’, ‘Graham cracker crumbs can be substituted with digestive biscuits or vanilla wafers by weight.’, ‘Cheesecake tastes better after chilling overnight.’, ‘Freeze slices wrapped individually for up to 3 months.’]
- Prep Time: 20 minutes
- Cook Time: 1 hour 10 minutes
- Category: Dessert
- Cuisine: American
Nutrition
- Serving Size: 1 slice (1/12th of c
- Calories: 320
- Fat: 22
- Carbohydrates: 26
- Fiber: 1
- Protein: 7
Keywords: classic cheesecake, creamy cheesecake, breakfast cheesecake, graham cracker crust, water bath cheesecake, easy cheesecake recipe