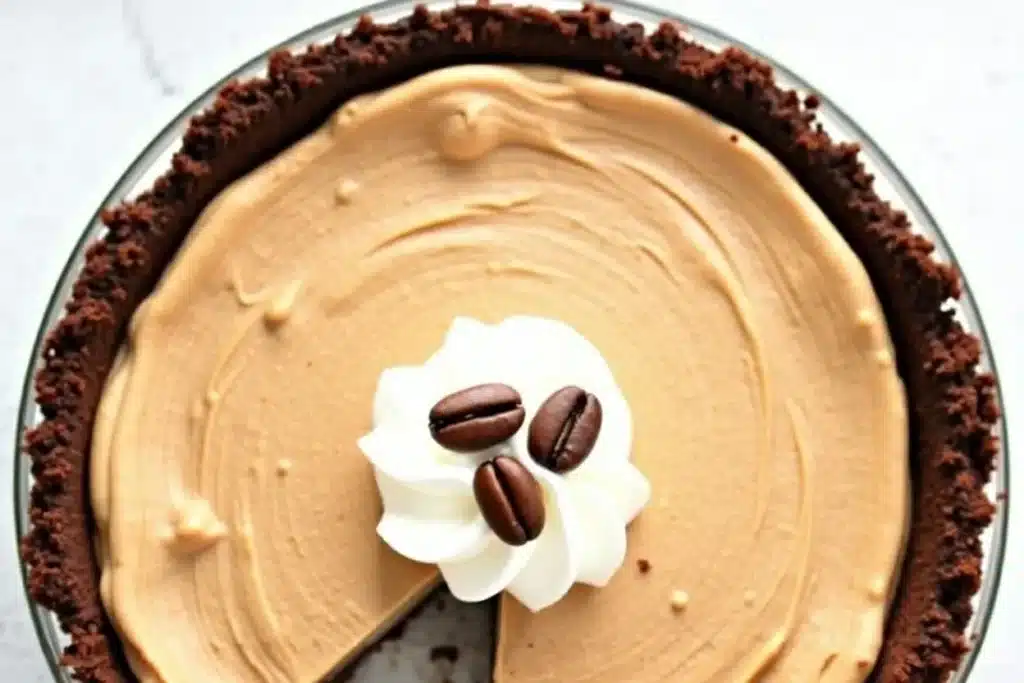
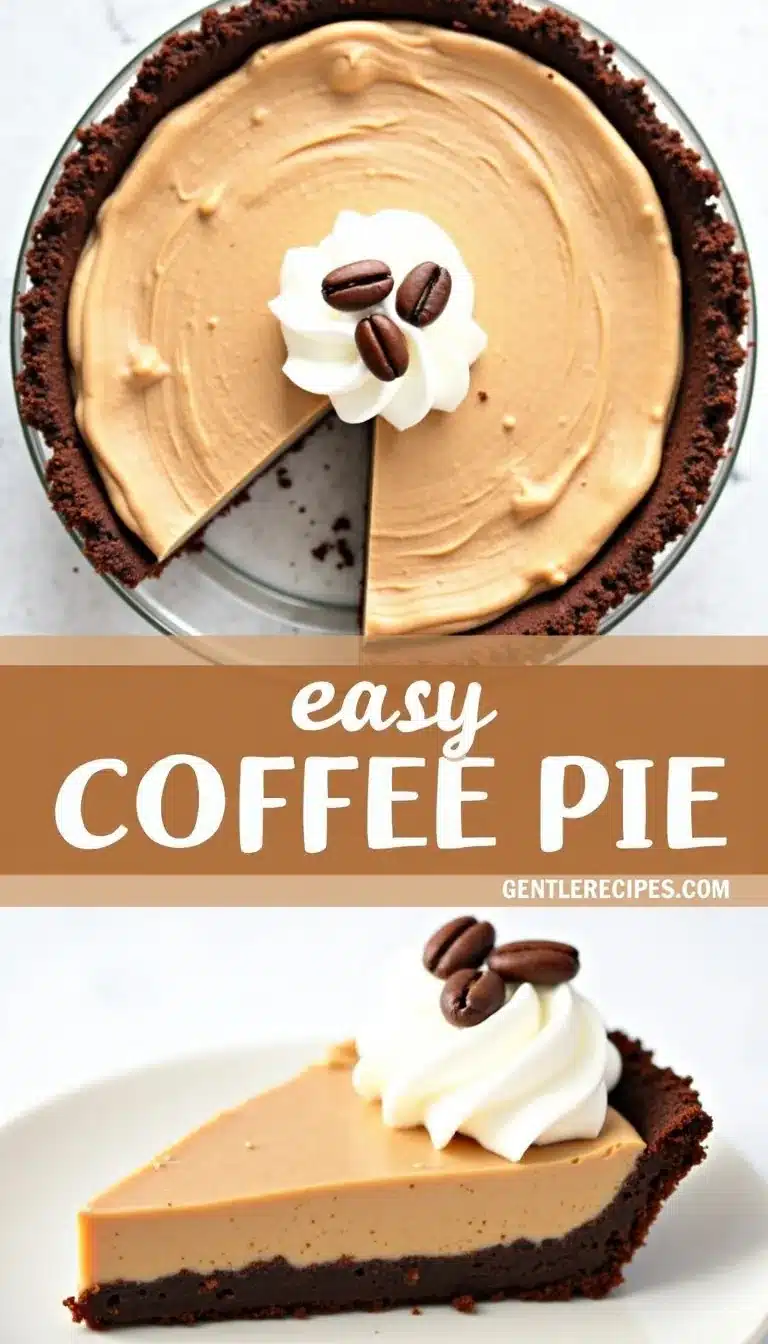
If you’ve ever craved something sweet, creamy, and packed with that rich coffee flavor, this coffee pie recipe easy no bake dessert is about to become your new favorite treat! Imagine a silky, coffee-infused filling nestled inside a crunchy chocolate cookie crust, all topped with clouds of whipped cream – and the best part? No oven required! This freezer pie is a true lifesaver when you want dessert without breaking a sweat, especially during those hot summer days when turning on the oven is just not happening. I’ve been obsessed with this recipe for ages, and honestly, I can’t wait for you to try it.
Coffee pie might sound a little out-of-the-box, but trust me, it’s a classic in its own right, especially if you’re a coffee lover like me. I first discovered coffee pie at a tiny roadside diner during a road trip with my best friend – one forkful and I was hooked. There’s something magical about the way coffee pairs with chocolate and cream, and this recipe captures all those dreamy flavors in one easy-to-make dessert. Plus, it’s freezer-friendly, which means you can make it ahead and always have a slice ready for an afternoon pick-me-up or a last-minute gathering. Let’s face it, life’s just better with coffee pie in the freezer!
Why You Will Love This Easy No Bake Coffee Pie Recipe
This coffee pie recipe easy no bake dessert is more than just a quick fix – it’s a little piece of dessert history with roots in American diner culture. Back in the 1950s, coffee-infused desserts started popping up in diners across the country, and coffee pie quickly became a local favorite in the Midwest. I remember my grandmother talking about her favorite “coffee icebox pie” that she used to share with friends after church on Sundays. It was always about the company, the conversation, and that familiar, comforting bite of something sweet and packed with coffee flavor.
Over the years, this pie has evolved from a labor-intensive, cooked custard pie to the modern, super-easy, no bake freezer dessert we love today. The beauty of this recipe is its simplicity – a handful of ingredients, a few minutes of mixing, and a little patience while it chills. It’s perfect for hot days, busy holidays, or whenever you want to surprise your family with something special but don’t have hours to spare. Plus, it’s totally customizable – you can jazz it up with chocolate shavings, a drizzle of caramel, or even a sprinkle of cinnamon for a seasonal twist.
If you’re anything like me, you’ll find yourself reaching for this recipe whenever you need a crowd-pleasing dessert that looks impressive but is secretly effortless. And because it’s stored in the freezer, it’s always ready to go, whether you’re planning a summer barbecue, a cozy winter gathering, or just need a sweet treat after dinner. Trust me, one bite and you’ll understand why this coffee pie is a family favorite in my house – and maybe soon, in yours too!
Ingredient Discussion
Let’s break down what you’ll need for this coffee pie recipe easy no bake dessert and chat about how to pick the best ingredients, plus some handy substitutions and storage tips. You know me, I’m always on the hunt for the tastiest (but easiest) way to make desserts shine!
- Chocolate Cookie Crust: You can use pre-made chocolate cookie crusts, or crush up about 24 chocolate sandwich cookies (like Oreos) and mix with 1/4 cup (60g) melted butter. I usually go for the classic Oreo brand, but any similar cookie will work. If you’re gluten-free, try gluten-free chocolate cookies. Store-bought crusts are convenient and save time, but homemade gives you control over thickness and flavor.
- Instant Coffee or Espresso Powder: This is the heart of the recipe! I like to use a strong instant espresso powder for a deeper flavor (about 2 tablespoons/10g), but you can use any instant coffee granules. If you want a milder taste, reduce the amount. For decaf, just swap in decaffeinated coffee powder. Store opened coffee tightly sealed in a cool, dark place to keep it fresh.
- Sweetened Condensed Milk: This gives the pie its creamy, sweet base. Look for cans that are not dented or expired. For a dairy-free version, you can find coconut condensed milk at many specialty stores or online. Once opened, cover and refrigerate any leftovers – it’ll last about a week.
- Whipped Topping or Heavy Whipping Cream: For convenience, I often use store-bought whipped topping (like Cool Whip) – you’ll need about 8 ounces (225g). If you prefer homemade, whip 1 cup (240ml) of heavy cream with 2 tablespoons (25g) sugar until stiff peaks form. Homemade has a richer flavor, but store-bought is stable and quick. Keep whipped topping frozen until ready to use; homemade whipped cream is best used fresh.
- Cream Cheese: This gives the filling structure and tang. Go for full-fat cream cheese for best texture. Let it soften at room temperature for easier mixing. Light or Neufchâtel cheese works too, but the pie will be slightly softer. Keep cream cheese refrigerated, and don’t use if it smells off or is past its best-by date.
- Vanilla Extract: Just a splash (about 1 teaspoon/5ml) brings all the flavors together. Pure vanilla extract is best, but imitation works in a pinch. Store it in a cool, dark cupboard.
- Optional Garnishes: Chocolate shavings, cocoa powder, a dusting of cinnamon, or even a drizzle of caramel. Use dark or milk chocolate for shavings – just run a vegetable peeler along a chocolate bar. For a nutty crunch, chopped toasted hazelnuts are fantastic. These extras aren’t required but really make the pie look and taste special!
For sourcing, your local grocery store will have almost everything you need. International stores sometimes carry unique instant coffee brands if you’re adventurous. And don’t forget, seasonal toppings like crushed peppermint or pumpkin spice make this pie perfect for holidays!
Equipment Needed
- 9-inch (23cm) Pie Plate: Glass or metal both work – I’ve used both with good results. If you don’t have a pie plate, a springform pan or even an 8×8-inch square dish will work in a pinch.
- Mixing Bowls: At least one large bowl for the filling, plus a small one for melting butter if making your own crust. Stainless steel or glass bowls are easiest to clean (and don’t absorb odors).
- Electric Mixer (Hand or Stand): Mixing the cream cheese and condensed milk by hand is possible, but an electric mixer gets it super smooth. I’ve tried both – and the mixer always wins for speed and silkiness!
- Rubber Spatula: Makes folding in whipped topping a breeze. If you don’t have one, a large spoon works, but spatulas really help scrape every bit of filling.
- Measuring Cups and Spoons: For accuracy, especially with the instant coffee and condensed milk.
- Plastic Wrap or Aluminum Foil: To cover the pie while it chills in the freezer. Reusable silicone covers are a great eco-friendly option.
If you’re on a budget, dollar stores often have decent pie plates and spatulas. I’ve even used an old cake tin in a pinch! Just remember, keep your mixer’s beaters clean and dry for fluffier whipped cream, and always let your cream cheese soften before mixing to avoid lumps.
Preparation Method
-
Prepare the Crust:
- If using a store-bought chocolate cookie crust, skip to the next step. For homemade: crush 24 chocolate sandwich cookies (about 250g) in a food processor, or place them in a zip-top bag and crush with a rolling pin. Mix with 1/4 cup (60g) melted butter until the texture resembles wet sand (takes about 5 minutes).
- Press the mixture firmly into the bottom and up the sides of a 9-inch (23cm) pie plate. Freeze for at least 15 minutes while preparing the filling.
-
Make the Coffee Filling:
- In a large bowl, beat 8 ounces (225g) softened cream cheese with an electric mixer until smooth (about 2 minutes). Scrape down the sides.
- Add 1 can (14 ounces/400g) sweetened condensed milk, 2 tablespoons (10g) instant coffee or espresso powder, and 1 teaspoon (5ml) vanilla extract. Beat until completely combined and no lumps remain (2-3 minutes). The mixture should smell like sweet coffee and look creamy and tan.
- Taste for coffee strength – if you want a stronger flavor, stir in another teaspoon of instant coffee. (I like mine bold!)
-
Fold in the Whipped Topping:
- Gently fold in 8 ounces (225g) thawed whipped topping or fresh whipped cream using a rubber spatula. Use broad, gentle strokes to keep the mixture light and airy. (Don’t overmix, or it’ll deflate!)
-
Fill and Freeze:
- Pour the coffee filling into the prepared crust. Smooth the top with a spatula. If you’re feeling fancy, use the back of a spoon to create swirls.
- Cover tightly with plastic wrap or foil and freeze for at least 6 hours, preferably overnight. The pie should be firm to the touch and slice cleanly when ready.
-
Garnish and Serve:
- Remove from freezer about 15 minutes before serving to soften slightly for easier slicing.
- Top with extra whipped cream, chocolate shavings, or a dusting of cocoa powder if desired. Use a sharp knife dipped in hot water for clean slices.
Troubleshooting Tips: If the filling looks curdled, the cream cheese was probably too cold – let it warm a bit and beat again. If the crust crumbles, add a touch more melted butter. Don’t worry if it’s not picture-perfect – it’ll taste amazing!
Cooking Tips & Techniques
First, always let your cream cheese soften at room temperature. I’ve tried to rush this and ended up with lumpy filling (not the end of the world, but not ideal). To speed things up, cut the cream cheese into cubes and let it sit for 20-30 minutes. If you forget – no shame, I’ve microwaved it in short bursts (just don’t melt it).
When folding in the whipped topping, use a light hand. Overmixing knocks out the air, leaving the filling dense instead of fluffy. I learned this the hard way after my first attempt came out more like a fudge than a mousse! Also, taste the filling before pouring it into the crust. If you want more coffee kick, stir in a bit more instant coffee dissolved in a teaspoon of water.
For the crust, pressing the cookie mixture firmly makes it less likely to crumble when slicing. I use the bottom of a measuring cup for even pressure. If the crust sticks to the pie plate, run a hot knife around the edges before serving.
Timing-wise, freezing overnight is best for a firm, sliceable pie. If you’re in a hurry, the minimum is about 6 hours, but the longer it sets, the cleaner your slices will be. And if you’re multitasking (aren’t we all?) – make the crust and filling the day before, then garnish just before serving. That way, everything looks and tastes super fresh.
Variations & Adaptations
- Mocha Coffee Pie: Stir 1/3 cup (60g) mini chocolate chips or a swirl of chocolate syrup into the filling for a chocolatey boost. Or, add a tablespoon of cocoa powder with the instant coffee for mocha vibes.
- Gluten-Free Coffee Pie: Use gluten-free chocolate cookies or a gluten-free graham cracker crust. All other ingredients are naturally gluten-free, so it’s a simple switch!
- Dairy-Free Coffee Pie: Use coconut-based sweetened condensed milk, dairy-free cream cheese (like Kite Hill or Tofutti), and coconut whipped topping. The flavor is slightly different (a touch of coconut), but still super tasty. I’ve made it this way for my lactose-intolerant friends, and they loved it.
- Seasonal Twists: For fall, add 1/2 teaspoon cinnamon and a pinch of nutmeg to the filling. In winter, try a sprinkle of crushed peppermint candies on top. For summer, serve with fresh berries.
- Personal Touch: Once, I stirred in a tablespoon of hazelnut liqueur for a grown-up version – it was a hit at our last girls’ night in!
Other adaptations: If you want less sugar, use light whipped topping and reduced-fat cream cheese. For a stronger coffee flavor, double the instant coffee. And if you like crunch, sprinkle chopped espresso beans on top before serving!
Serving & Storage Suggestions
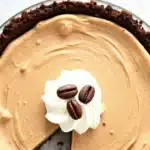
This coffee pie recipe easy no bake dessert is best served chilled straight from the freezer. Let it sit at room temperature for 10-15 minutes for easy slicing and maximum creaminess. I love to top each slice with a dollop of whipped cream and a few chocolate shavings – it looks so fancy with almost zero effort!
Pair with an iced latte for a true coffee shop experience, or serve alongside fresh strawberries
Easy No Bake Coffee Pie
- Total Time: 6 hours 20 minutes
- Yield: 8 servings 1x
Description
This easy no bake coffee pie features a creamy, coffee-infused filling in a chocolate cookie crust, topped with whipped cream. It’s the perfect freezer dessert for coffee lovers and requires no oven time.
Ingredients
- 1 pre-made chocolate cookie crust (or 24 chocolate sandwich cookies, crushed, plus 1/4 cup melted butter)
- 8 ounces (225g) cream cheese, softened
- 1 can (14 ounces/400g) sweetened condensed milk
- 2 tablespoons instant coffee or espresso powder
- 1 teaspoon vanilla extract
- 8 ounces (225g) whipped topping (like Cool Whip), thawed, or 1 cup heavy whipping cream whipped with 2 tablespoons sugar
- Optional: chocolate shavings, cocoa powder, cinnamon, caramel drizzle, or chopped toasted hazelnuts for garnish
Instructions
- If making a homemade crust: Crush 24 chocolate sandwich cookies in a food processor or in a zip-top bag with a rolling pin. Mix with 1/4 cup melted butter until the texture resembles wet sand (about 5 minutes). Press firmly into a 9-inch pie plate and freeze for at least 15 minutes.
- In a large bowl, beat softened cream cheese with an electric mixer until smooth (about 2 minutes).
- Add sweetened condensed milk, instant coffee or espresso powder, and vanilla extract. Beat until completely combined and smooth (2-3 minutes). Taste and add more coffee if desired.
- Gently fold in whipped topping or freshly whipped cream with a rubber spatula until just combined. Do not overmix.
- Pour the filling into the prepared crust and smooth the top. Cover tightly with plastic wrap or foil.
- Freeze for at least 6 hours, preferably overnight, until firm.
- Remove from freezer about 15 minutes before serving. Garnish with extra whipped cream, chocolate shavings, or other desired toppings. Slice with a sharp knife dipped in hot water for clean cuts.
Notes
Let cream cheese soften at room temperature for a smooth filling. For a gluten-free version, use gluten-free cookies for the crust. For a dairy-free version, use coconut condensed milk, dairy-free cream cheese, and coconut whipped topping. Taste the filling before freezing and adjust coffee strength as desired. Freeze overnight for best results and clean slices.
- Prep Time: 20 minutes
- Cook Time: 0 minutes
- Category: Dessert
- Cuisine: American
Nutrition
- Serving Size: 1 slice (1/8 of pie)
- Calories: 390
- Sugar: 30
- Sodium: 270
- Fat: 22
- Saturated Fat: 13
- Carbohydrates: 44
- Fiber: 1
- Protein: 6
Keywords: coffee pie, no bake dessert, freezer pie, easy coffee dessert, chocolate cookie crust, summer dessert, coffee lover, make ahead dessert