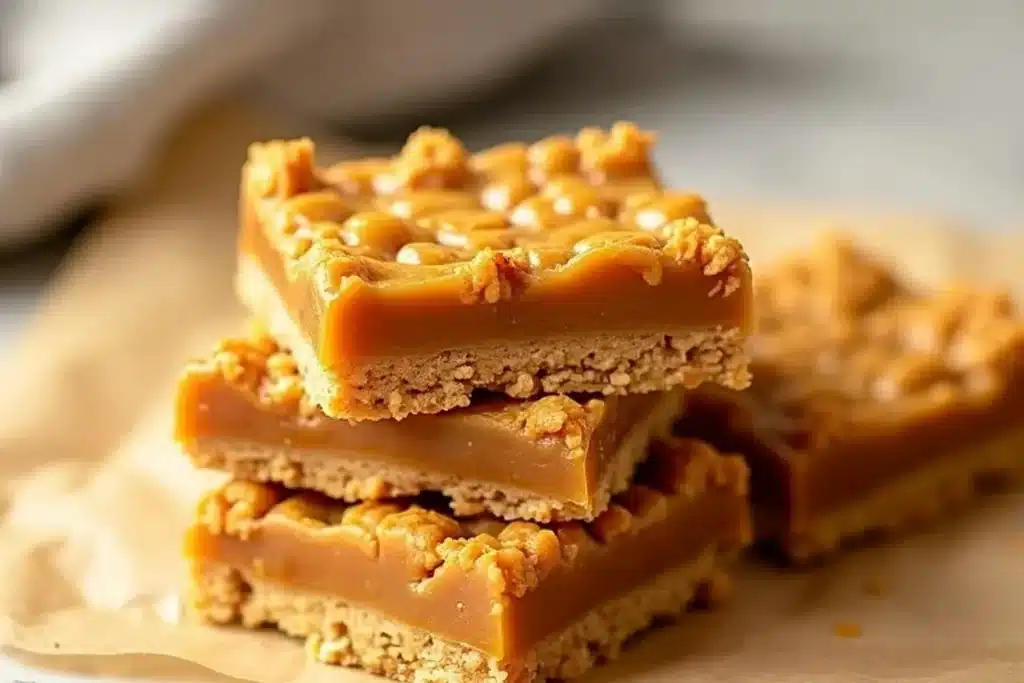
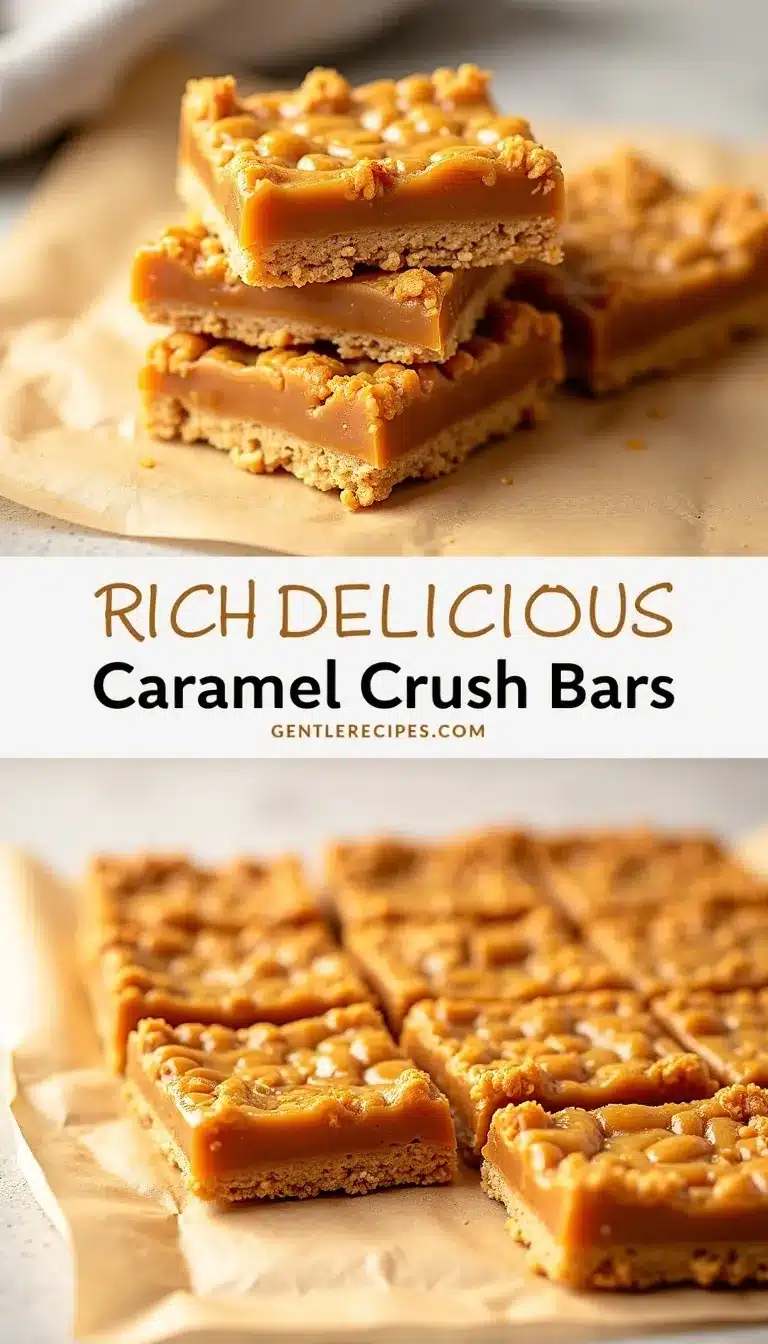
If you’re craving a sweet, gooey treat that comes together with hardly any fuss, you’ve just landed on the perfect recipe! My Caramel Crush Bars recipe is the answer to your dessert dreams—especially if you love all things caramel. These bars are rich, buttery, and loaded with caramel flavor. The best part? They’re completely no-bake, which means you don’t even have to turn on your oven. I can’t tell you how many times these bars have saved me when I needed a last-minute party dessert. Even folks who claim they “don’t have a sweet tooth” end up reaching for seconds. The combination of creamy caramel, crunchy cookie base, and a sprinkle of sea salt is honestly irresistible.
Let’s face it—sometimes you need a recipe that’s as easy as it is impressive. That’s where these Caramel Crush Bars shine. They come together in under 30 minutes, and they’re perfect for sharing at potlucks, parties, or just as a little treat for yourself after a long day. Plus, there’s a special story behind this recipe (I’ll get to that in a bit) that makes it even more special in my kitchen. If you’re looking for a dessert that wows with minimal effort, this is your new go-to. Let’s dive into why you’ll absolutely love making and eating these bars!
Why You Will Love This Caramel Crush Bars Recipe
Let me take you back for a second—this Caramel Crush Bars recipe actually has roots in a classic family tradition. My grandmother used to make something similar with whatever cookies she had on hand, a can of condensed milk, and a bit of ingenuity. She called it her “miracle bars,” and honestly, they were just that. Over time, I’ve tweaked the ingredients and made it my own, but the heart of the recipe remains the same: simple, sweet, and made for sharing.
Caramel bars like these have a bit of a retro vibe, don’t they? They remind me of old-fashioned dessert trays during the holidays. And yet, with the no-bake method, you get all that nostalgia without any of the hassle. This recipe is perfect for hot summer days when you’d rather not heat up the kitchen, but it’s cozy enough for winter gatherings too. I love making these around Halloween with a touch of cinnamon, or in the spring with crushed pastel candies on top. The flexibility is part of what makes them so fun.
Plus, these bars have traveled with me to countless parties, bake sales, and even impromptu picnics. There’s just something magical about that chewy caramel layer and the buttery, crumbly base. I’ve seen kids and adults alike light up when they spot these on the dessert table. So whether you’re making these for a special occasion or a quiet night in, you’re tapping into a recipe with history, love, and lots of caramel goodness. Trust me—it’s a keeper!
Ingredient Discussion
What Ingredients Do You Need for Caramel Crush Bars?
- Graham cracker crumbs (2 cups / 200g): These form the base—look for fresh, crisp crackers for the best texture. If you’re gluten-free, you can swap in GF graham crackers (I’ve used Pamela’s brand and it works great). Digestive biscuits or vanilla wafers also make fun alternatives. Store crumbs in an airtight jar to keep them dry and crunchy.
- Unsalted butter (1 cup / 225g): Good quality butter gives the base a rich flavor. I always reach for European-style butter when I want a deeper, creamier taste. If you’re dairy-free, try using a plant-based butter substitute (Miyoko’s has a great one). Keep butter cold until ready to use.
- Sweetened condensed milk (1 can / 14 oz / 395g): This is the magic ingredient for the caramel layer. Make sure to pick the full-fat version—low-fat varieties just don’t set as nicely. You’ll find this in the baking aisle. Once opened, refrigerate any leftovers in a sealed container for up to a week.
- Soft caramels (12 oz / 340g): You want chewy, not hard, caramels. Werther’s or Kraft caramels melt smoothly and give that luscious texture. I sometimes use homemade caramels for extra flavor, but store-bought work perfectly. If you’re avoiding dairy, look for coconut milk-based caramels.
- Heavy cream (1/3 cup / 80ml): This helps the caramel melt down into a pourable, creamy layer. Full-fat coconut cream is a great non-dairy swap. Keep cream cold and shake before using.
- Chocolate chips (1 cup / 175g): Semi-sweet or dark chocolate chips both work. Guittard and Ghirardelli are my go-tos. If you love white chocolate, that’s a fun twist too! Store chips in a cool, dry cupboard.
- Sea salt (1/2 tsp): A pinch of flaky sea salt on top balances the sweetness and gives a gourmet touch. Maldon is my favorite brand. If you’re not a fan of salty-sweet, you can skip this—but honestly, it’s worth trying at least once.
- Optional add-ins: Chopped nuts (pecans, almonds, walnuts), shredded coconut, or even a sprinkle of cinnamon. These add texture and extra flavor. Use what you love or what’s in season!
All these ingredients are easy to find at most grocery stores. For special items like coconut-based caramels or gluten-free graham crackers, try health food stores or order online. I’ve even made these with leftover holiday candy and they turned out amazing. The best part about this recipe is how forgiving it is—so don’t stress if you need to make a few swaps.
Equipment Needed
- 8×8-inch (20x20cm) baking pan: This size gives you thick, satisfying bars. If you only have a 9×9-inch, the bars will be a bit thinner, but still delicious. Line with parchment for easy removal (trust me, it makes life easier!).
- Medium saucepan: Essential for melting the caramel and cream together. Any heavy-bottomed pan will do. Avoid thin pans—they can cause scorching.
- Mixing bowls: You’ll want one for the crust and another for the chocolate. I use glass bowls, but stainless steel works too. If you’re tight on space, just rinse and reuse between steps.
- Heatproof spatula or wooden spoon: For stirring the caramel layer. Silicone spatulas are great because nothing sticks to them (and they’re easy to clean).
- Measuring cups and spoons: Accuracy matters for the caramel, so don’t eyeball it!
- Microwave-safe bowl: For melting chocolate chips. You can also use a double boiler if you prefer.
If you don’t have a parchment liner, just grease the pan well. And honestly, I’ve used a pie dish in a pinch—it worked! Just watch the thickness when slicing. Keep your tools clean between steps for best results. A little maintenance tip: soak caramel-stuck pans in warm water with baking soda for easy cleanup.
Preparation Method
- Prepare the pan: Line an 8×8-inch (20x20cm) baking pan with parchment paper, leaving an overhang on two sides for easy lifting. Lightly grease the exposed sides. This prevents sticking and helps you get nice, clean bars. Takes about 2 minutes.
- Make the crust: In a mixing bowl, combine 2 cups (200g) graham cracker crumbs and 1 cup (225g) melted unsalted butter. Stir until the mixture looks like wet sand. Press the mixture firmly into the bottom of your prepared pan. Use the bottom of a glass or your fingers to flatten it evenly. Chill in the fridge for 10 minutes to set. If the mixture feels too crumbly, add another tablespoon of melted butter.
- Melt the caramel: In a medium saucepan over low heat, combine 12 oz (340g) soft caramels (unwrapped!) and 1/3 cup (80ml) heavy cream. Stir constantly as the caramels melt—this takes about 5-7 minutes. The mixture should be smooth and glossy. If it starts to scorch, lower the heat and keep stirring. Remove from heat once fully melted.
- Pour the caramel layer: Carefully pour the hot caramel mixture over the chilled crust. Use a spatula to spread it into an even layer. Give the pan a gentle shake to level the caramel. Let it cool at room temperature for 10-15 minutes, or until it starts to firm up. The caramel should still be a little soft, but not runny.
- Melt the chocolate: In a microwave-safe bowl, heat 1 cup (175g) chocolate chips in 30-second bursts, stirring after each, until fully melted (about 1-2 minutes total). If you prefer, melt the chocolate in a double boiler. Stir until glossy and smooth.
- Add the chocolate topping: Pour the melted chocolate over the cooled caramel layer. Spread evenly with a spatula, making sure to reach the edges. While the chocolate is still wet, sprinkle with 1/2 tsp flaky sea salt (or your favorite extras—nuts, coconut, candies).
- Chill and set: Refrigerate the bars for at least 2 hours, or until firm. For best slicing, let the pan sit at room temperature for 10 minutes before cutting. Use a sharp knife dipped in hot water for clean slices.
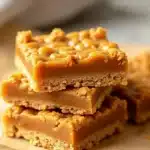
- Serve and enjoy: Lift the bars out using the parchment overhang and cut into 16 squares. The layers should be neat, with a crunchy base, gooey caramel, and shiny chocolate top. Total prep and chill time: about 2.5 hours (with most of that hands-off!).
Personal tip: Don’t rush the chilling step—if you try to slice too soon, the caramel will ooze everywhere (been there, done that!). If your kitchen is warm, keep the bars in the fridge until just before serving so they hold their shape.
Cooking Tips & Techniques
How Do You Get the Perfect Caramel Layer?
Here’s the real secret: low and slow is the way to go. Melting the caramels gently with cream keeps them from seizing or burning. If your caramel gets grainy, add a splash more cream and stir until it smooths out. I’ve definitely scorched more than one batch by rushing—so patience pays off!
When pressing the crust, really pack it down so it holds together. Use the bottom of a measuring cup or glass for extra pressure. If you’re adding nuts or coconut, sprinkle them evenly before the chocolate layer so they stick well. For the chocolate, microwave in short bursts and stir in between to prevent hot spots. If your chocolate looks dull, add 1 teaspoon of coconut oil for extra shine and easy slicing.
If you want perfectly clean layers, let each one cool and set before adding the next. And don’t skip the parchment liner—it makes removing the bars a breeze. One last tip: if your kitchen is hot, keep the bars chilled until just before serving. The caramel can get soft, especially during summer. Experience (and a few melted bars at a picnic!) taught me that lesson.
Variations & Adaptations
How Can You Customize Caramel Crush Bars?
- Gluten-Free: Swap in gluten-free graham crackers or digestive biscuits for the crust. The rest of the recipe is naturally gluten-free, so it’s an easy switch.
- Dairy-Free: Use plant-based butter and coconut milk-based caramels. Substitute coconut cream for heavy cream, and choose dairy-free chocolate chips (Enjoy Life is a solid option). I’ve made this version for friends with dairy allergies and they loved it!
- Nutty Crunch: Stir 1/2 cup chopped pecans or almonds into the crust, or sprinkle nuts on top of the chocolate. This adds great texture and a toasty flavor.
- Seasonal Twists: For fall, add a pinch of cinnamon to the crust and caramel layers. At Easter, top with pastel candy-coated chocolates. Around Christmas, sprinkle crushed peppermint candies over the chocolate.
- Extra Gooey: Swirl a few spoonfuls of peanut butter or Nutella into the caramel layer before topping with chocolate. Decadent, but so worth it!
My personal favorite? Adding a layer of toasted coconut in between the caramel and chocolate. It reminds me of those classic Samoa cookies! Don’t be afraid to play around—this recipe is forgiving and fun to adapt to whatever you have on hand.
Serving & Storage Suggestions
How Should You Serve and Store Caramel Crush Bars?
These bars are best served chilled or at cool room temperature. The layers hold together beautifully, and the chocolate doesn’t get too soft. Arrange the squares on a pretty platter, or stack them in cupcake liners for easy grab-and-go party snacks. They pair perfectly with coffee, black tea, or a cold glass of milk (for the kids, or the kid at heart!).
If you’re bringing these to a party, keep them in the fridge until it’s time to serve. To store leftovers, keep the bars in an airtight container in the refrigerator for up to 5 days. They also freeze surprisingly well—just separate layers with parchment paper and thaw in the fridge overnight. To reheat (if you want a
Caramel Crush Bars
- Total Time: 2 hours 30 minutes
- Yield: 16 bars 1x
Description
Caramel Crush Bars are rich, buttery, and loaded with caramel flavor, featuring a crunchy graham cracker base, gooey caramel layer, and a chocolate topping. This easy, no-bake dessert is perfect for parties, potlucks, or whenever you need a quick and impressive treat.
Ingredients
- 2 cups graham cracker crumbs (200g)
- 1 cup unsalted butter (225g), melted
- 1 can (14 oz) sweetened condensed milk (395g)
- 12 oz soft caramels (340g), unwrapped
- 1/3 cup heavy cream (80ml)
- 1 cup chocolate chips (175g), semi-sweet or dark
- 1/2 teaspoon flaky sea salt
- Optional: chopped nuts (pecans, almonds, walnuts), shredded coconut, cinnamon
Instructions
- Line an 8×8-inch baking pan with parchment paper, leaving an overhang on two sides for easy lifting. Lightly grease the exposed sides.
- In a mixing bowl, combine graham cracker crumbs and melted butter. Stir until the mixture resembles wet sand. Press firmly into the bottom of the prepared pan. Chill in the fridge for 10 minutes to set.
- In a medium saucepan over low heat, combine soft caramels and heavy cream. Stir constantly until the caramels are fully melted and the mixture is smooth and glossy, about 5-7 minutes. Remove from heat.
- Pour the hot caramel mixture over the chilled crust. Spread evenly with a spatula and let cool at room temperature for 10-15 minutes, until it starts to firm up.
- In a microwave-safe bowl, melt chocolate chips in 30-second bursts, stirring after each, until fully melted (about 1-2 minutes total). Stir until glossy and smooth.
- Pour the melted chocolate over the cooled caramel layer. Spread evenly and sprinkle with flaky sea salt (and any optional toppings).
- Refrigerate the bars for at least 2 hours, or until firm. For best slicing, let the pan sit at room temperature for 10 minutes before cutting. Use a sharp knife dipped in hot water for clean slices.
- Lift the bars out using the parchment overhang and cut into 16 squares. Serve and enjoy!
Notes
For best results, don’t rush the chilling step—slicing too soon will cause the caramel to ooze. Use parchment paper for easy removal. To customize, add nuts, coconut, or seasonal candies. For gluten-free, use GF graham crackers; for dairy-free, use plant-based butter, coconut cream, and dairy-free caramels and chocolate.
- Prep Time: 15 minutes
- Cook Time: 15 minutes
- Category: Dessert
- Cuisine: American
Nutrition
- Serving Size: 1 bar (1/16 of recipe)
- Calories: 320
- Sugar: 28
- Sodium: 170
- Fat: 19
- Saturated Fat: 12
- Carbohydrates: 38
- Fiber: 1
- Protein: 3
Keywords: caramel bars, no-bake dessert, party dessert, easy bars, chocolate caramel bars, graham cracker crust, sweetened condensed milk, potluck dessert, caramel squares, holiday dessert