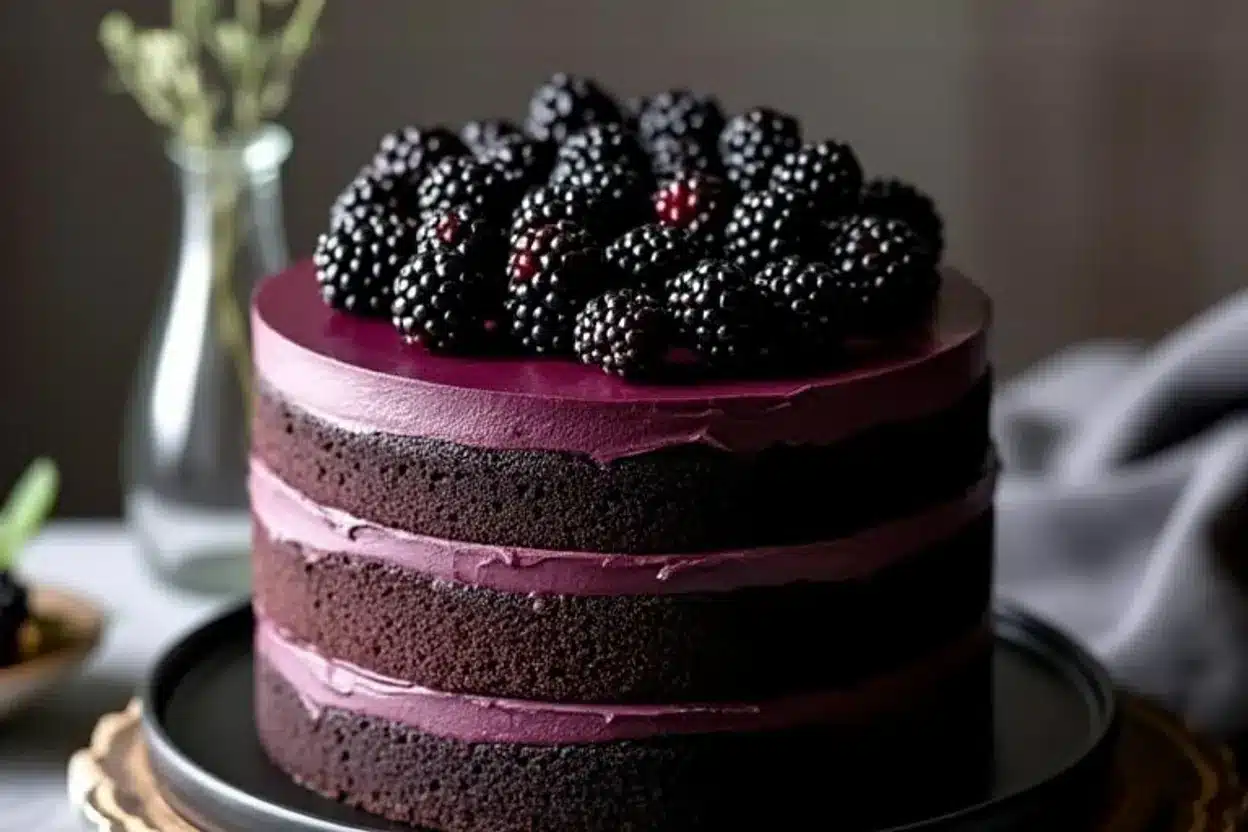
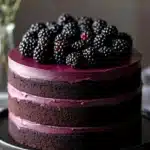
If you’re a chocolate lover, let me tell you about the amazing luxurious black velvet cake! Imagine a cake that’s as rich and decadent as it sounds, with layers of velvety chocolate goodness that practically melt in your mouth. This recipe is worth every moment you spend in the kitchen, and trust me, your taste buds will thank you! Black velvet cake is not just a dessert; it’s an experience, a moment of indulgence that can turn any day into a special occasion.
Now, here’s a fun fact for you: the origins of black velvet cake are a bit murky, but it’s believed to have emerged from the Victorian era, closely associated with the famous red velvet cake. The unique color comes from a combination of cocoa powder and a hint of food coloring, which gives it that striking dark hue! I remember the first time I tried it at a friend’s birthday party, and I was hooked. The moistness, the richness, it was like a chocolate dream come true. So roll up your sleeves, and let’s dive into this recipe!
Why You Will Love this Recipe
Black velvet cake has roots steeped in history, and it’s often associated with celebrations and special gatherings. The smooth, luxurious texture makes it a favorite among chocolate enthusiasts. Personally, I have fond memories of making this cake for family gatherings. It always brought smiles to faces, and the way it paired with a glass of cold milk was simply divine!
This recipe has evolved over time, adapting to different palates and preferences. You might find variations with cream cheese frosting, or even some with a ganache layer. It’s versatile and can be made to suit any occasion, whether it’s a birthday, an anniversary, or just a Tuesday that needs a little sweetening up. Plus, it’s perfect for the colder months when a rich dessert feels like a warm hug!
Ingredient Discussion
Let’s break down the key ingredients that make this black velvet cake truly special:
- All-Purpose Flour: This is your base. Look for a brand that has a fine texture. If you want to go gluten-free, a 1:1 gluten-free flour mix can work too!
- Cocoa Powder: Use high-quality unsweetened cocoa powder. Dutch-processed cocoa adds a deeper flavor, while natural cocoa will give it a lighter color. I personally love using Ghirardelli.
- Granulated Sugar: This sweetens the cake and balances the bitterness of the cocoa. Always taste your batter to ensure it’s sweet enough!
- Buttermilk: This ingredient not only adds moisture but also helps create that tender crumb. If you don’t have buttermilk on hand, you can make your own by mixing milk with a splash of vinegar or lemon juice.
- Eggs: These act as binders and add richness. Room temperature eggs work best for this recipe.
- Vegetable Oil: Using oil instead of butter in this cake keeps it moist. If you prefer a healthier option, avocado oil is a great substitute!
- Food Coloring: While optional, a bit of black food coloring enhances the cake’s dark hue. However, it’s not necessary if you prefer to skip it.
- Vanilla Extract: A splash of vanilla enhances all the flavors without overpowering them.
- Frosting: I recommend a cream cheese frosting or a rich chocolate ganache to complement the cake’s flavors.
When selecting ingredients, always pick the freshest options. This will significantly impact the flavor and texture. For storage, keep the cake in an airtight container at room temperature for up to three days, or in the fridge for about a week.
Equipment Needed
Before we start baking, let’s gather the necessary equipment:
- Two 9-inch round cake pans
- Mixing bowls (larger and smaller)
- A whisk and spatula
- Measuring cups and spoons
- Cooling rack
- Offset spatula (for frosting)
- Stand mixer or hand mixer
If you don’t have 9-inch pans, you can use 8-inch pans, but the baking time may vary slightly. Always grease and flour your pans to prevent sticking!
Preparation Method
Let’s get to the fun part—baking the cake! Follow these steps closely:
- Preheat your oven: Set your oven to 350°F (175°C). This ensures your cake will bake evenly.
- Prepare your pans: Grease and flour your cake pans. You can also line the bottoms with parchment paper for easy removal.
- Mix dry ingredients: In a large mixing bowl, sift together 2 cups of all-purpose flour, ¾ cup of cocoa powder, 2 cups of sugar, 1 ½ teaspoons of baking soda, 1 teaspoon of baking powder, and 1 teaspoon of salt. Sifting helps to aerate the flour and remove lumps.
- Combine wet ingredients: In another bowl, whisk together 1 cup of buttermilk, ½ cup of vegetable oil, 2 large eggs, and 2 teaspoons of vanilla extract until smooth.
- Combine both mixtures: Slowly add the wet mixture to the dry ingredients, mixing until just combined. Be careful not to overmix; a few lumps are okay!
- Add food coloring: If using, stir in a few drops of black food coloring until the desired color is reached.
- Pour into pans: Divide the batter evenly between the two prepared pans and smooth the tops with a spatula.
- Bake: Place in the preheated oven and bake for 30-35 minutes, or until a toothpick inserted in the center comes out clean. Your kitchen will smell heavenly!
- Cool: Once baked, remove the cakes from the oven and let them cool in the pans for about 10 minutes. Then, turn them out onto a cooling rack to cool completely.
- Frost: Once cooled, frost with your choice of frosting. I love a thick layer of cream cheese frosting or a simple chocolate ganache.
Remember, the key to a great cake is patience. Let it cool completely before frosting to avoid a melty mess!
Cooking Tips & Techniques
Here are some pro tips to ensure your black velvet cake turns out perfectly:
- Room Temperature Ingredients: Make sure your eggs and buttermilk are at room temperature. This helps them blend better and results in a smoother batter.
- Don’t Overmix: When combining wet and dry ingredients, mix just until combined. Overmixing can lead to a dense cake.
- Check for Doneness: Ovens can vary, so start checking your cake a few minutes before the suggested baking time. A toothpick should come out clean or with a few moist crumbs.
- Layering: If you’re making a multi-layer cake, make sure to level the tops of your cakes with a serrated knife for even stacking.
- Frosting Tips: If your frosting is too thick, add a splash of milk. If it’s too thin, add powdered sugar until you reach your desired consistency.
And don’t be afraid to experiment! Baking is as much about creativity as it is about precision.
Variations & Adaptations
This black velvet cake is versatile, and you can customize it in several ways:
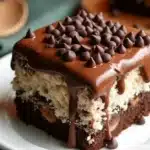
- Chocolate Chip Additions: For an extra chocolatey kick, fold in some chocolate chips into the batter!
- Flavored Frosting: Swap out the regular frosting for a peppermint or orange-flavored one to give it a seasonal twist.
- Gluten-Free Version: Use a gluten-free flour blend in place of all-purpose flour, and ensure all other ingredients are also gluten-free.
Feel free to get creative and add your own spin. I once made a mocha variation by adding espresso powder to the batter—it was a hit!
Serving & Storage Suggestions
When it comes to serving, this black velvet cake is best enjoyed at room temperature. It pairs wonderfully with a scoop of vanilla ice cream or a dollop of whipped cream. For a lovely presentation, garnish with chocolate shavings or fresh berries!
For storage, keep any leftovers in an airtight container at room temperature for up to three days. If you want to keep it longer, you can refrigerate it for up to a week. To reheat, simply pop a slice in the microwave for 10-15 seconds, and it’ll be just like fresh-baked!
As the cake sits, the flavors will deepen, making it even more delicious the next day!
Nutritional Information & Benefits
While this black velvet cake is certainly a treat, it can also have some benefits. Here’s a rough breakdown of the nutritional values per slice:
- Calories: 350
- Fat: 15g
- Carbohydrates: 50g
- Protein: 4g
Cocoa powder contains antioxidants, and dark chocolate has been linked to various health benefits, including improved heart health. Just remember, moderation is key!
Conclusion
This black velvet cake recipe is a must-try for any chocolate lover! With its rich flavors and moist texture, it’s truly a decadent dessert that can make any occasion feel special. Don’t be shy about customizing it to fit your tastes; after all, that’s what makes home baking so fun!
I’d love to hear how your cake turns out! Feel free to share your thoughts in the comments or any adaptations you’ve made. Happy baking, and remember—life is too short to skip dessert!
FAQs
- Can I use dark cocoa powder instead of regular cocoa powder? Yes! Dark cocoa powder will give your cake a more intense chocolate flavor.
- How can I make this cake gluten-free? Substitute all-purpose flour with a gluten-free flour blend, making sure all other ingredients are gluten-free as well.
- Can I make this cake ahead of time? Absolutely! You can bake the cake a day in advance and frost it just before serving.
- What’s the best way to store leftovers? Store in an airtight container at room temperature for up to three days or in the fridge for up to a week.
- Can I freeze this cake? Yes! Wrap slices tightly in plastic wrap and freeze for up to three months. Thaw in the fridge before enjoying.
Black Velvet Cake
- Total Time: 45-50 minutes
- Yield: 12 servings 1x
Description
This luxurious black velvet cake is rich and decadent, with layers of velvety chocolate goodness that practically melt in your mouth. It’s an experience that can turn any day into a special occasion.
Ingredients
- 2 cups all-purpose flour
- 3/4 cup cocoa powder
- 2 cups granulated sugar
- 1 1/2 teaspoons baking soda
- 1 teaspoon baking powder
- 1 teaspoon salt
- 1 cup buttermilk
- 1/2 cup vegetable oil
- 2 large eggs
- 2 teaspoons vanilla extract
- Black food coloring (optional)
- Cream cheese frosting or chocolate ganache (for frosting)
Instructions
- Preheat your oven to 350°F (175°C).
- Grease and flour your cake pans, or line the bottoms with parchment paper.
- In a large mixing bowl, sift together the flour, cocoa powder, sugar, baking soda, baking powder, and salt.
- In another bowl, whisk together the buttermilk, vegetable oil, eggs, and vanilla extract until smooth.
- Slowly add the wet mixture to the dry ingredients, mixing until just combined.
- If using, stir in a few drops of black food coloring until the desired color is reached.
- Divide the batter evenly between the two prepared pans and smooth the tops.
- Bake for 30-35 minutes, or until a toothpick inserted in the center comes out clean.
- Let the cakes cool in the pans for about 10 minutes, then turn them out onto a cooling rack to cool completely.
- Frost with your choice of frosting once cooled.
Notes
Ensure all ingredients are at room temperature for best results. Store leftovers in an airtight container at room temperature for up to three days or in the fridge for about a week.
- Prep Time: 15 minutes
- Cook Time: 30-35 minutes
- Category: Dessert
- Cuisine: American
Nutrition
- Serving Size: 1 slice
- Calories: 350
- Fat: 15
- Carbohydrates: 50
- Protein: 4
Keywords: black velvet cake, chocolate cake, dessert, baking, special occasion
")