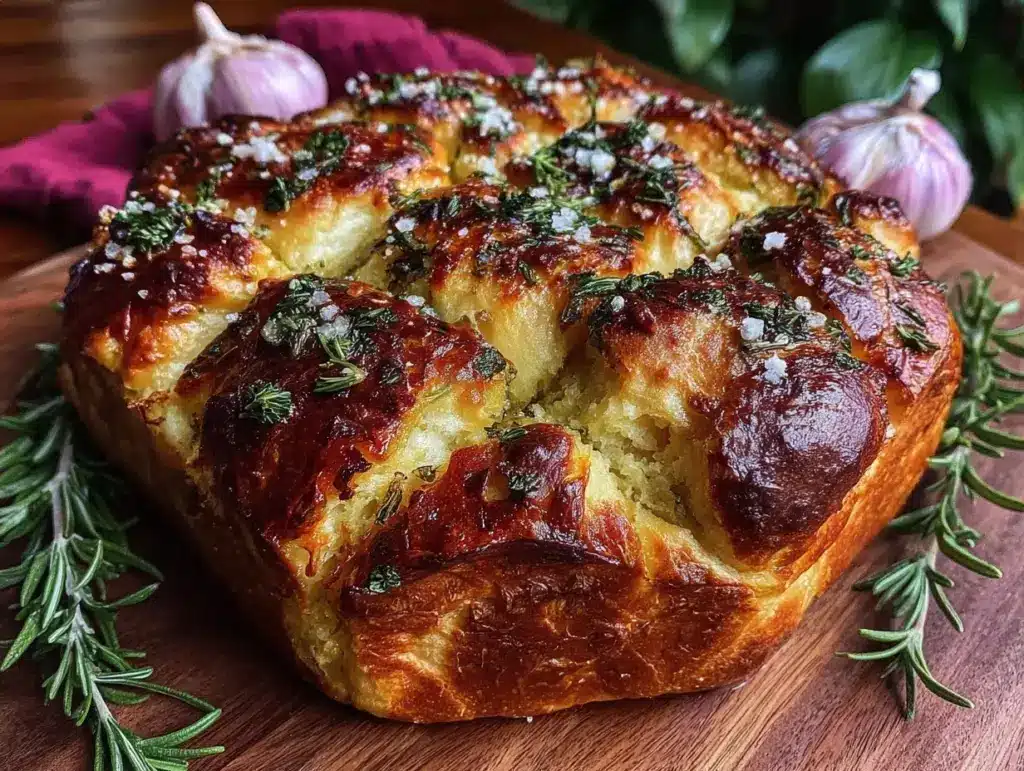
There’s something magical about the smell of freshly baked bread filling your kitchen. And when that bread is infused with garlic and rosemary, it’s like your house turns into a cozy bakery. This is the kind of bread that makes you want to grab a knife, slather on some butter, and devour it while it’s still warm. Trust me, this recipe will become a staple in your home—just like it has in mine.
I first made this bread on a chilly Sunday afternoon when I needed something comforting and simple. After experimenting with a few combinations, I found that garlic and rosemary are the ultimate duo. The subtle herbal notes paired with the savory kick of garlic turn a simple loaf into something truly special. Whether you’re serving it with soup, pasta, or just eating it plain (no shame!), this recipe is a guaranteed winner.
Why You’ll Love This Recipe
Let me tell you why this garlic rosemary bread is about to become your new best friend.
- Fluffy and golden crust: The bread comes out perfectly soft on the inside with a satisfyingly golden crust. It’s everything you want in homemade bread.
- Easy to make: No fancy techniques or equipment required. If you can stir and knead, you can make this bread.
- Smells like heaven: Trust me, your neighbors will start asking what’s baking. The aroma of garlic and rosemary is just irresistible.
- Versatile: Serve it with soups, make sandwiches, or toast it for breakfast. This bread can do it all.
And the best part? It’s a no-fuss recipe. Whether you’re a seasoned baker or just starting out, you’ll feel like a pro when you pull this out of the oven.
What Ingredients You’ll Need
This recipe uses simple ingredients that you probably already have in your pantry. Here’s what you’ll need:
- All-purpose flour (3 cups / 360g) – The base of your bread. You can use bread flour if you want a chewier texture.
- Garlic (4 cloves, minced) – Fresh garlic is key here. Skip the pre-minced jarred stuff—it won’t give you that same bold flavor.
- Fresh rosemary (2 tablespoons, finely chopped) – Fresh is best, but dried rosemary works in a pinch. Just use half the amount.
- Yeast (1 packet or 2 ¼ teaspoons) – Active dry yeast is perfect for this recipe.
- Warm water (1 ¼ cups / 300ml) – Around 110°F (43°C). If it’s too hot, it’ll kill the yeast; too cold, and the yeast won’t activate.
- Sugar (1 tablespoon) – Helps feed the yeast and adds a touch of sweetness.
- Salt (1 teaspoon) – Don’t skip this! It enhances the flavor.
- Olive oil (2 tablespoons) – Adds moisture and flavor to the dough.
Quick note: When chopping rosemary, I like to run my knife through it a few extra times to make sure I don’t bite into a big piece. You want it to be evenly distributed throughout the dough for that perfect herby flavor.
Equipment Needed
You don’t need a fancy setup to make this bread. Here’s what I use:
- Mixing bowl: One large bowl is all you need to mix and let the dough rise.
- Wooden spoon: My go-to tool for mixing. You can use your hands too—just be ready for a bit of a sticky situation!
- Measuring cups and spoons: Accuracy matters when baking bread, so don’t eyeball it.
- Baking sheet: I use a standard baking sheet lined with parchment paper for easy cleanup.
- Kitchen towel: For covering the dough while it rises. It keeps the dough warm and cozy.
Optional: A stand mixer with a dough hook can make the kneading process easier, but I prefer the hands-on approach—it’s therapeutic! Plus, it’s a mini arm workout.
How to Make It: Step-by-Step

Let’s dive into the process! It’s simpler than you think, and I’ll walk you through every step.
- Activate the yeast: In a large bowl, combine warm water (110°F/43°C), sugar, and yeast. Stir gently and let it sit for about 5 minutes until it’s foamy. If nothing happens, your yeast might be dead—try again with fresh yeast.
- Mix the dough: Add the flour, salt, minced garlic, and chopped rosemary to the yeast mixture. Stir until a shaggy dough forms. It’ll look rough, but don’t worry—it’s supposed to.
- Knead the dough: On a floured surface, knead the dough for about 8-10 minutes until it’s smooth and elastic. If it’s sticking to your hands, sprinkle on a little more flour as needed.
- Let it rise: Place the dough in a lightly oiled bowl, cover with a kitchen towel, and let rise in a warm spot for 1-2 hours or until it doubles in size.
- Shape and second rise: Punch down the dough to release air, shape it into a round loaf, and place it on a parchment-lined baking sheet. Cover again and let it rise for another 30 minutes.
- Bake: Preheat your oven to 375°F (190°C). Bake the bread for 25-30 minutes until it’s golden brown and sounds hollow when tapped on the bottom.
- Cool and serve: Let the bread cool for at least 15 minutes before slicing. (I know it’s hard, but trust me—it’s worth it.)
Pro tip: Brush olive oil or melted butter over the loaf right after baking for extra flavor and shine.
My Best Tips & Techniques
Here’s everything I’ve learned from making this garlic rosemary bread more times than I care to admit:
- Don’t kill the yeast: Test the water temperature before adding the yeast. If it’s too hot, it’s game over.
- Knead with love: Kneading helps develop the gluten, which gives the bread its structure. Don’t rush this step!
- Use fresh ingredients: Fresh rosemary and garlic make a world of difference. Trust me, the flavor is unbeatable.
- Don’t overbake: Check the bread at 25 minutes. If the top is golden and it sounds hollow when tapped, you’re good to go.
And my favorite tip? If you’re in a hurry, let the dough rise in a slightly warm oven (about 100°F). It speeds up the process without compromising the texture.
Ways to Mix It Up
Once you’ve mastered the basic recipe, try these fun variations:
- Cheesy Garlic Bread: Sprinkle shredded mozzarella and Parmesan on top before baking. It’s ooey, gooey perfection.
- Herb Explosion: Add thyme, oregano, or parsley along with the rosemary for extra depth of flavor.
- Whole Wheat Option: Replace half the all-purpose flour with whole wheat flour. The texture will be slightly heartier but still delicious.
- Spicy Kick: Add a teaspoon of red pepper flakes to the dough for a subtle heat.
Experiment and make it your own—I’ve tried all of these, and they’re equally amazing.
Serving Ideas & Storage
How to Serve:
This bread is perfect for any occasion. Here’s how I like to enjoy it:
- Warm with a pat of butter—simple and classic.
- As a side for soups, stews, or pasta dishes.
- Toasted with a drizzle of olive oil and a sprinkle of sea salt.
Storage Tips:
- Room temperature: Wrap the bread tightly in plastic wrap or store in an airtight container for up to 3 days.
- Freezer: Slice the bread, wrap each piece individually, and freeze for up to 2 months. Reheat frozen slices in a toaster or oven.
Pro tip: Slightly stale bread makes amazing croutons. Just cube it, toss with olive oil and seasonings, and bake at 375°F (190°C) for 10 minutes.
Nutritional Info & Health Benefits
Here’s the breakdown for one slice of bread (based on 12 slices):
| Calories | Protein | Carbs | Fat | Fiber |
|---|---|---|---|---|
| 170 | 5g | 28g | 3g | 2g |
This bread is lighter than store-bought options and has the added benefits of fresh ingredients like garlic and rosemary, which are known for their anti-inflammatory and immune-boosting properties.
Final Thoughts
So that’s my easy garlic rosemary bread recipe! It’s a simple, crowd-pleasing loaf that works for any occasion. Whether you’re hosting a dinner party or just craving something homemade, this bread is a winner every time.
Make it your own—try the variations, add your favorite mix-ins, or pair it with your go-to dishes. And if you’re anything like me, you might just make an extra loaf to freeze for those busy days when you need something comforting.
If you try this recipe, I’d love to hear how it turns out! Drop a comment below or tag me on Instagram @YourHandle—I can’t wait to see your creations.
Happy baking, and enjoy every fluffy, garlicky bite!
FAQs
Q: Can I use dried rosemary instead of fresh?
A: Yes, but use half the amount since dried herbs have a more concentrated flavor. Fresh rosemary will give you the best taste, though!
Q: What if I don’t have a stand mixer?
A: No problem! You can knead the dough by hand. It takes a bit longer, but it’s totally doable.
Q: Can I make this bread gluten-free?
A: You can try using a gluten-free all-purpose flour blend. The texture might be slightly different, but it should still work.
Q: How do I store leftover bread?
A: Wrap it tightly in plastic wrap or store it in an airtight container at room temperature for up to 3 days. For longer storage, freeze individual slices.
Q: Can I double the recipe?
A: Absolutely! Just double all the ingredients and use two baking sheets. Baking time should stay the same.
Pin This Recipe!


Easy Garlic Rosemary Bread Recipe – Perfectly Fluffy & Delicious
- Total Time: 2 hours 45 minutes
- Yield: 12 slices 1x
Description
A fluffy and golden homemade bread infused with garlic and rosemary, perfect for any occasion and easy to make.
Ingredients
- 3 cups all-purpose flour (360g)
- 4 cloves garlic, minced
- 2 tablespoons fresh rosemary, finely chopped
- 1 packet or 2 ¼ teaspoons active dry yeast
- 1 ¼ cups warm water (110°F/43°C)
- 1 tablespoon sugar
- 1 teaspoon salt
- 2 tablespoons olive oil
Instructions
- Activate the yeast: In a large bowl, combine warm water (110°F/43°C), sugar, and yeast. Stir gently and let it sit for about 5 minutes until it’s foamy.
- Mix the dough: Add the flour, salt, minced garlic, and chopped rosemary to the yeast mixture. Stir until a shaggy dough forms.
- Knead the dough: On a floured surface, knead the dough for about 8-10 minutes until it’s smooth and elastic.
- Let it rise: Place the dough in a lightly oiled bowl, cover with a kitchen towel, and let rise in a warm spot for 1-2 hours or until it doubles in size.
- Shape and second rise: Punch down the dough to release air, shape it into a round loaf, and place it on a parchment-lined baking sheet. Cover again and let it rise for another 30 minutes.
- Bake: Preheat your oven to 375°F (190°C). Bake the bread for 25-30 minutes until it’s golden brown and sounds hollow when tapped on the bottom.
- Cool and serve: Let the bread cool for at least 15 minutes before slicing.
Notes
[‘Test the water temperature before adding the yeast to avoid killing it.’, ‘Kneading helps develop gluten for better bread structure.’, ‘Use fresh rosemary and garlic for the best flavor.’, ‘Brush olive oil or melted butter over the loaf right after baking for extra flavor and shine.’]
- Prep Time: 15 minutes
- Cook Time: 25-30 minutes
- Category: Bread
- Cuisine: American
Nutrition
- Serving Size: 1 slice
- Calories: 170
- Sugar: 1
- Sodium: 240
- Fat: 3
- Carbohydrates: 28
- Fiber: 2
- Protein: 5
Keywords: garlic bread, rosemary bread, homemade bread, easy bread recipe, fluffy bread, baking, comfort food