Did you know that sourdough bread has been a staple for thousands of years, long before commercial yeast was even a thing? It’s like a little piece of history baked right into your loaf. But here’s the twist—sourdough doesn’t have to be just crusty artisan rounds. Imagine all that tangy flavor, soft crumb, and a perfectly sliceable loaf you can use for sandwiches, toast, or whatever your heart desires. Enter: sourdough sandwich bread.
I’ll admit, when I first started baking sourdough, I was intimidated. Would it rise? Would it taste right? And don’t even get me started on the sticky dough disasters. But once I cracked the code, I couldn’t stop making this bread. It’s the perfect blend of flavor and practicality, and it’ll make you rethink store-bought bread forever.
In this guide, we’ll go step-by-step through the tools, ingredients, recipe, and even how to fix those common mishaps (because let’s be honest, we’ve all been there). By the end, you’ll be whipping up loaves that are perfect for PB&Js, grilled cheese, or just slathering with butter fresh out of the toaster. Ready to get started? Let’s do this!
Main Headings
What Makes Sourdough Sandwich Bread Special?
Sourdough sandwich bread isn’t just any bread—it’s an experience. Imagine biting into a slice that’s soft enough for your favorite PB&J yet still has that signature tang only sourdough can deliver. That’s the magic of this bread.
The flavor is the real star. Sourdough’s natural fermentation process creates a depth you won’t find in most store-bought sandwich loaves. The slight tanginess pairs perfectly with everything from savory deli meats to sweet jams. It’s a bread that enhances whatever you put on it.
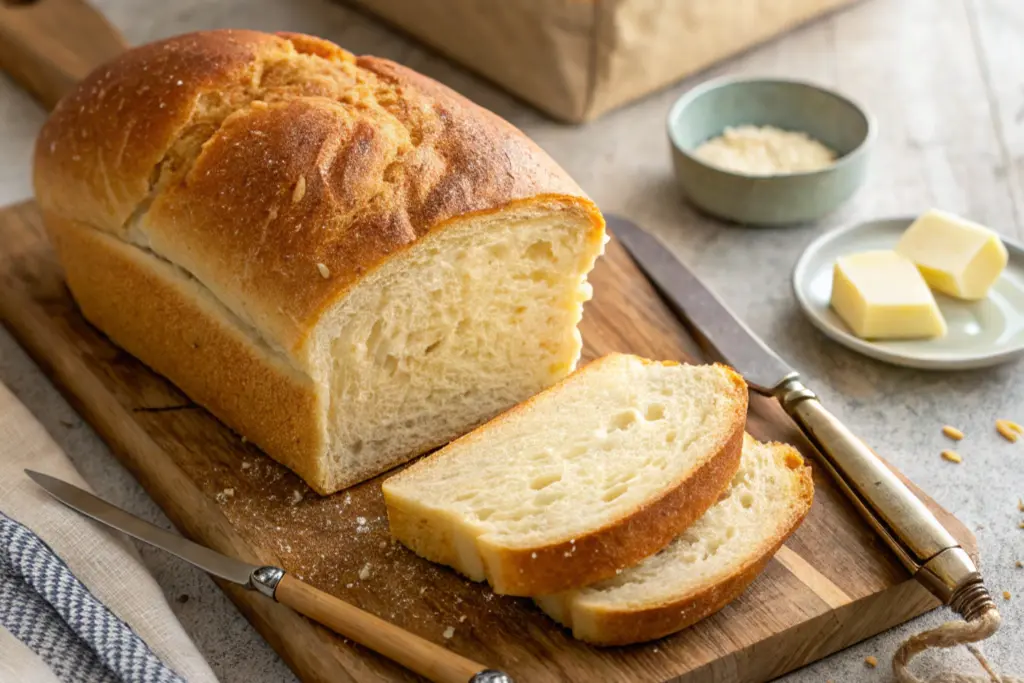
Texture-wise, sourdough sandwich bread is a step up from traditional sourdough. It’s crafted to be softer and more structured—no giant air pockets or overly chewy crusts here. Instead, you get a tender crumb and a crust that’s just firm enough to hold its shape. This makes it perfect for toasting, slicing, and spreading without falling apart.
Another huge win is its health factor. Thanks to natural fermentation, sourdough bread is easier to digest than most other breads. The fermentation process breaks down gluten and phytic acid, which can make it gentler on your stomach and better for absorbing nutrients. Plus, those natural probiotics? Your gut will thank you.
Finally, let’s talk versatility. A loaf of sourdough sandwich bread can go sweet, savory, or anything in between. You’ll find yourself reaching for it at breakfast, lunch, dinner, and maybe even dessert (French toast, anyone?).
So, what makes it special? It’s flavorful, soft, healthy, and just downright versatile. Once you start baking it, you’ll wonder how you ever settled for plain old sandwich bread.
Essential Tools and Ingredients for Sourdough Sandwich Bread
Baking sourdough sandwich bread is as much about the right tools and ingredients as it is about technique. Don’t worry—no fancy gadgets are required, just a few basics that make the process smoother and more enjoyable.
Tools You’ll Need for Sourdough Sandwich Bread
- Kitchen Scale
Measuring by weight is a game-changer for consistent bread. Trust me, eyeballing flour with cups is like playing baking roulette. - Mixing Bowls
Large, sturdy bowls are a must for mixing and proofing. Bonus points if they’re see-through, so you can admire the dough’s rise. - Loaf Pan
For sandwich bread, a standard 9×5-inch loaf pan works wonders. It gives the bread its signature rectangular shape. - Bench Scraper
Ever tried moving sticky dough without one? It’s like trying to pick up Jello with your hands. A bench scraper makes shaping and cleanup easier. - Dough Thermometer (Optional)
Knowing the dough’s temperature can help you nail fermentation times, especially in a chilly kitchen.
Key Ingredients for Sourdough Sandwich Bread
- Flour
Stick with bread flour for structure, or mix in some whole wheat for extra flavor. All-purpose works too but might yield a slightly denser loaf. - Sourdough Starter
This is your bread’s engine. A bubbly, active starter is key—think of it like having a well-tuned car before a road trip. - Water
Use filtered or distilled water to avoid chlorine, which can mess with the starter’s fermentation. - Salt
It’s small but mighty. Salt enhances flavor and controls fermentation. Skimp on it, and you’ll notice! - Optional Add-Ins
Honey, milk, or butter can make your loaf softer and slightly sweet, while seeds or herbs can add texture and flavor.
Why These Matter for Sourdough Sandwich Bread
Each tool and ingredient plays a role in your bread’s success. For instance, a loaf pan ensures the bread rises upward, not outward, while bread flour creates that soft but sturdy structure perfect for slicing. A sourdough starter, of course, is the heart of it all—feeding and caring for it is like nurturing a tiny pet that pays you back in delicious bread.
Now that you’re geared up, let’s get into the real fun: baking!
Step-by-Step Recipe for Sourdough Sandwich Bread

Alright, it’s time to roll up your sleeves and dive in. Baking sourdough sandwich bread is an art and a science, but I’ll walk you through it step by step.
Step 1: Preparing Your Starter
Feed your sourdough starter the night before. A good feeding schedule is a 1:1:1 ratio of starter, flour, and water. For example, if you have 50g of starter, mix in 50g of flour and 50g of water. By morning, it should be bubbly, active, and ready to go. If it floats in water, you’re golden!
Step 2: Mixing the Dough
- Combine Ingredients
In a large bowl, mix 500g bread flour, 350g water, 100g active starter, and 10g salt. If you’re feeling fancy, add a tablespoon of honey or olive oil for extra flavor. - Hydration Tip
Dough too sticky? Sprinkle in a bit of flour. Too dry? Add water a teaspoon at a time. The goal is a slightly sticky but manageable dough. - Autolyse (Optional)
Let the flour and water sit for 30 minutes before adding salt and starter. This step improves gluten development.
Step 3: Bulk Fermentation
Cover the bowl and let the dough ferment for 4–6 hours, depending on room temperature. Every 30 minutes to an hour, perform a stretch and fold: lift one side of the dough, stretch it, and fold it over. Do this on all four sides. It strengthens the dough and helps it rise beautifully.
Step 4: Shaping and Proofing
- Shape the Dough
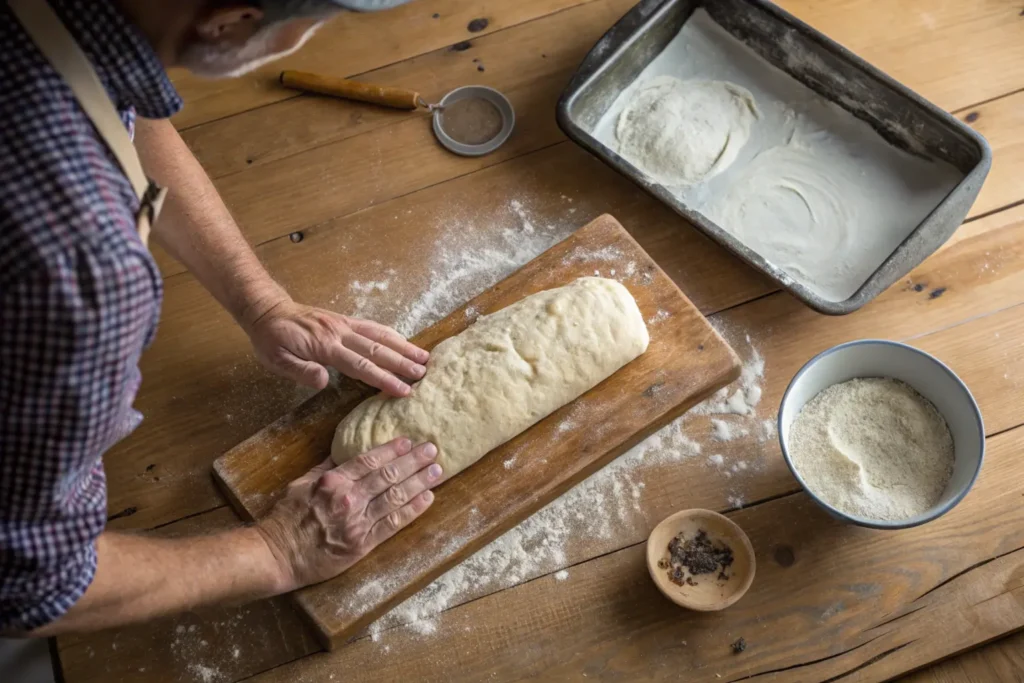
Lightly flour your surface and gently shape the dough into a rectangle. Roll it into a log and place it seam-side down in a greased loaf pan. - Final Proof
Cover the pan and let the dough proof for 2–4 hours, or until it’s just about doubled in size. A finger poke should leave a slight indent that springs back slowly.
Step 5: Baking
- Preheat Your Oven
Heat to 375°F (190°C) about 30 minutes before baking. - Bake the Bread
Place the loaf pan in the oven and bake for 35–40 minutes, or until the top is golden brown, and it sounds hollow when tapped. - Cool Completely
Let the bread cool in the pan for 10 minutes, then transfer it to a wire rack to cool fully. Cutting too soon can ruin the texture. (I know it’s hard, but it’s worth it!)
Congratulations, you’ve just baked your first sourdough sandwich bread!
Troubleshooting Common Issues with Sourdough Sandwich Bread
Baking sourdough sandwich bread isn’t always smooth sailing. Don’t worry—every baker has had their share of sticky doughs, dense loaves, and moments of frustration. Let’s tackle some common issues and how to fix them.
1. Dense or Gummy Texture
The Problem: Your bread feels heavy, and the crumb looks wet or doughy.
The Fix:
- Underproofing: The dough didn’t rise enough. Give it more time during the bulk fermentation and proofing stages. Keep an eye on how much it expands rather than relying solely on a timer.
- Hydration Issues: Too much water can make the dough gummy. Reduce the water slightly next time, especially if you live in a humid climate.
- Weak Starter: If your sourdough starter isn’t strong and bubbly, the bread won’t rise properly. Feed it consistently and make sure it’s active before using.
2. Overproofed Loaf
The Problem: The dough rises too much and collapses, leaving you with a flat loaf.
The Fix:
- Keep an eye on your dough during the final proof. If it looks puffy and wobbly, it’s time to bake.
- Proof in a cooler spot if your kitchen is warm, or reduce proofing time.
3. Uneven Crumb or Large Holes
The Problem: While open crumb is great for artisan sourdough, sandwich bread needs a more even texture.
The Fix:
- During shaping, degas the dough gently to release large air pockets.
- Be consistent with stretch and folds during bulk fermentation to strengthen the dough structure.
4. Crust Too Hard or Thick
The Problem: Your crust is too tough for a sandwich loaf.
The Fix:
- Brush the top with milk or butter before baking to soften the crust.
- Cover the bread loosely with foil if it browns too quickly.
5. Adjusting for Climate
The Problem: Your bread turns out differently in winter vs. summer.
The Fix:
- In cooler temperatures, dough ferments slower. Use warm water (not hot!) during mixing, and consider proofing in a warm spot.
- In hot weather, reduce fermentation times to prevent overproofing.
Remember, every loaf is a lesson. Troubleshooting helps you understand the quirks of sourdough and your unique environment. Keep notes, experiment, and don’t give up!
Creative Uses for Sourdough Sandwich Bread
A fresh loaf of sourdough sandwich bread opens up a world of possibilities. Sure, you could just eat it plain, but where’s the fun in that? Let’s explore some creative (and delicious) ways to use your homemade bread.
For more sandwich inspiration, dive into Texas Toast Sliced Bread: Everything You Need to Know.
1. Sandwiches with a Twist
- Classic Reimagined: Try a grilled cheese with sharp cheddar, caramelized onions, and a drizzle of honey.
- Epic Breakfast: Layer it with smashed avocado, a runny egg, and a sprinkle of chili flakes.
- Gourmet Lunch: Make a turkey club with cranberry sauce and arugula.
2. Sweet and Savory Toast Toppings
- Sweet Ideas: Slather on peanut butter, sliced bananas, and a drizzle of honey. Or go fancy with cream cheese, fresh berries, and a dusting of powdered sugar.
- Savory Ideas: Top with hummus, roasted veggies, and a sprinkle of feta. For a quick snack, spread on ricotta and finish with a dash of olive oil and salt.
3. Breakfast Treats
- French Toast: Use slightly stale slices for French toast. The sourdough tang adds a unique depth to the sweetness.
- Bread Pudding: Combine chunks of sourdough with eggs, milk, sugar, and spices, then bake until golden and custardy.
4. Croutons and Breadcrumbs
Got leftover bread? Cut it into cubes, toss with olive oil and herbs, and bake for homemade croutons. Or blitz it in a food processor for fresh breadcrumbs—perfect for casseroles or coating chicken.
5. Party Pleasers
- Mini Sandwiches: Use small slices for sliders or tea sandwiches.
- Bread Bowls: Hollow out a loaf and fill it with dip for an edible serving dish.
With sourdough sandwich bread, you’re only limited by your imagination—and maybe your pantry!
Conclusion
Baking sourdough sandwich bread is a journey worth taking. From the first bubbly signs of your starter to the aroma of a fresh loaf coming out of the oven, every step connects you to a centuries-old tradition. Not only is it deeply satisfying, but it’s also a practical way to create a soft, flavorful bread that elevates everyday meals.
Whether you’re making classic sandwiches, gourmet toasts, or even indulging in French toast, sourdough sandwich bread adds a special touch to everything it meets. Sure, it might take a bit of trial and error—there’s always something new to learn—but that’s part of the fun!
So, what are you waiting for? Dive into the world of sourdough, and don’t forget to customize your loaves with your favorite add-ins or toppings. Share your baking adventures in the comments—I’d love to hear about your successes, lessons, and even those “oops” moments.
Happy baking, and may your sourdough rise to every occasion!


10 thoughts on “Sourdough Sandwich Bread: The Ultimate Recipe for Home Bakers”