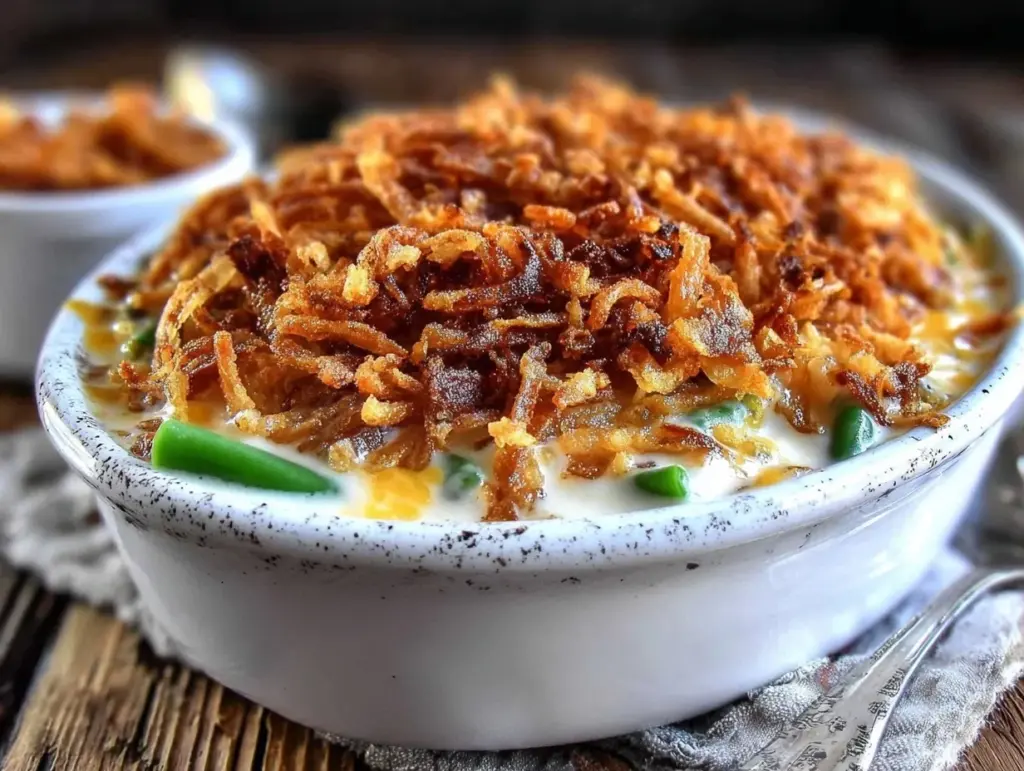
I have a confession to make. For years, I was a loyal subscriber to the Campbell’s condensed soup box. I grew up with the classic canned version—it was the non-negotiable side dish at Thanksgiving, the one thing everyone expected and nobody really talked about until it was gone. It was safe. It was consistent. And honestly? It was a little boring.
Then, about five years ago, my mother-in-law made me a green bean casserole from scratch. I remember sitting at the table, expecting the usual mushy texture and overly salty sauce, but instead, I got something completely different. The green beans were still crisp-tender, the sauce was rich and creamy without being heavy, and those crispy fried onions? They were fresh, golden, and made right in the pan. I ate three servings. My mother-in-law just smiled and said, “I told you. It takes longer to wait for the delivery driver than to make this.”
That was the moment I realized I’d been cheating myself out of a better holiday experience. I wanted that same comfort, that same nostalgia, but I didn’t want to spend hours peeling and chopping fresh beans or fussing over a complex roux that might break. I wanted speed. I wanted flavor. I wanted it ready in time for the main course to finish roasting.
So I spent the next year testing. I tried blanching, steaming, roasting, and even microwaving green beans. I played with different flour-to-butter ratios for the sauce. I experimented with homemade fried onions (which take forever) and store-bought shortcuts. Through all the burnt butter and thin sauces, I landed on a method that is genuinely fast, ridiculously easy, and tastes like it came from a fancy restaurant kitchen. This classic green bean casserole ready in 30 minutes has become my secret weapon for holidays, potlucks, and even random Tuesday dinners when I need comfort food fast.
If you’re skeptical about making a casserole from scratch because you think it’s too much work, I get it. But once you try this version, you’ll never go back to the can. It’s creamy, it’s crunchy, and it’s ready before you know it. Let me show you how to make the best green bean casserole without the fuss.
Why You’ll Love This 30-Minute Version
There are a dozen reasons I keep coming back to this recipe, but let’s be real: the big one is time. We all have those moments where the oven is full, the table is set, and you realize the side dish isn’t done. This green bean casserole saves the day every single time.
Stupid Simple — Seriously, if you can open a bag of frozen beans and stir a pot, you can make this. I’ve walked my teenage nephew through it over video chat while he was stuck at a hotel for work. He nailed it.
Lightning Fast — 30 minutes from start to finish, and only 15 of those are active cooking. The rest is just waiting for the water to boil or the sauce to thicken. I make this on busy weeknights when I get home at 6:30 pm and need dinner on the table by 7:15.
Texture Paradise — Most casseroles suffer from mush. Not this one. By using a specific blanching method and topping it with crispy onions at the very end, you get that perfect contrast: tender beans, creamy sauce, and crunchy topping. It’s a mouthful of joy.
Pantry-Friendly — You probably have most of these ingredients already. Frozen green beans, butter, flour, milk, and onions are staples. I keep a bag of frozen beans in the freezer specifically for this recipe because it’s the ultimate safety net.
Crowd-Pleaser — I’ve served this to my picky vegetarian sister, my garlic-hating uncle, and my food-snob friend who claims she “doesn’t eat casserole.” Everyone went back for seconds. Even the picky eater asked for more.
Budget-Smart — Feeds 6-8 people for under $10. Frozen beans are cheap, milk is cheap, and you’re using basic pantry staples. That’s a fraction of the cost of catering or ordering takeout.
This is my go-to when I need dinner to just work. No complicated techniques, no weird ingredients, just reliable, delicious food that makes everyone happy. And if you need a quick main course to go with it, I also have a summer chicken caprese skillet that’s ready in the same timeframe, so you can plan a full meal in under an hour.
Ingredients You’ll Need
Here’s the best part: you probably have most of this already. I’m particular about three ingredients here, and I’ll tell you exactly why they matter. This isn’t just a list; it’s a guide to making sure your casserole turns out perfect every time.
For the Base
Frozen green beans (16 ounces / 450g) — I use the frozen kind, not fresh. Why? Because frozen green beans are blanched at the peak of freshness before freezing. They hold their color better and cook faster. Look for brands like Bird’s Eye or Kirkland. Fresh beans require peeling and chopping, which kills the 30-minute goal.
Unsalted butter (3 tablespoons / 42g) — This is your flavor base. Use real butter, not margarine. It adds that rich, savory note that defines the casserole. Salted butter works too, but you’ll need to reduce the added salt later.
All-purpose flour (3 tablespoons / 24g) — This is what thickens the sauce into a creamy gravy. Don’t skip this or try to use too little, or you’ll end up with soup. Don’t use too much, or it’ll be paste. Three tablespoons is the sweet spot.
Milk (2 cups / 480ml) — I use whole milk for the creamiest result. If you’re watching calories, 2% works, but 1% or skim will make the sauce thinner and less rich. Half-and-half is too heavy and might split if boiled too hard.
Chicken or vegetable broth (1/2 cup / 120ml) — This adds depth that milk alone can’t provide. It gives the sauce that savory, umami kick. Low-sodium is best so you can control the salt level.
For the Flavor
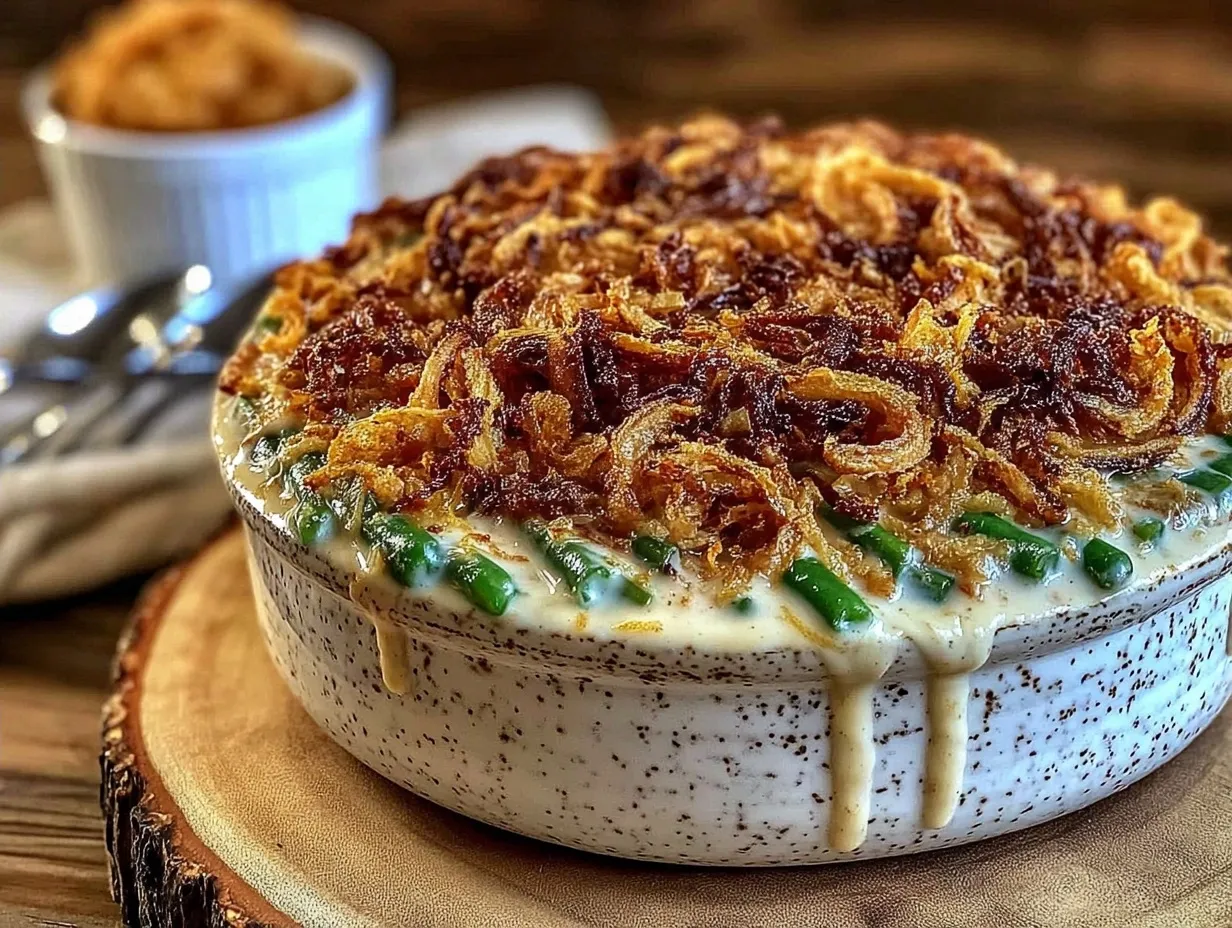
Garlic powder (1/2 teaspoon) — Not fresh garlic. Fresh garlic can burn quickly in a short cook time and might leave raw bits. Garlic powder distributes evenly and gives a consistent flavor. If you must use fresh, mince it finely and add it at the very end.
Onion powder (1/2 teaspoon) — Similar to the garlic, this adds a subtle onion flavor that complements the topping. It’s a flavor booster that doesn’t require chopping.
Dijon mustard (1 teaspoon) — This is my secret weapon. It doesn’t make the casserole taste like mustard. Instead, it cuts through the richness of the cream and adds a little tangy brightness. You won’t taste it directly, but you’ll miss it if it’s gone.
Worcestershire sauce (1 teaspoon) — Again, this is for depth. It adds a savory, slightly tangy note that makes the dish taste more complex. A few dashes go a long way.
Salt and black pepper — To taste. I usually start with 1/2 teaspoon salt and 1/4 teaspoon pepper, then adjust after tasting. Remember, your topping will add salt too.
For the Topping
Canned fried onions (1 can / 2.6 ounces) — The classic choice. Brands like French’s are the gold standard. They’re crispy, flavorful, and save you from making your own. If you want to go fancy, see the variation section below.
Optional fresh herbs — A sprinkle of fresh thyme or chives on top adds a pop of color and freshness. I like this for holidays when I want it to look a bit more elegant.
Sharp cheddar cheese (1/4 cup, grated) — I add this sometimes for a cheesy twist. It melts into the sauce and adds a nice sharpness. If you’re sticking to the classic, skip it.
I always keep a bag of frozen green beans and a can of fried onions in my pantry. It’s my backup plan for when I’m exhausted. And if you’re looking for other quick side dishes to round out a meal, these garlic herb roasted potatoes are another easy winner that pairs well with roast chicken or turkey.
Equipment Needed
You don’t need fancy equipment for this. Here’s what I actually use. Keep it simple so you’re not hunting for gadgets.
Large pot — I use a 6-quart pot for boiling the green beans. It needs to hold the water and the beans comfortably. My ancient stainless steel pot from college still works fine.
Colander — For draining the beans. Or just use the lid to drain—I do this when I’m being lazy and don’t want to wash another dish.
Medium saucepan or skillet — 3-4 quart size is perfect for making the sauce. I prefer a saucepan because it has high sides, which prevents splattering when you whisk in the milk.
Whisk — Essential for the roux. You need to whisk constantly to avoid lumps. A silicone whisk is great because it doesn’t scratch non-stick pans.
Measuring cups and spoons — Pretty standard stuff. Dollar store versions work fine, but make sure they’re accurate.
8×8 inch baking dish — If you plan to bake it to brown the top. If you’re serving it immediately, a serving bowl works too.
Optional but nice:
- Microplane grater — For grating fresh nutmeg if you want to add a pinch.
- Immersion blender — If you want a super smooth sauce, you can blend it briefly. I usually don’t bother.
Don’t have a baking dish? Any oven-safe skillet works—doesn’t need to be fancy. And if you’re making other dishes for a holiday, this sheet pan caprese chicken is another easy recipe that uses similar basic equipment.
How to Make It: Step-by-Step
Alright, let’s make this! I’m walking you through exactly how I do it, including the little tricks I’ve picked up so you don’t make my mistakes.
Step 1: Prep the Green Beans (5 minutes)
Start by boiling water. Get a large pot of salted water to a rolling boil—it should taste like the ocean. While that’s heating, measure out your frozen green beans. Do not thaw them. Cooking them straight from frozen is key to keeping them crisp-tender. Once the water is boiling, add the beans. Cook for exactly 3-4 minutes. You want them bright green and tender, but still firm. If you overcook them, they’ll turn mushy later in the sauce. Drain them immediately in a colander and rinse with cold water to stop the cooking. Shake off excess water. Set aside.
Step 2: Make the Roux (3 minutes)
In your medium saucepan, melt the butter over medium heat. Once it’s foaming, add the flour. Whisk constantly for about 1-2 minutes. You’re making a roux. It should turn a light blonde color and smell nutty. Don’t let it brown, or it’ll taste burnt. If it starts to smoke, lower the heat. This step creates the base for your thick sauce.
Step 3: Build the Sauce (5 minutes)
Slowly pour in the milk and broth while whisking constantly. This is the tricky part—add the liquid gradually to prevent lumps. Keep whisking until the mixture is smooth. Turn up the heat to medium-high and bring to a gentle simmer. Let it cook for 2-3 minutes, stirring frequently, until it thickens enough to coat the back of a spoon. It should look like a thin gravy. If it’s too thick, add a splash more milk. If it’s too thin, let it simmer a minute longer.
Step 4: Season and Combine (2 minutes)
Remove the sauce from heat. Stir in the garlic powder, onion powder, Dijon mustard, Worcestershire sauce, salt, and pepper. Taste it now. This is your chance to adjust. Does it need more salt? More pepper? Add it now. Once seasoned, fold in the drained green beans. Stir gently to coat them evenly. The beans are already cooked, so you’re just warming them through.
Step 5: Top and Bake (10-15 minutes)
Preheat your oven to 350°F (175°C). Pour the green bean mixture into your baking dish. Sprinkle the fried onions evenly over the top. If you’re adding cheese, sprinkle it on now. Bake for 10-15 minutes, until the sauce is bubbling around the edges and the onions are golden brown. If you’re serving immediately, you can skip the baking and just top with onions right before serving, but baking helps meld the flavors.
Step 6: Serve
Serve hot. The sauce will thicken slightly as it cools, which is normal. Garnish with fresh herbs if you like. Enjoy!
Total Time: About 30 minutes (15 minutes active, 15 minutes hands-off)
Built-in Troubleshooting:
- Sauce too thin? Simmer longer or add a teaspoon of cornstarch mixed with water.
- Sauce too thick? Add more milk, a splash at a time.
- Beans too mushy? You overcooked them in Step 1. Next time, reduce boil time to 2-3 minutes.
Expert Tips & Tricks
Here’s everything I’ve learned from making this dozens of times. These tips will save you from my mistakes.
Don’t Thaw the Beans
This is the #1 tip. Frozen green beans are blanched before freezing. If you thaw them, they release water and become soggy. Cook them straight from the bag. It keeps them vibrant green and firm.
Whisk Like Your Life Depends On It
When making the roux, don’t stop whisking. Lumps of flour are the enemy of a smooth casserole. If you get lumps, strain the sauce through a sieve. But if you whisk well, you won’t need to.
Season in Layers
Don’t just salt the beans. Season the sauce. Season the beans (they’re bland on their own). Taste the final mixture before baking. It’s easier to fix it before it’s hot than after.
The Onion Trick
If you’re worried about the fried onions getting soggy, add half of them to the sauce and half on top. This gives you onion flavor in every bite AND a crunchy topping. It’s a game-changer.
Room Temperature Milk
If your milk is ice cold, it can shock the roux and cause lumps. Take it out of the fridge 15 minutes before cooking. Or microwave it for 30 seconds. It helps the sauce come together smoother.
Common Mistakes (and how to avoid them):
- Mistake: Sauce is grainy — Fix: Heat was too high when adding flour. Keep heat medium and whisk constantly.
- Mistake: Beans are dull green — Fix: You overcooked them. Rinse with cold water immediately after boiling to stop the cooking process.
- Mistake: Everything is too salty — Fix: Use low-sodium broth and unsalted butter. You can always add more salt, but you can’t take it away.
Variations & Substitutions
Once you’ve nailed the basic version, here’s how you can mix it up. I’ve tried all of these.
Ham & Swiss Version
Add 1 cup diced ham and 1/2 cup shredded Swiss cheese to the sauce. It’s like a fondue for green beans. My kids love this version.
Mushroom Lover’s
Sauté 8oz sliced mushrooms with the butter before adding the flour. Cook until golden brown. Adds earthiness and makes it feel fancier.
Lighter Version
Use 1% milk and reduce butter to 2 tablespoons. Use low-sodium broth. It’s thinner but still good. I make this when I’m trying to be “healthy.”
Gluten-Free
Use gluten-free fried onions (like those from French’s) and substitute the flour with a 1:1 gluten-free flour blend. Everything else is naturally gluten-free.
Vegetarian/Vegan
Use vegetable broth and olive oil instead of butter. Use a plant-based milk (like oat or soy) that doesn’t separate. Use vegan fried onions. It’s different but still tasty.
Alfredo Twist
Replace the milk with heavy cream and add 1/2 cup grated Parmesan. It’s richer and cheesier. Great if you’re serving it with steak.
Bacon Bits
Stir in 1/2 cup cooked, crumbled bacon with the onions. Adds smokiness and crunch. This Hatch green chile chicken enchiladas recipe is another dish where bacon adds a nice smoky kick, so if you like that flavor profile, you’ll love adding bacon here too.
Serving & Storage
How to Serve:
I usually serve this straight from the baking dish at the dinner table—it looks rustic and stays warm. But here are other ways I’ve enjoyed it:
Side Dishes:
- Roast turkey or ham
- Grilled chicken (this keto grilled lemon herb salmon is a great light option)
- Mashed potatoes (yes, double starch, but it’s holiday food)
- Simple green salad with balsamic vinaigrette (this homemade balsamic vinaigrette is perfect)
Storage Instructions:
Refrigerator: Store in an airtight container for up to 3 days. The sauce will thicken in the fridge—totally normal.
Reheating: Best method: Add to a skillet with a splash of milk over low heat. Stir until heated through and creamy again. Microwave method: Heat in 30-second intervals, stirring between. Add a splash of milk if it’s too thick.
Freezing: Honestly, this doesn’t freeze well because of the dairy. The sauce separates when thawed. Make it fresh or store in the fridge for up to 3 days.
Nutrition Information
I’m not a nutritionist, but here’s the breakdown if you’re tracking. This is per serving (based on 6 servings).
Calories: 180 | Protein: 6g | Carbs: 20g | Fiber: 4g | Sugar: 4g | Fat: 9g | Saturated Fat: 4g | Cholesterol: 15mg | Sodium: 450mg | Calcium: 120mg
What’s Good:
- Decent fiber from the green beans
- Calcium from the cheese and milk
- Lower calorie than many holiday sides
What to Know:
- Higher in sodium from the broth and onions
- Contains dairy and gluten
- Moderate calories, but easy to control portions
My Take:
Look, this is comfort food. It’s not a diet recipe. But it’s way better than takeout, costs less, and I know exactly what’s in it. When I want to make it lighter, I use the low-fat milk version and skip the extra cheese. But usually? I just eat a reasonable portion and enjoy it.
Final Thoughts
So that’s my go-to classic green bean casserole ready in 30 minutes! I’ve probably talked your ear off at this point, but when you make a recipe this often, you have a lot to say about it.
This has saved weeknight dinners and holiday feasts more times than I can count. It’s my answer to “what’s for dinner” when I’m tired, don’t want takeout, and still want something that tastes really good. My kids are happy, my guests are impressed, and I’m happy because I’m not stressed about cooking.
Make it yours! Try different add-ins, swap in your favorite vegetables, adjust the seasoning. The best recipes are the ones you adapt to your family’s tastes. And if you need another quick side dish, these air fryer zucchini with crispy parmesan herb topping are another easy win that comes together in minutes.
If you make this, drop a comment and let me know what you think! I love hearing how recipes turn out in your kitchen. And if something doesn’t work, tell me that too—I’m here to help troubleshoot.
Happy cooking! And I hope your kitchen smells half as good as mine does right now.
Frequently Asked Questions
Q: Can I use fresh green beans instead of frozen?
A: You can, but it takes longer. You’ll need to trim and blanch them in boiling water for 3-4 minutes, then ice bath them to stop cooking. Frozen beans are blanched already, so they’re faster. If you use fresh, reduce the boiling time in Step 1 to 2-3 minutes to avoid mushiness.
Q: Why did my sauce get lumpy?
A: Usually means you didn’t whisk enough when adding the flour or milk. Make sure your roux is smooth before adding liquid. Add milk slowly while whisking constantly. If you get lumps, strain the sauce through a fine-mesh sieve.
Q: Can I make this ahead for a dinner party?
A: Sort of. You can make the sauce and cook the beans up to 2 days ahead. Store them separately in the fridge. When ready to serve, combine, top with onions, and bake. It won’t be quite as good as fresh, but it’s close and saves you stress.
Q: Why did my sauce get watery?
A: This happens if you used too much liquid or didn’t simmer long enough. Let the sauce simmer for 2-3 minutes after adding milk to thicken. If it’s already watery, simmer longer or add a teaspoon of cornstarch mixed with water.
Q: Can I use almond milk instead of dairy milk?
A: You can, but it will be thinner. Use an unsweetened, unflavored almond milk or oat milk. Oat milk is creamier and works better. You might need to add a little extra flour to thicken it.
Q: How do I reheat leftovers without it getting dry?
A: Add a splash of milk or cream to a skillet, add your leftover casserole, and heat gently over low heat, stirring frequently. The extra liquid brings back the creamy texture. Microwave sort of works but tends to dry it out.
Q: Can I double this recipe?
A: Absolutely! Double everything and use your biggest pot and saucepan. The cooking times stay the same. Just make sure your baking dish is large enough—you might need a 9×13 inch dish instead of 8×8.
Pin This Recipe!


Classic Green Bean Casserole: Easy 30-Minute Holiday Side
- Total Time: 30 minutes
- Yield: 6 servings 1x
Description
A fast, from-scratch green bean casserole that delivers creamy sauce and crispy onions in just 30 minutes, using frozen beans for convenience and perfect texture.
Ingredients
- 16 ounces frozen green beans
- 3 tablespoons unsalted butter
- 3 tablespoons all-purpose flour
- 2 cups whole milk
- 1/2 cup chicken or vegetable broth
- 1/2 teaspoon garlic powder
- 1/2 teaspoon onion powder
- 1 teaspoon Dijon mustard
- 1 teaspoon Worcestershire sauce
- 1/2 teaspoon salt (or to taste)
- 1/4 teaspoon black pepper (or to taste)
- 1 can (2.6 ounces) fried onions
- 1/4 cup sharp cheddar cheese, grated (optional)
- Fresh thyme or chives for garnish (optional)
Instructions
- Boil a large pot of salted water. Add frozen green beans (do not thaw) and cook for 3-4 minutes until bright green and tender-crisp.
- Drain the beans immediately and rinse with cold water to stop the cooking process. Shake off excess water and set aside.
- In a medium saucepan, melt butter over medium heat. Add flour and whisk constantly for 1-2 minutes until the mixture is light blonde and nutty-smelling.
- Slowly pour in milk and broth while whisking constantly to prevent lumps. Bring to a gentle simmer over medium-high heat.
- Cook the sauce for 2-3 minutes, stirring frequently, until it thickens enough to coat the back of a spoon.
- Remove sauce from heat. Stir in garlic powder, onion powder, Dijon mustard, Worcestershire sauce, salt, and pepper. Taste and adjust seasoning.
- Fold in the drained green beans until evenly coated.
- Preheat oven to 350°F (175°C). Pour the mixture into an 8×8 inch baking dish.
- Sprinkle fried onions evenly over the top. Add cheese if using.
- Bake for 10-15 minutes until the sauce is bubbling and onions are golden brown. Serve hot.
Notes
Do not thaw the frozen green beans before cooking to maintain texture. If the sauce is too thin, simmer longer or add a cornstarch slurry. If too thick, add more milk. For a gluten-free version, use GF flour and GF fried onions. For a vegan version, use vegetable broth, olive oil, plant-based milk, and vegan fried onions.
- Prep Time: 15 minutes
- Cook Time: 15 minutes
- Category: Side Dish
- Cuisine: American
Nutrition
- Serving Size: 1 serving
- Calories: 180
- Sugar: 4
- Sodium: 450
- Fat: 9
- Saturated Fat: 4
- Carbohydrates: 20
- Fiber: 4
- Protein: 6
Keywords: green bean casserole, holiday side dish, 30 minute recipe, easy casserole, frozen green beans, Thanksgiving side, comfort food