It was 6:15 AM on a Tuesday, the kind of morning where the coffee hasn’t kicked in yet and my brain feels like it’s wrapped in cotton wool. I was standing in my kitchen, staring into the pantry like it held the secrets to the universe, trying to find something that would keep me from crashing at 10:30 AM. Usually, I grab that granola bar wrapper that’s been hiding in the back of the drawer since last month. You know the one—stale, overly sweet, and somehow disappointing every single time.
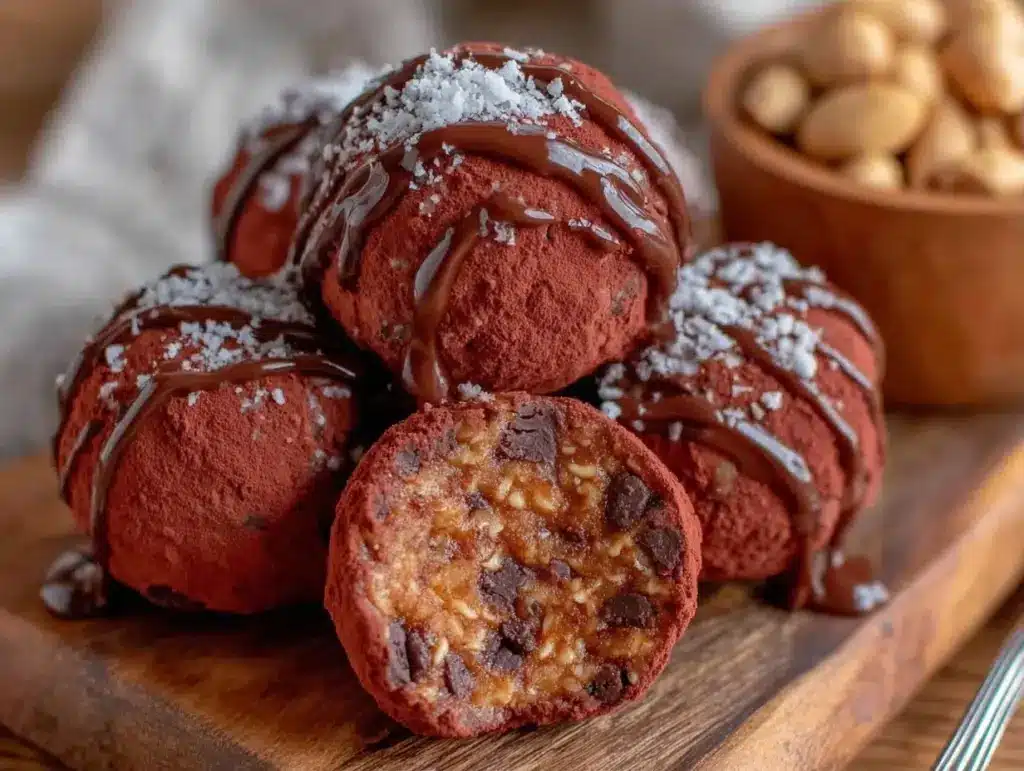
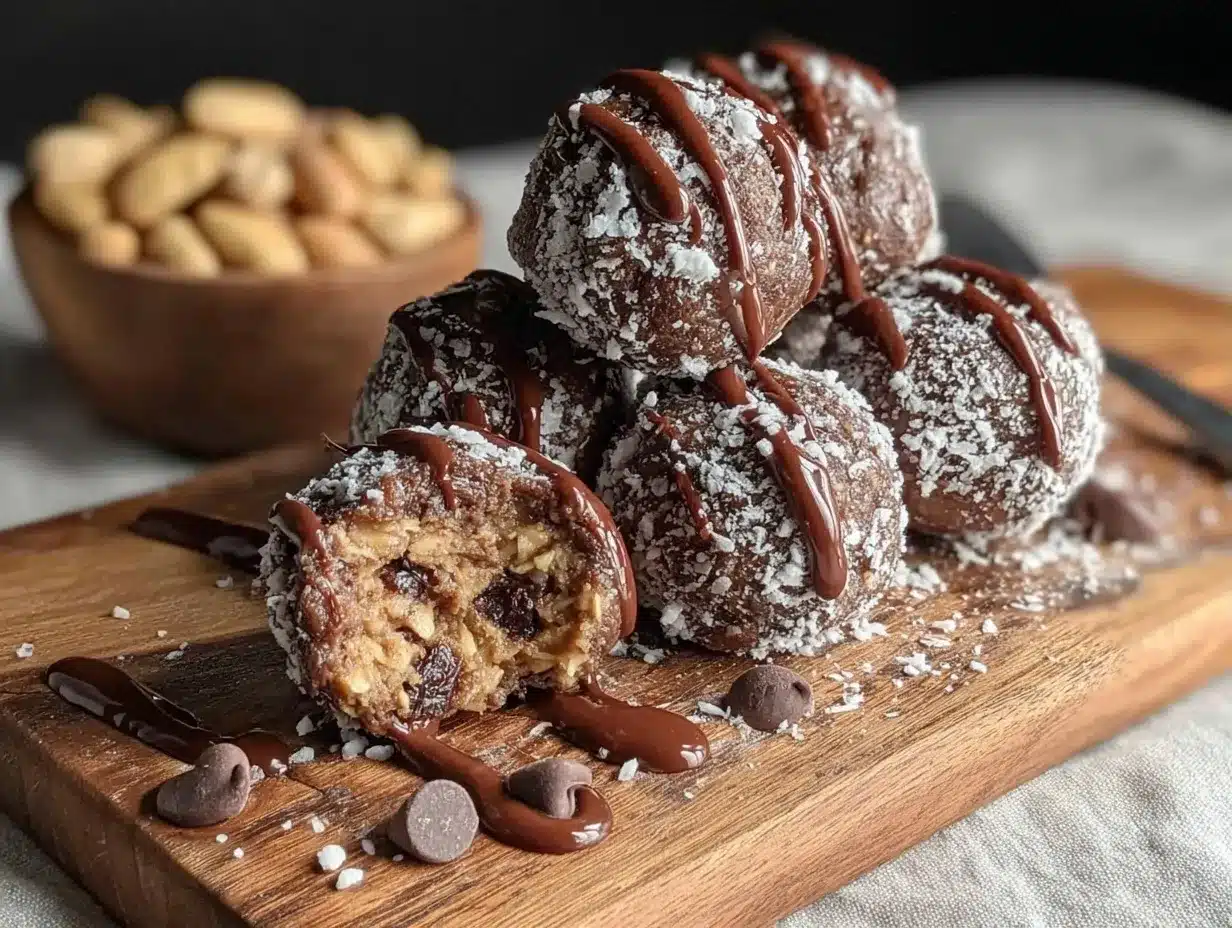
But that morning, I decided to do something different. I had a jar of peanut butter, some oats, a drizzle of honey, and a handful of chocolate chips. I dumped them all into a bowl, gave it a stir, rolled them into little balls, and threw them in the freezer. Ten minutes later, I had five perfect little energy bombs ready to go.
I ate one on the way out the door. By 10:30 AM, I wasn’t crashing. I was actually focused. And that’s when I realized: I didn’t need another complicated meal prep recipe or a fancy superfood smoothie (though I do love a good creamy peach smoothie bowl). I just needed something simple, real, and fast.
These no-bake peanut butter energy balls have been my lifeline for two years now. They’re the reason I don’t end up buying overpriced snacks at the gas station. They’re sticky, sweet, salty, and incredibly easy to make. If you’re tired of buying pre-packaged energy bites that cost $6 for six tiny pieces, you need to try this. It’s basically magic in a bowl.
Why You’ll Love This Recipe
Look, I’m not going to lie to you. There are a thousand “healthy” snack recipes out there. But this one? This one actually tastes like a treat. It’s not one of those bland, chalky protein balls that taste like you’re eating a supplement. These are genuinely delicious. Here’s why I keep making them:
- Zero Baking Required — Seriously. No oven, no preheating, no dirty baking sheets. Just a bowl, a spoon, and a freezer. If you can mix ingredients, you can make this.
- Ready in 10 Minutes — This is the fastest snack I make. I chop nuts, stir the mixture, roll them up, and freeze. It takes less time than it takes to boil water for pasta. Perfect for when you need a quick fix before work or school.
- Only 6 Ingredients — You probably have all of these right now. Peanut butter, oats, honey, flaxseed, vanilla, and chocolate chips. That’s it. No weird powders you have to order online.
- Meal Prep Friendly — I make a huge batch on Sunday and eat them all week. They last for weeks in the freezer, so I always have a backup snack ready. It’s like having a cheat code for healthy eating.
- Customizable — Hate chocolate chips? Use dried cranberries. Don’t like flaxseed? Skip it. This recipe is a blank canvas for your favorite add-ins. I even like to swap the peanut butter for almond butter sometimes, similar to how I tweak my peach butter for different flavors.
These balls are my answer to “what’s for a snack?” when I’m hungry but don’t want to make a whole meal. They’re portable, non-messy (mostly), and they keep me full. Honestly, they’re so good that my kids fight over them. I’ve started making double batches just to keep the peace.
Ingredients You’ll Need
Here’s the best part: this recipe relies on pantry staples. You don’t need to run to the store for anything exotic. Here’s exactly what you need and why I pick these specific items.
The Base
Peanut Butter (1 cup / 250g) — This is the star. I use natural creamy peanut butter, but crunchy works too if you like texture. Just make sure it’s not the kind with added oil that separates too much. If it’s super runny, pop it in the microwave for 15 seconds to thicken it up. I stick to brands like Justin’s or even standard Jif if I’m being lazy, but check the label—no hydrogenated oils, please.
Old-Fashioned Rolled Oats (1 cup / 90g) — Don’t use instant oats; they turn into mush. Don’t use steel-cut oats; they’re too hard. Rolled oats are the sweet spot. They hold their shape and give you that chewy texture. If you need gluten-free, just make sure your oats are certified gluten-free. I’ve used overnight oats before, and these work the same way.
Honey (½ cup / 170g) — Honey binds everything together and adds natural sweetness. Maple syrup works too, but the flavor changes slightly. I love the floral note honey brings. Use raw honey if you have it—it’s tastier. If your honey is crystallized, warm it up in a small bowl of hot water first.
Ground Flaxseed (2 tablespoons) — This adds fiber and healthy omega-3s. It also helps bind the mixture a bit more. You can buy pre-ground flaxseed, or grind whole seeds in a coffee grinder. It’s optional, but I recommend it for the nutritional boost. If you don’t have it, just add an extra tablespoon of oats.
The Flavor Boosters
Vanilla Extract (1 teaspoon) — Just a splash. It makes the peanut butter taste more like a dessert. Don’t skip this. It’s a small ingredient, but it makes a big difference in flavor complexity.
Salt (½ teaspoon) — Even though these are sweet, salt is crucial. It balances the sweetness and makes the peanut butter taste nuttier. Use fine sea salt. I usually add this to the dry ingredients first.
Dark Chocolate Chips (½ cup / 85g) — The classic choice. But honestly, I’ve tried everything. Mini chips are easier to distribute. Semi-sweet chips are less sweet. White chocolate chips? Sure, if you’re indulging. I like to mix in some chopped peanuts sometimes, for that extra crunch. It’s like a Reese’s cup in ball form.
Optional Add-Ins
Mini Marshmallows — For a s’mores vibe. I add these occasionally for the kids.
Chia Seeds — If you’re already using flax, chia is a good swap or addition. They’re tiny and almost tasteless.
Coconut Flakes — For rolling the finished balls. Adds a nice tropical twist.
Equipment Needed
You don’t need any fancy gadgets for this. Here’s what I actually use:
Large Mixing Bowl — I use a 4-quart bowl. It needs to be big enough to mix everything without making a mess. Glass or ceramic works best, but plastic is fine too.
Spatula — A silicone spatula is perfect for scraping the bowl and mixing thick peanut butter. Metal spoons work, but they’re harder to maneuver.
Measuring Cups and Spoons — Standard stuff. I use the nesting sets. Make sure you level off your dry ingredients.
Baking Sheet — Line it with parchment paper or a silicone mat. This prevents sticking and makes cleanup a breeze. I use a rimmed baking sheet so I can slide it into the freezer easily.
Small Bowl — For mixing the wet ingredients (peanut butter and honey) before adding the dry stuff. It’s easier to mix smooth liquids first.
Ice Cream Scoop (Optional) — If you want uniform balls, use a small ice cream scoop. It saves time and ensures they’re all the same size. I don’t always use it, but it helps when I’m in a rush.
How to Make It: Step-by-Step
Alright, let’s make these! I’m walking you through exactly how I do it, including the little tricks I’ve picked up over the years.
Step 1: Mix the Wet Ingredients (2 minutes)
In your small bowl, combine the peanut butter and honey. If your peanut butter is stiff, microwave it for 15-20 seconds to soften it. Stir until it’s smooth and glossy. This step is crucial because if the peanut butter is too cold or thick, it won’t mix well with the oats later.
Step 2: Add the Dry Ingredients (2 minutes)
Pour the mixture into your large mixing bowl. Add the rolled oats, ground flaxseed, salt, and vanilla extract. Stir everything together with your spatula. You want to make sure the oats are fully coated. It might look a bit dry at first, but that’s normal. Keep stirring until it starts to come together.
Step 3: Fold in the Chocolate Chips (1 minute)
Now, add your chocolate chips (or any other add-ins like nuts or dried fruit). Fold them in gently. Be careful not to overmix at this stage; you just want to distribute the chips evenly. The mixture should hold together when you pinch it. If it’s too crumbly, add another teaspoon of honey. If it’s too sticky, add a tablespoon more oats.
Step 4: Chill the Mixture (5 minutes)
This is the secret step. Put the bowl in the fridge for 5-10 minutes. This firms up the peanut butter and makes the mixture much easier to roll. I know it’s tempting to start rolling right away, but trust me—chilling makes a huge difference. The balls will hold their shape better and won’t stick to your hands as much.
Step 5: Roll the Balls (2 minutes)
Take the bowl out of the fridge. Using your hands, scoop out about 1 tablespoon of mixture and roll it into a ball between your palms. If the mixture is sticking to your hands, wet them slightly with water. This helps prevent sticking. Place the rolled balls on your parchment-lined baking sheet. Try to keep them uniform in size for even chilling.
Step 6: Freeze (30 minutes)
Put the baking sheet in the freezer for at least 30 minutes. This firms them up completely. You can eat them soft, but frozen they have a texture similar to a frozen yogurt bite. I usually leave them in the freezer until I’m ready to eat them.
Total Time:
About 10 minutes active, plus 30 minutes chilling. Total time from start to finish is under 45 minutes.
Expert Tips & Tricks
Here’s everything I’ve learned from making these dozens of times. These tips will save you from my mistakes.
Use Natural Peanut Butter Carefully
Natural peanut butter can be runnier than standard brands. If you use natural PB, you might need a bit more oats or a longer chilling time. I usually add an extra tablespoon of oats when using natural PB to compensate for the extra oil.
Don’t Skip the Chill
I’ve tried rolling them without chilling, and they were a sticky mess. The 5-minute fridge break is non-negotiable. It firms up the fats and makes the process so much smoother.
Wet Your Hands
If the mixture is sticking to your fingers, dip your hands in cold water for a second. It creates a barrier that prevents sticking. You don’t need to dry them off completely; just a light film of water works.
Store Properly
Once frozen, transfer the balls to an airtight container or freezer bag. They last up to 3 months in the freezer. If you keep them in the fridge, they’ll last about 2 weeks. I prefer the freezer because they stay firm and don’t get too soft.
Make Them Bite-Sized
For kids or for portion control, roll them smaller. I make some about the size of a marble. They’re perfect for grabbing on the go. I pack them in my kids’ lunchboxes alongside their freezer-friendly breakfast burritos for a complete snack.
Variations & Substitutions
Once you’ve nailed the basic version, here’s how you can mix it up. I’ve tried all of these, and they’re all winners.
Almond Butter Version
Swap peanut butter for almond butter. It’s slightly sweeter and nuttier. I love this version with dark chocolate chips and a pinch of sea salt on top. It feels more gourmet.
Sunflower Butter Version
For nut-free schools or friends, use sunflower butter. It’s a great substitute and has a milder flavor. You might need a tiny bit more honey since sunflower butter is less sweet.
Trail Mix Balls
Add ½ cup of mixed nuts (walnuts, pecans, almonds) and ¼ cup of dried cranberries. This is like a trail mix in ball form. Great for hiking or camping.
Coconut Lime
Add 1 teaspoon of lime zest and swap chocolate chips for white chocolate chips with lime zest. It’s refreshing and tropical. I pair this with a summer chicken caprese skillet for a light lunch.
Protein Power
Add 1 scoop of vanilla protein powder. This will dry out the mixture, so you’ll need to add an extra tablespoon of honey or milk. Great for post-workout snacks.
Dietary Modifications:
– Gluten-Free: Use certified gluten-free oats. Everything else is naturally gluten-free.
– Vegan: Use agave nectar or maple syrup instead of honey. Use vegan chocolate chips.
– Paleo: Use almond butter, maple syrup, and coconut flakes instead of oats. Note: These will be softer and stickier.
Serving & Storage
How to Serve:
I usually eat these straight from the freezer. They’re cold, firm, and satisfying. But you can also eat them at room temperature if you prefer a softer texture. I pack them in my bag for afternoon snacks at work. They don’t melt quickly if you keep them in a cooler bag.
Side Dishes:
These are snacks, so they don’t really have side dishes. But they pair well with a glass of cold milk or a cup of tea. I sometimes have one with my morning spiced fig smoothie bowl for a bigger breakfast.
Storage Instructions:
– Freezer: Store in an airtight container or freezer bag for up to 3 months. Label the bag with the date so you know when to use them up.
– Fridge: Store in an airtight container for up to 2 weeks. They will soften in the fridge, so keep them in the coldest part.
– Counter: Not recommended. Peanut butter and honey can go rancid or attract ants if left out too long. Always refrigerate or freeze.
Reheating:
You don’t need to reheat these. Just let them sit at room temperature for 5 minutes if they’re too hard. Eating them cold is the best way to enjoy them.
Nutrition Information
I’m not a nutritionist, but here’s the breakdown if you’re tracking. Keep in mind that nutrition can vary based on the specific brands of ingredients you use.
Per Serving (based on 12 balls, 1 ball each):
- Calories: 150
- Protein: 5g
- Carbs: 18g
- Fiber: 2g
- Sugar: 10g
- Fat: 8g
- Saturated Fat: 2g
- Cholesterol: 0mg
- Sodium: 100mg
What’s Good:
– Good source of healthy fats from peanut butter.
– Fiber from oats and flaxseed.
– Protein for satiety.
– No refined sugar (sweetened with honey).
What to Know:
– Higher in calories due to peanut butter and oats. Portion control is key.
– Contains peanuts (nut allergy warning).
– Honey is a sugar, so diabetics should monitor intake.
My Take:
Look, these are snacks. They’re meant to be enjoyed in moderation. One or two balls is a perfect snack. They’re better than a candy bar because they have real ingredients. I don’t stress about the calories; I stress about how good they make me feel. Energy boost without the crash.
Final Thoughts
So that’s my go-to no-bake peanut butter energy balls! I’ve probably talked your ear off at this point, but when you make a recipe this often, you have a lot to say about it. These little balls have saved me more times than I can count. They’re my answer to “I’m hungry but I don’t want to cook” when I’m tired after work or rushing out the door.
My kids are happy, my husband’s happy, and I’m happy because I’m not stressing about what to pack for lunch. They’re simple, affordable, and incredibly delicious. Make them yours! Try different add-ins, swap in your favorite nut butter, or adjust the sweetness. The best recipes are the ones you adapt to your family’s tastes.
If you make this, drop a comment and let me know what you think! I love hearing how recipes turn out in your kitchen. And if something doesn’t work, tell me that too—I’m here to help troubleshoot. Happy snacking! And I hope your kitchen smells half as good as mine does right now (it usually smells like peanut butter and chocolate).
Frequently Asked Questions
Can I use crunchy peanut butter?
Yes! Crunchy peanut butter adds a nice texture contrast. I actually prefer it sometimes. Just make sure the chunks aren’t too large, or they might tear the balls. If the chunks are big, pulse them in a food processor first to break them down slightly.
Why are my energy balls too sticky?
This usually happens if the peanut butter is too runny or if you didn’t chill the mixture enough. Add more oats, one tablespoon at a time, until the mixture is firm enough to roll. Also, make sure you wet your hands before rolling. If they’re still sticky after chilling, put them back in the freezer for another 10 minutes.
Can I freeze these?
Absolutely! These are designed to be frozen. They last up to 3 months in the freezer. I keep a bag in the freezer at all times so I always have a snack ready. Just thaw them for 5 minutes before eating if you don’t like them rock hard.
Can I make these without honey?
You can use maple syrup or agave nectar. Keep in mind that these liquids are thinner than honey, so you might need a bit more oats to bind the mixture. Start with ¼ cup of syrup and add more oats as needed. The flavor will be slightly different, but still delicious.
How many calories are in each ball?
Each ball is approximately 150 calories, depending on the size and ingredients used. If you make them larger, the calories will be higher. I aim for about 1 tablespoon of mixture per ball, which keeps the portion reasonable.
Can I use almond butter instead of peanut butter?
Yes, almond butter is a great substitute. It’s slightly sweeter and has a different flavor profile. You might need a tiny bit more honey since almond butter is less sweet than peanut butter. I love this version with dark chocolate chips.
Do I have to use chocolate chips?
No! You can use any add-ins you like. Dried cranberries, chopped nuts, coconut flakes, or even white chocolate chips work great. I sometimes make a batch with just dried cherries and dark chocolate for a tart flavor.
Pin This Recipe!
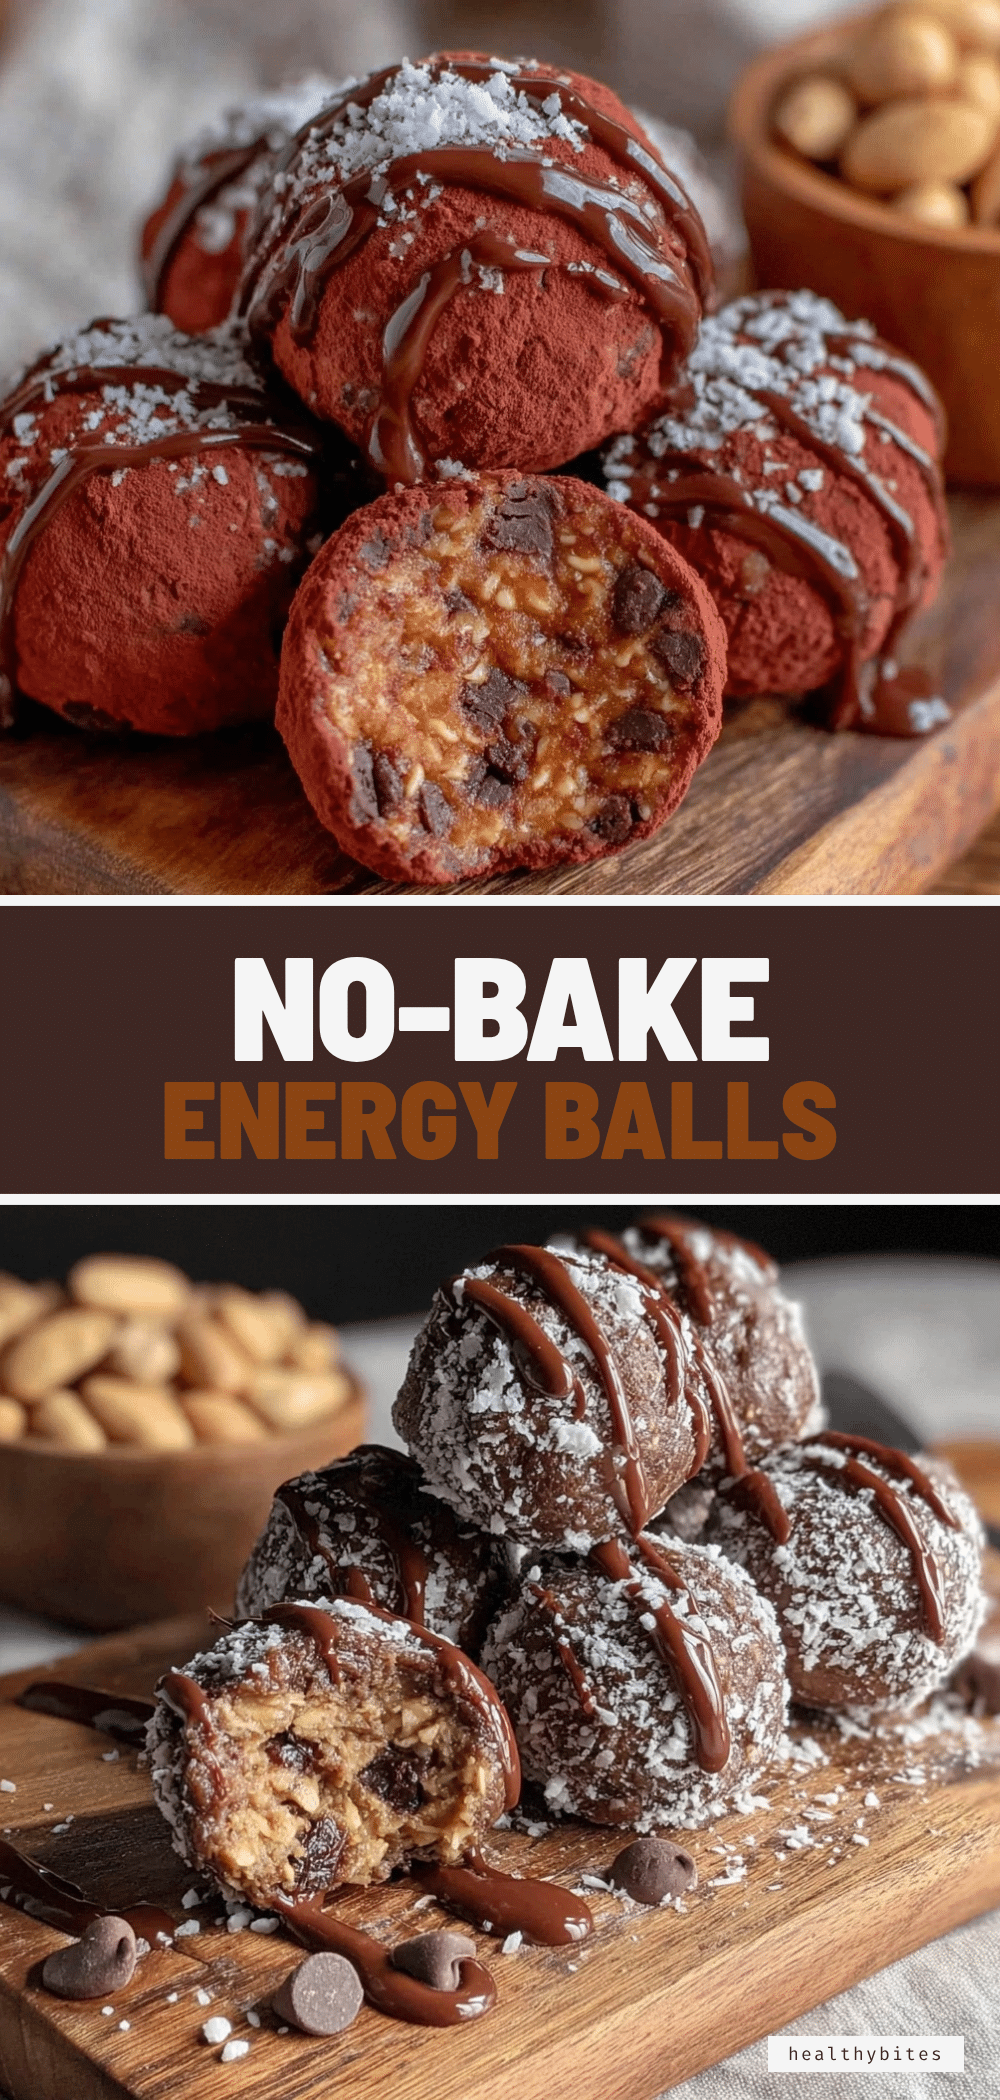

No-Bake Peanut Butter Energy Balls: Easy 10-Minute Snack
- Total Time: 45 minutes
- Yield: 12 servings 1x
Description
These no-bake peanut butter energy balls are a simple, healthy, and delicious snack ready in just 10 minutes of active time. Made with pantry staples like peanut butter, oats, and honey, they provide a sustained energy boost without the crash.
Ingredients
- 1 cup (250g) natural creamy peanut butter
- 1 cup (90g) old-fashioned rolled oats
- ½ cup (170g) honey
- 2 tablespoons ground flaxseed
- 1 teaspoon vanilla extract
- ½ teaspoon fine sea salt
- ½ cup (85g) dark chocolate chips
Instructions
- In a small bowl, combine the peanut butter and honey. If the peanut butter is stiff, microwave it for 15-20 seconds to soften it, then stir until smooth and glossy.
- Pour the wet mixture into a large mixing bowl. Add the rolled oats, ground flaxseed, salt, and vanilla extract. Stir with a spatula until the oats are fully coated and the mixture starts to come together.
- Fold in the chocolate chips (or other add-ins) gently until evenly distributed. The mixture should hold together when pinched.
- Place the bowl in the refrigerator for 5-10 minutes to firm up the peanut butter and make rolling easier.
- Remove the bowl from the fridge. Scoop out about 1 tablespoon of mixture and roll it into a ball between your palms. If the mixture sticks, wet your hands slightly with water. Place balls on a parchment-lined baking sheet.
- Freeze the baking sheet for at least 30 minutes to firm the balls completely before serving or storing.
Notes
If using natural peanut butter, you may need an extra tablespoon of oats as it can be runnier. Do not skip the chilling step as it prevents sticking. Store in an airtight container in the freezer for up to 3 months or in the fridge for up to 2 weeks.
- Prep Time: 10 minutes
- Cook Time: 0 minutes
- Category: Snack
- Cuisine: American
Nutrition
- Serving Size: 1 ball
- Calories: 150
- Sugar: 10
- Sodium: 100
- Fat: 8
- Saturated Fat: 2
- Carbohydrates: 18
- Fiber: 2
- Protein: 5
Keywords: no-bake, peanut butter, energy balls, healthy snack, gluten-free, meal prep, quick snack, vegan option