I learned the hard way that “easy appetizer” is a dangerous phrase in the party planning world. Last summer, I was hosting my in-laws for the first time. I wanted to impress, so I planned an elaborate charcuterie board, a warm bread bowl dip, and a complicated ceviche. I spent six hours prepping. I was sweating by the time the doorbell rang. Meanwhile, my husband grabbed a bag of chips and dumped a tub of store-bought salsa into a bowl. He added some leftover black beans and corn from dinner. He threw it together in two minutes.
Here’s the thing: The store-bought dip was gone in ten minutes. The elaborate charcuterie board sat there for hours. The loaded cowboy caviar was the only thing that actually made people dance.
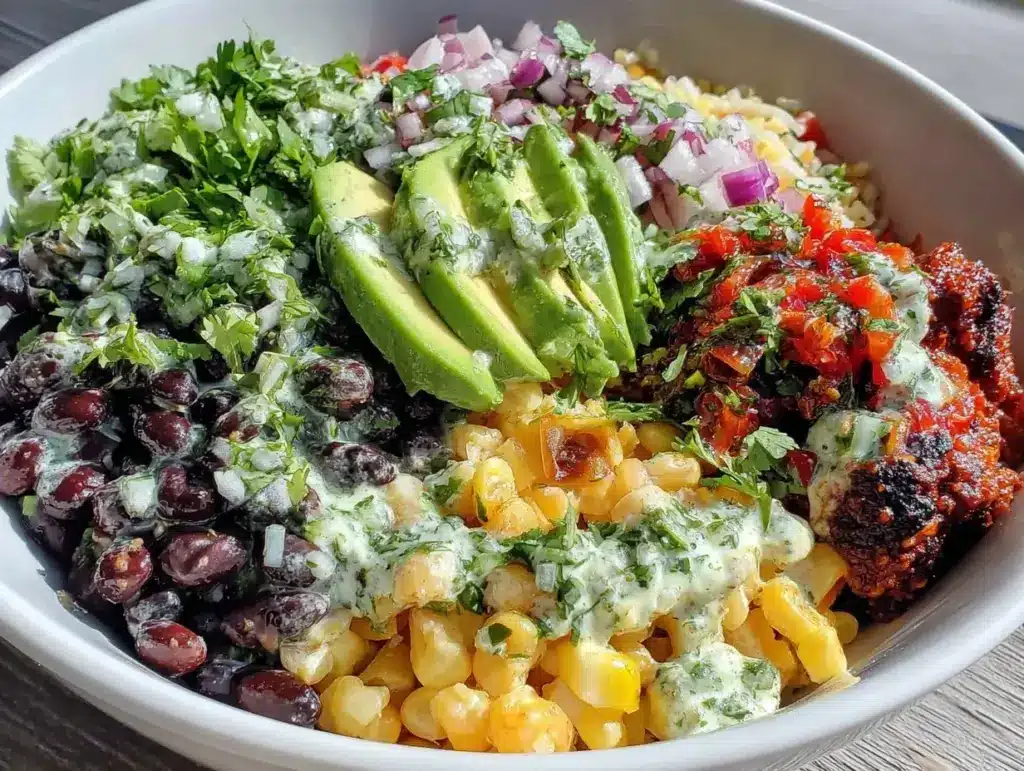
That was the year I stopped trying to be a fancy host and started being a smart one. This loaded cowboy caviar isn’t just a dip; it’s a flavor bomb that takes less time than boiling water. It’s the ultimate crowd-pleaser because it’s crunchy, creamy, spicy, and tangy all at once. I’ve made this for Super Bowl parties, backyard barbecues, and even potlucks where I was the only one bringing food (and I ate half of it myself, don’t tell my husband).
People assume cowboy caviar is some complex Tex-Mex dish that requires hours of chopping and marinating. It’s not. It’s really just a fancy name for a sweet corn and black bean salad that acts as a dip. And once you taste how good it is with tortilla chips, you’ll never go back to plain salsa again. It’s the kind of recipe that makes you look like a culinary genius while you’re literally just opening cans and bags.
Why You’ll Love This Recipe
There’s a reason this loaded cowboy caviar has become my go-to for every single gathering. It’s not just about the taste—though that’s huge. It’s about how it fits into your life.
- Zero Cooking Required — Seriously. If you can open a can and rinse beans, you can make this. I’ve made this while watching TV, while folding laundry, and while helping my kid with homework. No stove, no oven, no cleanup hassle.
- Make-Ahead Magic — This is the secret weapon. It tastes better the next day. The flavors meld together overnight, making it infinitely more flavorful than when you make it right before the party. I usually make it the night before, which means zero stress on party day.
- Customizable for Everyone — Got a picky eater? Leave out the jalapeños. Have a vegan friend? Skip the cheese. This recipe is incredibly forgiving. It’s like a flavor playground where you control the ingredients.
- Budget-Friendly Feeding — You can feed a crowd of 10-15 people for under $20. That’s cheaper than a single platter at a restaurant. It uses pantry staples like beans, corn, and canned tomatoes, which are always on sale.
- Gluten-Free Friendly — As long as you check your chips, this dip is naturally gluten-free. It’s a lifesaver when you’re hosting people with dietary restrictions and you don’t want them to feel left out.
Real talk? This is the only appetizer I make anymore. It’s reliable, it’s delicious, and it keeps the hunger at bay until dinner is ready. Plus, the leftovers are amazing straight from the fridge for lunch the next day.
Ingredients You’ll Need
Here’s the best part: you probably have most of this already in your pantry. I’m not asking you to hunt down exotic ingredients. This is about using simple, fresh, accessible stuff to make something incredible.
The Base
Black beans (1 can, 15 oz / 425g) — Rinse and drain them well. I use low-sodium so I can control the salt. If you’re in a rush, canned is fine, but dried beans soaked overnight are better if you have time. For this quick dip, canned is your best friend.
White corn (1 can, 15 oz / 425g) — Or frozen corn. I prefer frozen because it’s sweeter and doesn’t have that canned metallic taste. If you use canned, rinse it thoroughly. The corn adds that essential crunch and sweetness that balances the beans.
Red bell pepper (1 large, diced / about 150g) — This adds color and a fresh, crisp bite. I love the contrast of the red against the black beans. Don’t skip this; it makes the dish look vibrant and appetizing.
Green bell pepper (1 large, diced / about 150g) — This adds a slightly bitter, fresh note. Some people are scared of raw green pepper, but in this dip, it’s subtle and refreshing. If you really dislike it, you can swap it for more red pepper or use celery for crunch.
The Flavor Boosters
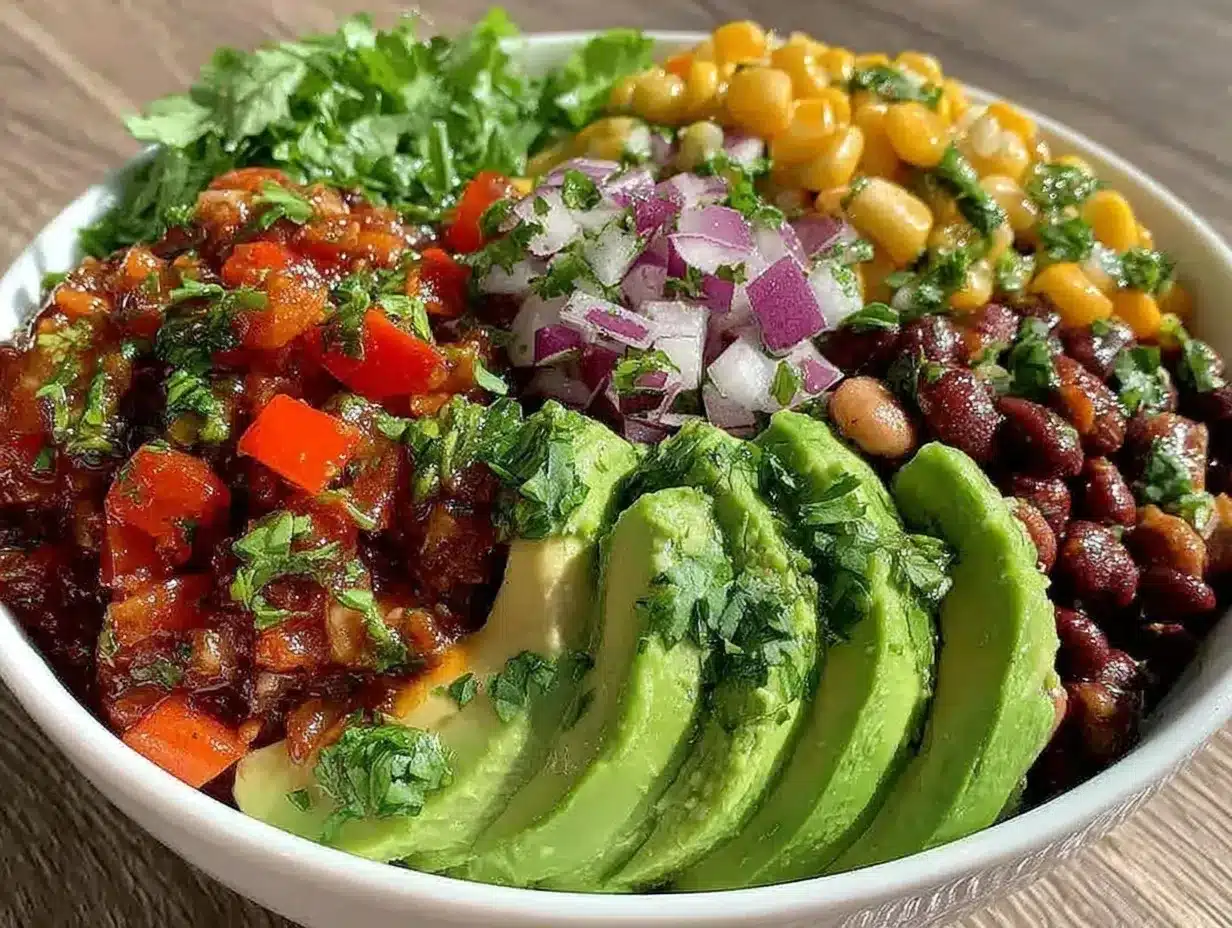
Red onion (1 medium, finely diced / about 100g) — This is non-negotiable. The sharp bite of the onion cuts through the creaminess of the dressing. Soak the diced onion in cold water for 10 minutes if you’re worried about it being too strong. It mellows it out nicely.
Jalapeños (1-2, seeded and minced) — This is where you control the heat. I usually use one for a mild kick and two if I want people to feel it. Remove the seeds and ribs if you want it milder. Fresh is best, but jarred jalapeños work in a pinch.
Fresh cilantro (½ cup, chopped) — This is the herb that makes it taste like summer. I use a lot of it. If you’re one of those people who thinks cilantro tastes like soap, you can skip it, but you’re missing out on the fresh finish. Parsley is a weird but acceptable substitute.
The Dressing
Avocado oil or olive oil (½ cup / 120ml) — Avocado oil has a neutral flavor that lets the veggies shine. Olive oil adds a fruity note. I use avocado oil because it’s heart-healthy and doesn’t overpower the dip.
Lime juice (¼ cup / 60ml) — Freshly squeezed is mandatory. Bottled lime juice tastes artificial and bitter in this recipe. Squeeze two or three limes. The acidity is what makes the flavors pop.
Red wine vinegar (2 tablespoons) — This adds a tangy depth that lime alone can’t achieve. It balances the sweetness of the corn.
Cumin (1 teaspoon) — Ground cumin is the backbone of Tex-Mex flavor. It’s earthy and warm. Don’t use too much, or it’ll taste like a curry. Just a teaspoon is perfect.
Garlic powder (1 teaspoon) — I use powder here because it distributes evenly. Fresh garlic can be too sharp in a cold dip. If you must use fresh, mince it super finely.
Salt and black pepper — To taste. I usually start with 1 teaspoon of salt and adjust from there. Always taste before serving.
The Toppings (The “Loaded” Part)
Cheddar cheese (1 cup, shredded / 100g) — Sharp cheddar adds a salty, creamy element. I shred my own block because pre-shredded cheese has anti-caking agents that make it clumpy. It melts better too if you warm the dip slightly.
Ripe avocados (2, diced) — This is the creamy element that makes it luxurious. Add these right before serving so they don’t brown. It’s the best part of the dip for me.
Cherry tomatoes (1 cup, halved) — Optional, but I love the burst of juiciness they add. They’re sweet and fresh, complementing the corn perfectly.
Equipment Needed
You don’t need anything fancy for this. Here’s what I actually use.
Large mixing bowl — I use a 5-quart stainless steel bowl. It needs to be big enough to toss everything without spilling. A glass bowl works too, but I like the weight of metal.
Colander — For rinsing the beans and corn. A fine-mesh strainer works if you don’t have a colander.
Sharp knife — For dicing peppers and onions. A dull knife makes everything mushy. I use my 8-inch chef’s knife for this.
Measuring cups and spoons — Standard stuff. I have a set from IKEA that’s cheap and durable.
Wooden spoon or spatula — For mixing. Silicone works too. Just make sure it’s big enough to reach the bottom of the bowl.
Serving spoon — I use a large slotted spoon so people can get the liquid dressing with their chips. Or just a regular big spoon.
How to Make It: Step-by-Step
Alright, let’s make this! It’s incredibly straightforward. I’m walking you through exactly how I do it, including the little tricks I’ve picked up over the years.
Step 1: Prep Your Veggies (10 minutes)
Start by dicing your red and green bell peppers. Aim for small, uniform pieces—about ¼ inch. You want them to be bite-sized so every chip gets a little bit of everything. Finely dice the red onion. If you’re sensitive to strong onion flavor, soak these diced veggies in a bowl of cold water for 10 minutes, then drain and pat dry. This removes the harsh bite.
Step 2: Rinse and Drain (5 minutes)
Open your cans of black beans and corn. Rinse them under cold water in a colander until the water runs clear. This removes the starchy liquid from the can, which can make the dip slimy. Shake the colander well to remove excess water. Wet beans = watery dip. We don’t want that.
Pro tip: If you’re using frozen corn, thaw it and pat it dry with paper towels. Same principle—dry ingredients make a better texture.
Step 3: Make the Dressing (2 minutes)
In a small bowl, whisk together the avocado oil, lime juice, red wine vinegar, cumin, garlic powder, salt, and black pepper. Whisk until it’s emulsified and slightly thickened. It should look like a shiny, pale yellow liquid. Taste it. It should be tangy and salty. If it needs more lime, add it now. The dressing is the soul of this dip.
Step 4: Combine Everything (5 minutes)
In your large mixing bowl, add the rinsed beans, corn, diced peppers, red onion, and jalapeños. Pour the dressing over the top. Toss everything together gently but thoroughly. You want every piece of vegetable coated in that zesty dressing. Add the chopped cilantro and fold it in.
At this stage, you can eat it immediately, but I recommend letting it sit in the fridge for at least an hour. The flavors need time to marry. The beans absorb the dressing, and the corn gets a little more tender. This step is crucial for flavor depth.
Step 5: Add the “Loaded” Toppings (Just before serving)
Right before you bring it to the party, fold in the shredded cheddar cheese and the diced avocados. If you’re adding cherry tomatoes, add them now too. Toss gently one last time. The avocados will start to brown if they sit too long, so this last-minute addition keeps them bright green and creamy.
Step 6: Serve
Transfer to a serving bowl. Garnish with a few extra cilantro leaves or a wedge of lime for presentation. Serve with sturdy tortilla chips. I like the thick, restaurant-style chips because they don’t break under the weight of the dip.
Total Time: About 20 minutes active, plus chilling time.
Expert Tips & Tricks
Here’s everything I’ve learned from making this dozens of times. These tips will save you from my mistakes.
Don’t Skip the Chilling Time
I know you’re excited to eat it. Resist the urge. This dip is like a vinaigrette salad—it tastes bland when first mixed. After sitting in the fridge for 2-4 hours (or overnight), the cumin and lime penetrate the beans, and the corn sweats a little, creating a natural sauce. The flavor difference is night and day.
Keep the Avocados Separate Until Serving
Avocados oxidize quickly. If you mix them in the night before, they’ll turn brown and mushy by party time. Dice them right before you leave the house or right when guests arrive. If you’re worried about browning, toss the diced avocado with a little extra lime juice.
Use Sharp Cheddar
Mild cheddar gets lost in the mix. You need a sharp or extra-sharp cheddar to stand up to the bold flavors of the cumin and lime. Grate your own block. Pre-shredded cheese has potato starch that prevents it from melting properly and can make the dip gritty.
Balance the Heat
If you’re making this for a mixed crowd, make the base mild (no jalapeños) and put a small bowl of sliced jalapeños or hot sauce on the side. This way, everyone can customize their bite. I’ve learned this the hard way when someone with a low spice tolerance ate the whole bowl and regretted it.
Make it Ahead for Meal Prep
This is fantastic for meal prep. Store the bean and corn mixture in the fridge for up to 3 days. Add the cheese and avocado fresh each day. It’s a great high-protein, high-fiber snack that keeps you full.
Variations & Substitutions
Once you’ve nailed the basic version, here’s how you can mix it up. I’ve tried all of these.
Protein-Packed Version
Add grilled, shredded chicken or black beans are already there, but I often add diced rotisserie chicken or even crumbled chorizo for a heartier meal. It turns the dip into a main course salad.
Green Goddess Cowboy Caviar
Swap the red and green peppers for extra avocado and add spinach or kale. Blend half the avocado into the dressing for a creamy, green dip. It’s fresh and vibrant.
Spicy Mango Twist
Add diced fresh mango and swap the jalapeño for serrano pepper. The sweetness of the mango pairs amazingly with the lime and cumin. It’s a tropical take on the classic.
Vegetarian/Vegan
Skip the cheese or use a vegan cheddar alternative. The base is already vegan. It’s naturally plant-based and protein-rich from the beans.
Gluten-Free
Just ensure your tortilla chips are certified gluten-free. Most corn chips are, but some have wheat starch added. Check the label.
Serving & Storage
How to Serve:
I serve this in a wide, shallow bowl so people can scoop easily. Place it on a platter with a variety of chips—white corn, blue corn, and maybe some pita chips for variety. It’s also great served over a bed of lettuce as a salad.
Side Dishes:
This is a complete appetizer, but if you’re serving it as part of a larger meal, it pairs well with grilled meats like the keto grilled lemon herb salmon or crispy lemon garlic chicken thighs. The fresh, acidic flavors cut through the richness of grilled meats perfectly.
Storage Instructions:
Store the bean and corn mixture in an airtight container in the refrigerator for up to 4 days. The flavors actually improve over the first two days. Do not freeze this dip—the beans and vegetables will get mushy and watery when thawed. It’s best fresh.
Reheating:
Don’t reheat this. It’s meant to be served cold or at room temperature. Heat will cook the peppers and make the texture unpleasant.
Nutrition Information
I’m not a nutritionist, but here’s the breakdown if you’re tracking. This is a relatively healthy dip compared to creamy cheese dips.
Per Serving (based on 10 servings, ½ cup each):
– Calories: 180
– Protein: 6g
– Carbs: 22g
– Fiber: 7g
– Sugar: 4g
– Fat: 8g
– Saturated Fat: 1.5g
– Cholesterol: 5mg
– Sodium: 250mg (varies by bean brand)
– Calcium: 60mg
What’s Good:
– High in fiber from beans and corn
– Good source of plant-based protein
– Healthy fats from avocado and olive oil
– Low in saturated fat (unless you add lots of cheese)
What to Know:
– Sodium can be high if you don’t use low-sodium beans. Rinse well!
– Calories add up quickly if you eat lots of chips.
– It’s not a low-carb food, but it’s a complex carb source.
My Take:
Look, this is a snack. It’s fun, tasty, and sharing-friendly. It’s not a diet food, but it’s definitely a healthier option than buffalo wing dip or nacho cheese. When I make this, I use lots of veggies and moderate the cheese. It’s a great way to sneak more fiber into your diet without even thinking about it.
Final Thoughts
So that’s my loaded cowboy caviar! I know I’ve talked a lot about how easy it is, but when you make a recipe this often, you realize that simplicity is the ultimate sophistication. This dip has saved me more times than I can count. It’s my answer to “what should I bring?” when I’m tired, busy, and don’t want to spend hours in the kitchen.
It’s the kind of dish that makes people ask for the recipe immediately. They can’t believe it’s just beans, corn, and veggies. They think it’s some fancy restaurant dish. That’s the magic of good flavor combinations.
Make it yours! Add extra jalapeños if you like heat, throw in some mango if it’s summer, or skip the cheese if you’re dairy-free. The best recipes are the ones you adapt to your tastes. If you make this, drop a comment and let me know how you like it. I love hearing how recipes turn out in your kitchen.
Happy cooking! And I hope your party is a hit.
Frequently Asked Questions
Can I make this ahead of time?
Yes! This is actually better made ahead. Make the bean and corn mixture up to 2 days in advance. Store it in the fridge. Add the cheese and avocado right before serving. This gives the flavors time to meld and makes party day stress-free.
Why did my cowboy caviar turn out watery?
Usually, this happens if you didn’t rinse the beans and corn well enough, or if you added canned tomatoes that weren’t drained properly. Make sure to rinse the beans and corn thoroughly and shake them dry. Also, if you’re using fresh tomatoes, salt them and let them drain in a colander for 15 minutes before adding.
Can I use frozen corn?
Absolutely. Frozen corn is often sweeter and higher quality than canned. Just thaw it and pat it dry with paper towels to remove excess moisture. It works perfectly in this recipe.
How long does it last in the fridge?
The bean and corn mixture lasts up to 4 days in an airtight container. The avocado should be added fresh each day to prevent browning. After 4 days, the beans may start to get mushy.
Is this gluten-free?
Yes, the dip itself is naturally gluten-free. Just make sure your tortilla chips are certified gluten-free. Some chips contain wheat starch, so always check the label.
Can I freeze this dip?
No, I don’t recommend freezing it. The beans and vegetables will lose their texture and become watery and mushy when thawed. It’s best enjoyed fresh.
What chips go best with this?
Thick, sturdy tortilla chips are best. Restaurant-style chips work well. White corn chips are traditional, but blue corn chips add a nice nutty flavor. Avoid thin, delicate chips as they’ll break under the weight of the dip.
Pin This Recipe!
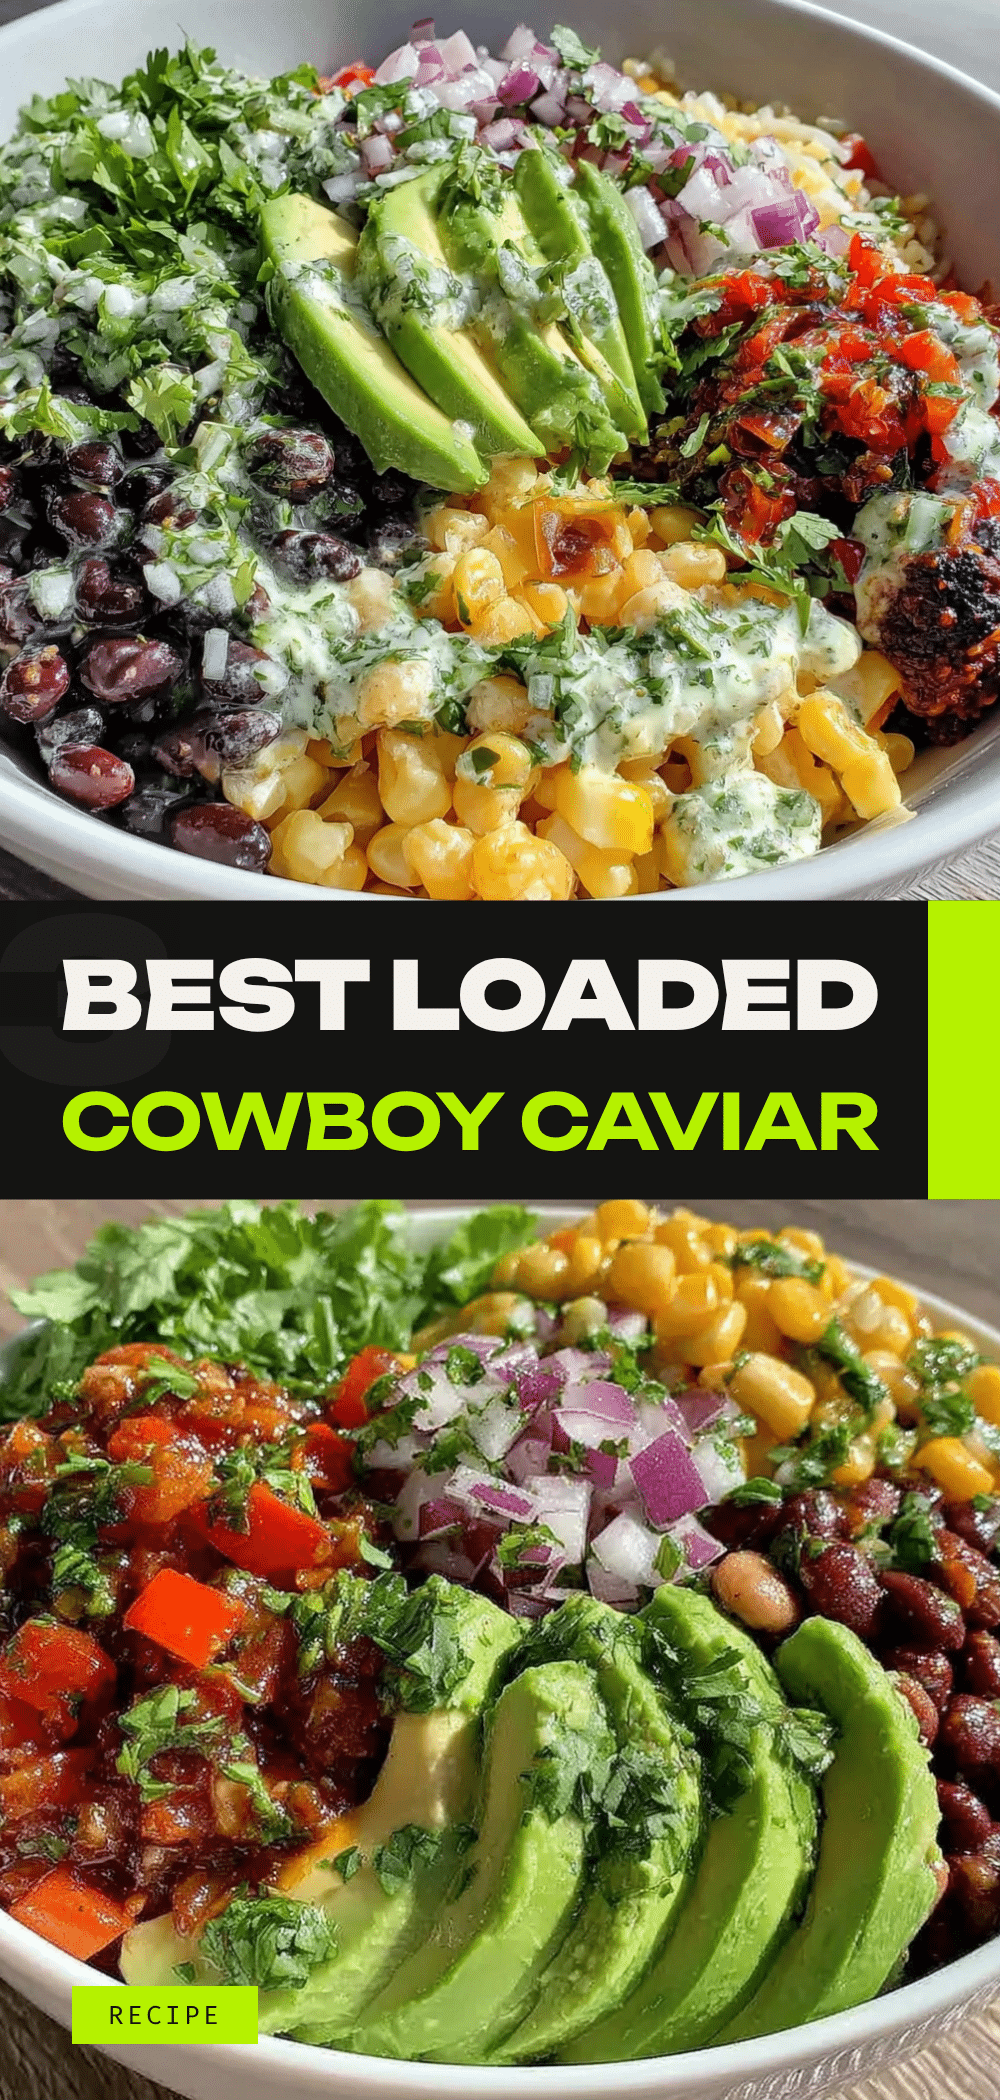
Loaded Cowboy Caviar: Best 5-Ingredient Party Dip
- Total Time: 20 minutes
- Yield: 10 servings 1x
Description
A quick, no-cook Tex-Mex bean and corn salad that serves as a flavorful, crunchy, and creamy party dip. It is customizable, budget-friendly, and tastes even better after chilling overnight.
Ingredients
- 1 can (15 oz) black beans, rinsed and drained
- 1 can (15 oz) white corn (or frozen corn, thawed and dried)
- 1 large red bell pepper, diced
- 1 large green bell pepper, diced
- 1 medium red onion, finely diced
- 1–2 jalapeños, seeded and minced
- ½ cup fresh cilantro, chopped
- ½ cup avocado oil or olive oil
- ¼ cup fresh lime juice
- 2 tablespoons red wine vinegar
- 1 teaspoon ground cumin
- 1 teaspoon garlic powder
- Salt and black pepper to taste
- 1 cup sharp cheddar cheese, shredded
- 2 ripe avocados, diced
- 1 cup cherry tomatoes, halved (optional)
Instructions
- Dice the red and green bell peppers into small, uniform pieces (about ¼ inch). Finely dice the red onion. If desired, soak the diced onions in cold water for 10 minutes to mellow the flavor, then drain and pat dry.
- Rinse the black beans and corn under cold water in a colander until the water runs clear. Shake well to remove excess moisture.
- In a small bowl, whisk together the avocado oil, lime juice, red wine vinegar, cumin, garlic powder, salt, and black pepper until emulsified.
- In a large mixing bowl, combine the rinsed beans, corn, diced peppers, red onion, and jalapeños. Pour the dressing over the mixture and toss gently to coat evenly. Fold in the chopped cilantro.
- Cover and refrigerate for at least 1 hour (or overnight) to allow flavors to meld.
- Right before serving, fold in the shredded cheddar cheese, diced avocados, and cherry tomatoes (if using).
- Transfer to a serving bowl and serve with sturdy tortilla chips.
Notes
[‘Do not skip the chilling time; the flavors improve significantly after sitting in the fridge for 2-4 hours or overnight.’, ‘Add avocados and cheese right before serving to prevent browning and maintain texture.’, ‘Rinse beans and corn thoroughly to remove starchy liquid and prevent a watery dip.’, ‘Use sharp cheddar for better flavor impact.’, ‘This dip does not freeze well; the texture of beans and vegetables will become mushy upon thawing.’]
- Prep Time: 20 minutes
- Cook Time: 0 minutes
- Category: Appetizer
- Cuisine: Tex-Mex
Nutrition
- Serving Size: ½ cup
- Calories: 180
- Sugar: 4
- Sodium: 250
- Fat: 8
- Saturated Fat: 1.5
- Carbohydrates: 22
- Fiber: 7
- Protein: 6
Keywords: cowboy caviar, party dip, bean salad, no cook recipe, appetizer, gluten-free, vegan option, make-ahead