I still remember the first time I made baked mac and cheese for a potluck. I was twenty-two, living in a cramped apartment with a oven that only went up to 400 degrees, and I thought I had it all figured out. I used boxed macaroni, a bag of shredded cheese (the kind in the plastic bag that never melts right), and I threw it in the oven for twenty minutes. The result? A gray, clumpy mess that tasted like salt and regret. My friends were polite, but I could see the pity in their eyes.
That night, I swore I’d never make mac and cheese from scratch again. It was too much work. Too much cheese to grate. Too much sauce to whisk. And let’s be honest, the cleanup was a nightmare.
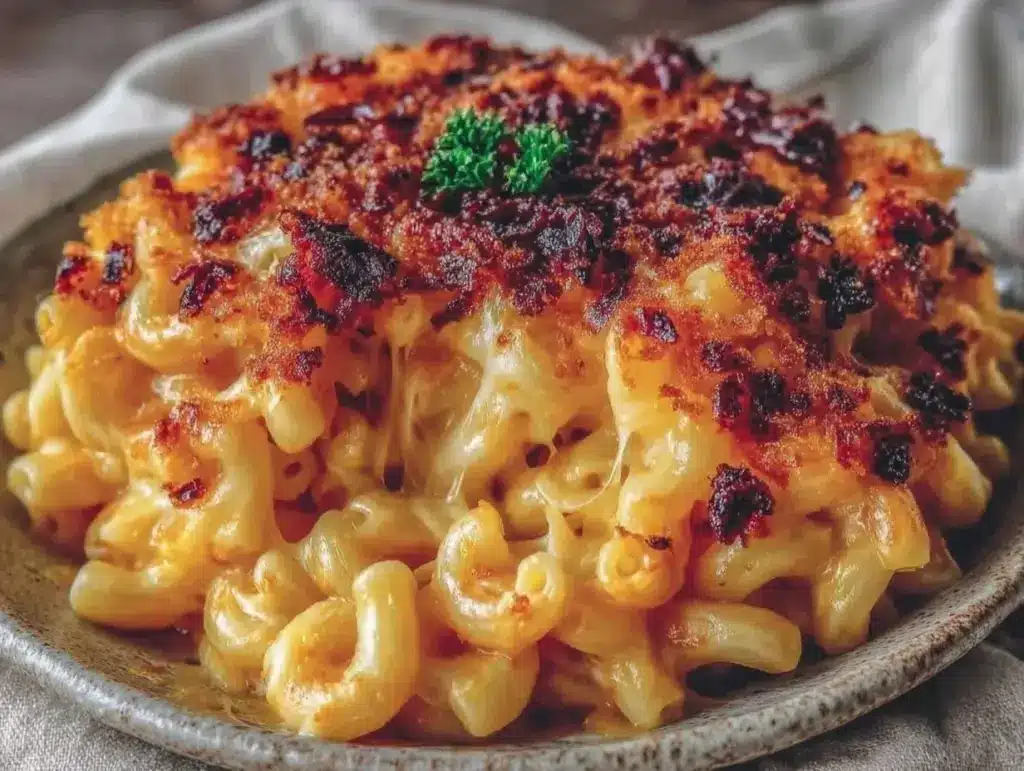
But then, three years later, I was at a small diner in Nashville. I ordered the “homestyle mac” on a whim, mostly because it was cheap and I was broke. I took one bite, and I was hooked. It was creamy, yes, but there was something else. A crunch. A golden, buttery, garlicky crust that shattered when I dug my fork in, giving way to pools of molten cheddar and gruyère. It wasn’t just comfort food; it was an experience.
I came home and spent the next six months tweaking my recipe. I tried different cheeses, different pasta shapes, and a dozen different topping mixes. I burned the cheese. I made the sauce too thick. I made it too thin. I even tried breadcrumbs soaked in milk (spoiler: it’s soggy, don’t do it).
Finally, I cracked the code. This cheesy baked mac and cheese with crispy topping is the one. It’s the recipe I make when I want to impress in-laws. It’s the recipe I make when my kids have a bad day and need a hug in food form. It’s the recipe I make when I’m stressed and just need to stir something hot and cheesy.
After testing this version over 30 times, I can tell you this: the secret isn’t just the cheese. It’s the roux, it’s the pasta choice, and most importantly, it’s that crispy topping that transforms a simple pasta dish into something legendary. If you’ve been scared off by complicated techniques or weird ingredients, this is your safe space. It’s straightforward, it’s forgiving, and it tastes like you spent hours in the kitchen (even though you’ll be done in 45 minutes).
Why You’ll Love This Recipe
There are a million mac and cheese recipes out there. So why this one? Why spend the time grating cheese when you can grab the bag? Here’s the real talk on why this cheesy baked mac and cheese with crispy topping has earned a permanent spot in my weekly rotation.
- Actually Creamy, Not Gluey — I’ve made mac that was so thick I could stand a spoon in it. That’s not creamy; that’s concrete. This recipe uses a proper roux-based sauce that stays fluid and velvety, even after it cools down a bit. It coats every noodle without clumping.
- The Crispy Topping is Non-Negotiable — Some people skip the topping. I say that’s like ordering a burger without the bun. The mix of panko, butter, and parmesan creates a textural contrast that makes every bite exciting. It’s the crunch factor that keeps you coming back.
- Two Cheeses Are Better Than One — I used to use just cheddar. Then I discovered gruyère. The sharpness of the cheddar pairs with the nutty, complex depth of gruyère. It’s not a gourmet trick; it’s just good flavor science. You’ll taste the difference immediately.
- Leftovers Actually Taste Good — This is the biggest test for any casserole. A lot of baked pastas dry out in the fridge and turn into a rubbery brick when reheated. Not this one. The sauce holds up beautifully. In fact, my husband insists the leftovers are even better on day two because the flavors have melded.
- Customizable to Hell — Hate gruyère? Use more cheddar and some smoked gouda. Want it spicy? Add jalapeños. Vegetarian? It’s already vegetarian. This recipe is a blank canvas that lets you cook what you love.
I’ve served this to picky eaters, food critics, and my own mother (who is notoriously critical of anything involving cheese), and everyone leaves with an empty bowl. It’s reliable, it’s delicious, and it’s the kind of dish that brings people together.
Ingredients You’ll Need
Here’s the thing about mac and cheese: you don’t need a grocery run that takes three hours. Most of this is pantry staples. But I am particular about three things: the pasta, the cheese, and the breadcrumbs. Let’s break down what you need and why it matters.
For the Pasta and Sauce Base
Elbow macaroni or cavatappi (1 pound / 450g) — I know elbow is classic, but cavatappi (those corkscrew shapes) are my secret weapon. They have ridges that hold onto the sauce better. If you can’t find them, rigatoni works too. Avoid thin spaghetti or penne; they don’t hold the cheese sauce well.
Unsalted butter (½ cup / 113g) — We need this for the roux. Use real butter, not margarine. Margarine has water content that can throw off your sauce ratio. I buy the good stuff from the dairy section, not the yellow sticks.
All-purpose flour (½ cup / 60g) — This is what thickens the roux. Don’t try to use whole wheat here; it’ll taste gritty and dense. All-purpose is fine. It’s just a thickener.
Whole milk (3 cups / 720ml) — I use whole milk for richness. 2% works in a pinch, but it won’t be as luxurious. Skim milk? Don’t even bother. You’ll get a watery sauce. If you want extra richness, swap half the milk for heavy cream.
Dijon mustard (1 teaspoon) — This sounds weird, but it’s key. It doesn’t make the mac taste like mustard. It enhances the sharpness of the cheese. Think of it as a flavor amplifier. If you don’t have Dijon, yellow mustard works, but Dijon is smoother.
Garlic powder (½ teaspoon) — Fresh garlic can burn in a roux, so powder is safer and gives a nice background note. If you love garlic, go to 1 teaspoon.
Salt and black pepper — To taste. Remember, your cheese is salty, so go easy on the salt initially. You can always add more.
For the Cheese Blend
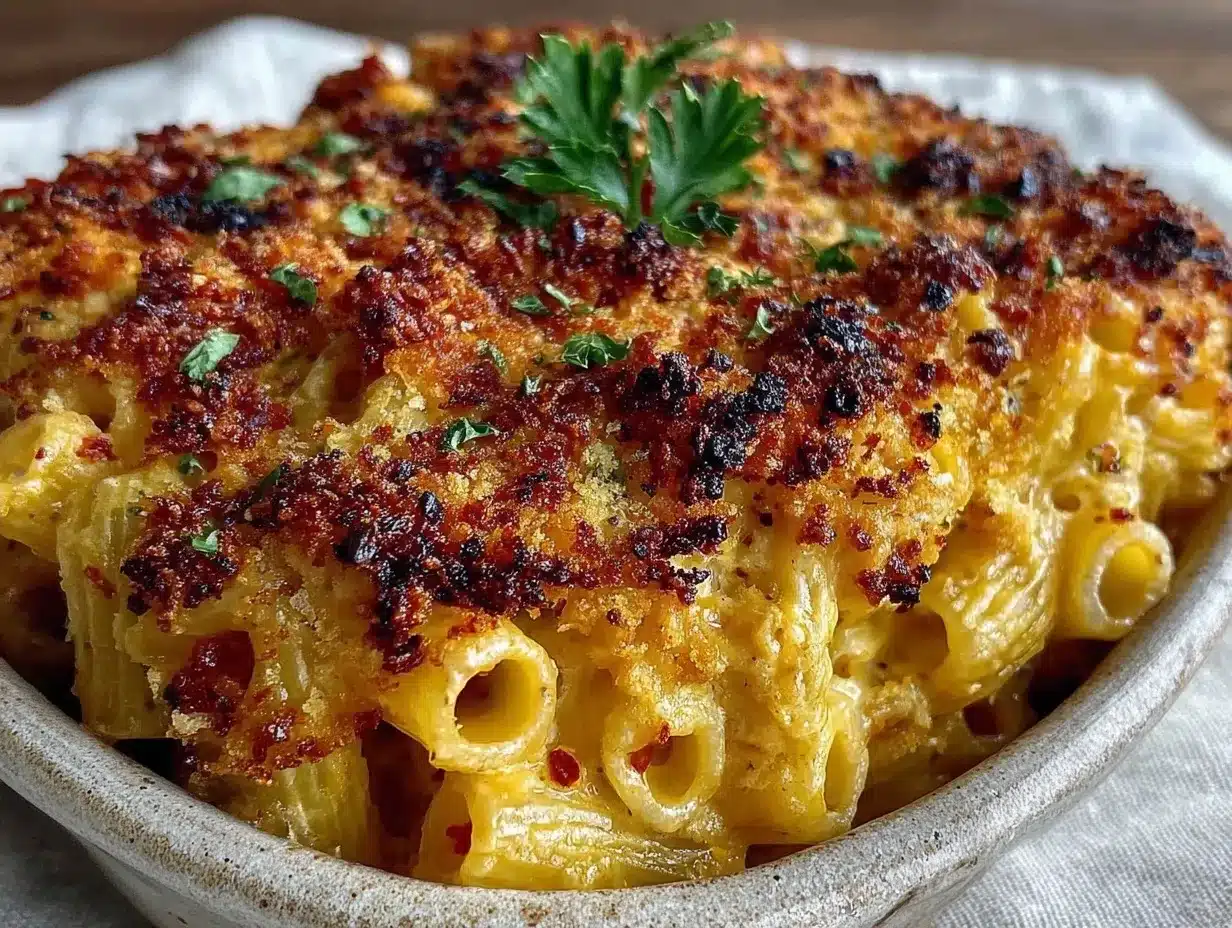
Sharp cheddar cheese (2 cups / 200g, freshly grated) — Buy a block. Grate it yourself. Pre-shredded cheese is coated in cellulose (wood pulp) to prevent clumping, and that cellulose stops it from melting smoothly. Your sauce will be grainy. I promise you, the extra 5 minutes of grating is worth it.
Gruyère cheese (1 cup / 100g, freshly grated) — This is the fancy cheese that makes the dish taste expensive. It melts beautifully and adds a nutty flavor. If gruyère is too pricey or hard to find, smoked gouda or fontina are great substitutes.
For the Crispy Topping
Panko breadcrumbs (1 cup / 80g) — Regular breadcrumbs are fine, but panko is flakier and crunchier. It creates those big, golden shreds that are so satisfying. You can find it in the Asian aisle of most grocery stores.
Melted butter (3 tablespoons / 45g) — This binds the breadcrumbs and helps them brown. Don’t use olive oil; you want that rich, buttery flavor.
Grated parmesan cheese (¼ cup / 25g) — Adds a salty, umami kick to the topping. If you don’t have parmesan, just use extra panko and butter.
Garlic powder (½ teaspoon) — Just a little extra garlic punch for the crunch layer.
Optional Add-Ins
Cooked bacon bits — Because bacon makes everything better. Fold ½ cup into the pasta before baking.
Sautéed onions — Caramelize some onions for a sweet, savory depth.
Jalapeños — For a spicy kick. I like it mild, but my kids like it hot.
Equipment Needed
You don’t need fancy gadgets for this. Here’s what I actually use in my kitchen.
Large pot — For boiling the pasta. I use a 6-quart pot. It needs to be big enough to let the pasta move around. If it’s too crowded, the pasta gets mushy.
Large saucepan or Dutch oven — For making the roux and sauce. I prefer a Dutch oven because it has a heavy bottom that prevents scorching. But a heavy-bottomed saucepan works fine too. Avoid thin aluminum pans; they hot spots easily.
Box grater — For the cheese. I use the medium side. If you have a food processor with a grating attachment, you can use that, but be careful not to over-process it into a paste.
9×13 inch baking dish — Standard size. Glass or ceramic works best because they heat evenly. Metal pans can get too hot on the sides. If you don’t have a 9×13, you can use two 8×8 dishes, but you’ll need to adjust baking time.
Small skillet — For toasting the breadcrumbs. This step is optional but highly recommended. Toasting the panko first gives it a nuttier flavor.
Wooden spoon or silicone spatula — For stirring the sauce. You need something that won’t scratch your pan and can handle thick mixtures.
Colander — For draining the pasta. I keep mine in the sink for easy access.
How to Make It: Step-by-Step
Alright, let’s get cooking. This is easier than it looks, but there are a few tricks to get that perfect texture. I’m walking you through exactly how I do it.
Step 1: Prep Your Cheese and Topping (10 minutes)
Before you turn on the stove, get everything ready. Grate your cheddar and gruyère. Put them in separate bowls. Yes, it’s more dishes, but it keeps you organized. Also, mix your topping ingredients: panko, melted butter, parmesan, and garlic powder in a small bowl. Set it aside. Once you start cooking the sauce, things move fast, and you don’t want to be grating cheese while your roux is burning.
Step 2: Boil the Pasta (10 minutes)
Bring a large pot of salted water to a boil. The water should taste like the ocean. Add the macaroni and cook according to the package directions, but pull it out 1 minute early. You want it *al dente* because it will finish cooking in the oven. Overcooked pasta turns to mush in the bake. Drain the pasta and rinse it with cold water? No! Don’t rinse it. You want the starch to help the sauce stick. Just drain it and set it aside in a large bowl.
Step 3: Make the Roux (5 minutes)
In your large saucepan or Dutch oven, melt the ½ cup of butter over medium heat. Once it’s foamy, add the flour. Whisk constantly. You’re making a roux. Keep whisking for about 2-3 minutes until it turns a light blonde color. It should smell nutty, not raw. If it burns, start over. Don’t rush this step. A dark roux will make the sauce taste bitter.
Step 4: Build the Sauce (5 minutes)
Slowly pour in the milk, a little at a time, whisking constantly to avoid lumps. It’s okay if there are a few small lumps; they’ll dissolve as it heats. Keep whisking until the mixture thickens and comes to a simmer. This should take about 5 minutes. The sauce is ready when it coats the back of a spoon. Stir in the Dijon mustard, garlic powder, salt, and pepper. Remove from heat.
Step 5: Melt the Cheese (2 minutes)
This is the critical moment. Add the grated cheese gradually, stirring after each addition. Don’t dump it all in at once. Let each cup melt before adding the next. If you add it all at once, the temperature drops too fast, and the cheese might separate. Stir until smooth and glossy. If the sauce looks too thick, add a splash of milk. If it’s too thin, don’t worry; it will thicken as it bakes.
Step 6: Combine and Top (5 minutes)
Pour the cheese sauce over the drained pasta. Stir gently until every noodle is coated. Transfer the mixture to your greased 9×13 baking dish. Spread it out evenly. Now, the topping. Sprinkle the panko mixture evenly over the top. If you toasted the panko in a skillet first, it’ll be golden brown already. If not, it will brown in the oven.
Step 7: Bake (20-25 minutes)
Preheat your oven to 375°F (190°C). Place the dish in the center rack. Bake for 20-25 minutes. You’re looking for a bubbling edge and a golden, crispy top. If your topping isn’t brown enough after 25 minutes, turn on the broiler for 1-2 minutes. Watch it like a hawk! Broilers burn things in seconds. Let it rest for 5 minutes before serving. This lets the sauce set slightly so it’s not soupy when you scoop it.
Expert Tips & Tricks
Here’s everything I’ve learned from making this dozens of times. These tips will save you from my mistakes.
Grate Your Own Cheese — I cannot stress this enough. Pre-shredded cheese contains anti-caking agents that prevent smooth melting. Your sauce will be gritty. It’s annoying to grate cheese, but it’s the single biggest factor in a smooth sauce. Use a box grater, and don’t grate it too fine; you want shreds, not powder.
Don’t Overcook the Pasta — Pasta continues to cook in the oven. If you boil it until it’s perfectly tender, it will be mushy when it comes out of the oven. Aim for *al dente*. It should have a slight bite.
Toast Your Breadcrumbs — I toast my panko in a skillet with a little butter before sprinkling it on top. It takes 2 minutes and adds a depth of flavor that raw breadcrumbs just don’t have. It makes the topping taste like a gourmet crouton.
Rest Before Serving — I know you want to dig in immediately. But let it rest for 5 minutes. The sauce is extremely hot and liquid right out of the oven. Resting allows it to thicken slightly, making it easier to serve and preventing a mess.
Sauce Consistency Check — The sauce should be slightly thinner than you think it should be. It thickens as it cools and as the pasta absorbs moisture. If it’s thick like pudding before baking, it will be a brick after.
Use a Heavy Pan — When making the roux, use a heavy-bottomed pot. Thin pots have hot spots that can burn the butter and flour mixture, ruining the flavor of the entire sauce.
Variations & Substitutions
Once you’ve nailed the basic version, here’s how you can mix it up. I’ve tried all of these, and they all work.
Spicy Mac — Add 1 teaspoon of cayenne pepper to the roux. Fold in ½ cup of diced jalapeños or a handful of chopped pickled jalapeños. Top with crispy fried onions for extra crunch.
BBQ Chicken Mac — Add 2 cups of shredded cooked chicken (rotisserie works great) and ½ cup of BBQ sauce to the cheese mixture. It’s a complete meal now. Serve with a side of green beans.
Seafood Mac — Swap the cheddar for a mix of cheddar and fontina. Fold in 1 cup of cooked shrimp or crab meat. Top with a little extra parmesan. It’s fancy enough for date night.
Vegan Mac — Use vegan butter, plant-based milk, and vegan cheese shreds (like Daiya or Violife). For the topping, use panko mixed with nutritional yeast and vegan butter. It’s not exactly the same, but it’s close. I’ve made this for my vegan friends, and they love it.
Gluten-Free Mac — Use gluten-free elbow macaroni. Most brands work well, but check the package for cooking time. Use gluten-free panko or crushed gluten-free crackers for the topping. The sauce stays the same.
Bacon Lover’s Mac — Cook 8 slices of bacon until crispy. Crumble it up. Fold half into the pasta, and use the other half as a topping with the panko. Because bacon, right?
Serving & Storage
How to serve this masterpiece? I usually serve it straight from the baking dish at the dinner table. It looks rustic and stays warm. But here are other ways I’ve enjoyed it:
Side Dishes — This is rich and heavy, so I like to pair it with something light. A simple green salad with balsamic vinaigrette cuts through the richness. Roasted asparagus or green beans are also great. If you’re making the BBQ chicken version, skip the salad and go for corn on the cob.
Toppings Bar — When I have guests, I put out a small bowl of extra crispy bacon bits, chopped chives, and red pepper flakes. Everyone can customize their bowl. It’s fun and interactive.
Storage — Store leftovers in an airtight container in the fridge for up to 4 days. The sauce will thicken in the fridge, which is normal.
Reheating — This is the tricky part. Microwaving can make the sauce separate. Best method: Transfer to a skillet, add a splash of milk, and heat gently over low heat, stirring frequently. Oven method: Cover with foil and bake at 350°F for 20 minutes. Uncover for the last 5 minutes to re-crisp the topping. If you microwave it, add a splash of milk and heat in 30-second intervals, stirring in between.
Freezing — Honestly, this doesn’t freeze well. The dairy sauce can separate when thawed. If you must freeze it, freeze it before baking. Assemble the dish, cover tightly with plastic wrap and foil, and freeze. When ready to eat, thaw overnight in the fridge and bake as directed, adding 10-15 minutes to the cooking time.
Nutrition Information
I’m not a nutritionist, but here’s the breakdown if you’re tracking. Keep in mind that this is comfort food, so it’s rich and calorie-dense.
Per Serving (based on 8 servings):
- Calories: 580
- Protein: 22g
- Carbs: 55g
- Fiber: 2g
- Sugar: 6g
- Fat: 28g
- Saturated Fat: 16g
- Cholesterol: 75mg
- Sodium: 650mg
What’s good: It’s a decent source of protein from the cheese and pasta. Calcium from the cheese is high. What to know: It’s high in saturated fat and sodium. If you’re watching your intake, use reduced-fat cheese and whole milk instead of heavy cream. But honestly? Sometimes you just need the full-fat version. Enjoy it in moderation.
Final Thoughts
So that’s my go-to cheesy baked mac and cheese with crispy topping. I’ve probably talked your ear off at this point, but when you make a recipe this often, you have a lot to say about it.
This dish has saved weeknight dinners more times than I can count. It’s my answer to “what’s for dinner” when I’m tired, don’t want takeout, and still want something that tastes really good. My kids are happy, my husband’s happy, and I’m happy because I’m not stressed about cooking.
Make it yours! Try different add-ins, swap in your favorite vegetables, adjust the cheese. The best recipes are the ones you adapt to your family’s tastes. If you make this, drop a comment and let me know what you think! I love hearing how recipes turn out in your kitchen. And if something doesn’t work, tell me that too—I’m here to help troubleshoot.
Happy cooking! And I hope your kitchen smells half as good as mine does right now.
Frequently Asked Questions
Can I use pre-shredded cheese?
You can, but I don’t recommend it. Pre-shredded cheese has anti-caking agents that prevent it from melting smoothly. Your sauce will be grainy and less creamy. It’s worth the extra 5 minutes to grate your own cheese from a block. It makes a huge difference in texture.
Why is my mac and cheese watery?
This usually happens if the pasta absorbed too much sauce, or if you added too much milk. Make sure you’re not overcooking the pasta before baking. Also, let the sauce simmer long enough to thicken before adding the cheese. If it’s watery after baking, it might just need a few more minutes in the oven to reduce.
Can I make this ahead of time?
Yes! Assemble the mac and cheese up to 24 hours in advance. Cover it tightly with plastic wrap and refrigerate. When you’re ready to bake, take it out of the fridge and let it sit for 30 minutes to come to room temperature. Bake as directed, but add 10-15 minutes to the cooking time since it’s starting cold.
What’s the best cheese to use?
Sharp cheddar is classic, but it can be too sharp if you use too much. Gruyère adds a nutty, complex flavor that balances the cheddar. Smoked gouda is another great option for a smoky flavor. I recommend a mix of two cheeses for the best result.
How do I get the topping extra crispy?
Toast the panko breadcrumbs in a skillet with butter before sprinkling them on top. This gives them a head start on browning. Also, make sure your oven is fully preheated, and don’t skip the broiling step at the end if the topping isn’t golden enough.
Can I add vegetables?
Absolutely. Sautéed broccoli, spinach, or caramelized onions work great. Just make sure to cook the vegetables first so they’re not watery. Fold them into the pasta before adding the cheese sauce. I love adding roasted cauliflower for a healthy twist.
Does this freeze well?
It’s not ideal. The dairy sauce can separate when frozen and thawed. If you must freeze it, freeze it before baking. Thaw overnight in the fridge and bake as directed. For best results, make it fresh.
Pin This Recipe!
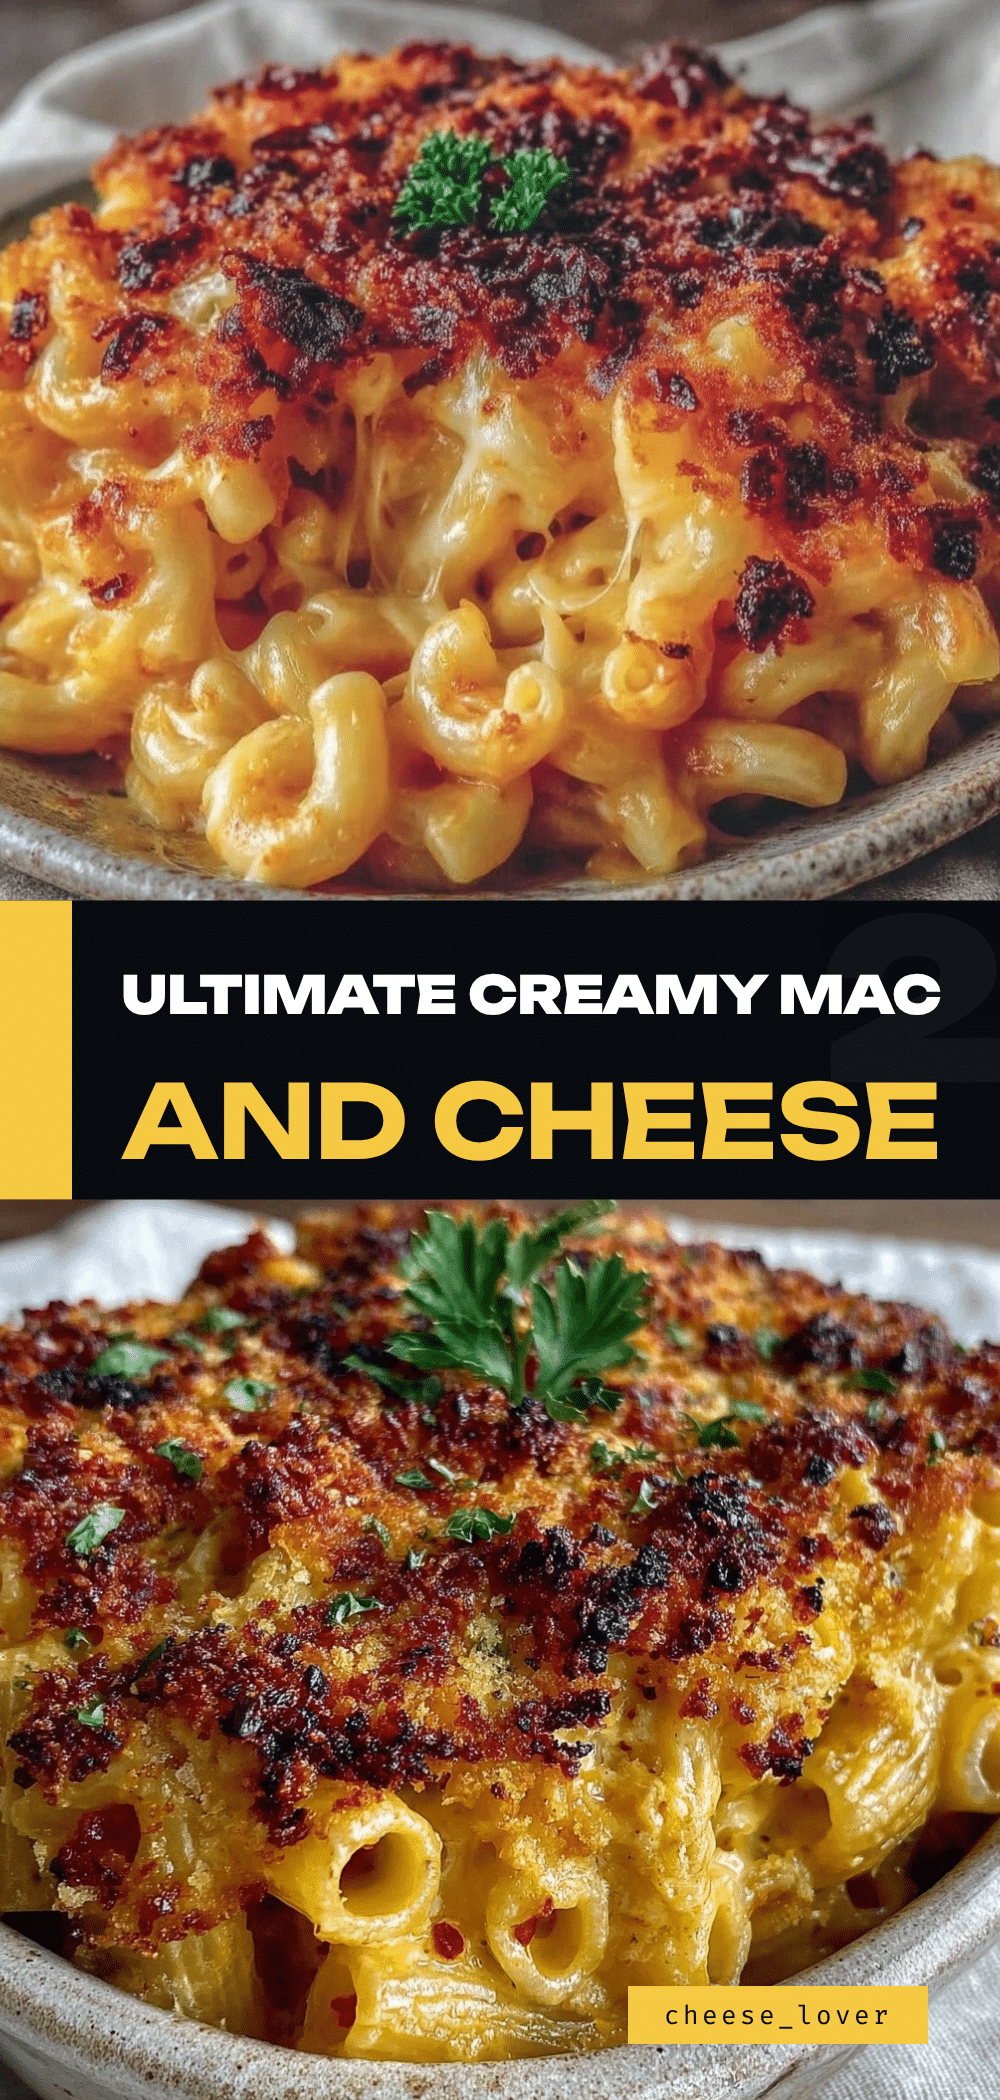

Cheesy Baked Mac and Cheese: 5-Step Crispy Topping
- Total Time: 45 minutes
- Yield: 8 servings 1x
Description
A creamy, velvety mac and cheese featuring a roux-based sauce and a golden, garlicky panko-parmesan crust. This forgiving recipe yields a comforting dish that is perfect for impressing guests or satisfying a craving.
Ingredients
- 1 pound elbow macaroni or cavatappi
- ½ cup unsalted butter (divided)
- ½ cup all-purpose flour
- 3 cups whole milk
- 1 teaspoon Dijon mustard
- ½ teaspoon garlic powder (divided)
- Salt and black pepper to taste
- 2 cups sharp cheddar cheese, freshly grated
- 1 cup gruyère cheese, freshly grated
- 1 cup panko breadcrumbs
- 3 tablespoons melted butter (for topping)
- ¼ cup grated parmesan cheese
- Optional: Cooked bacon bits, sautéed onions, or jalapeños
Instructions
- Preheat oven to 375°F (190°C).
- Grate the cheddar and gruyère cheeses. In a small bowl, mix panko, 3 tablespoons melted butter, parmesan, and ½ teaspoon garlic powder for the topping.
- Bring a large pot of salted water to a boil. Cook pasta until 1 minute shy of al dente. Drain and set aside (do not rinse).
- In a large saucepan or Dutch oven, melt ½ cup butter over medium heat. Whisk in flour and cook for 2-3 minutes until light blonde.
- Slowly whisk in milk, continuing to whisk until the sauce thickens and simmers (about 5 minutes).
- Stir in Dijon mustard, remaining garlic powder, salt, and pepper. Remove from heat.
- Gradually stir in the grated cheddar and gruyère until melted and smooth.
- Combine the cheese sauce with the drained pasta in a large bowl. Transfer to a greased 9×13 inch baking dish.
- Sprinkle the panko topping evenly over the pasta.
- Bake for 20-25 minutes until bubbling and golden brown. Optionally broil for 1-2 minutes for extra crispness.
- Let rest for 5 minutes before serving.
Notes
Grate your own cheese to avoid anti-caking agents that prevent smooth melting. Do not rinse the pasta after boiling to keep the starch for sauce adherence. Let the dish rest for 5 minutes after baking to allow the sauce to set. For leftovers, reheat gently with a splash of milk to prevent separation.
- Prep Time: 15 minutes
- Cook Time: 30 minutes
- Category: Main Course
- Cuisine: American
Nutrition
- Serving Size: 1/8 of the dish
- Calories: 580
- Sugar: 6
- Sodium: 650
- Fat: 28
- Saturated Fat: 16
- Carbohydrates: 55
- Fiber: 2
- Protein: 22
Keywords: mac and cheese, baked mac, crispy topping, comfort food, cheesy pasta, gruyere, cheddar, panko crust